Showing posts with label cardigan. Show all posts

Monday, March 23, 2015

L A R C H


My Larch cardigan is finished ! I had a few minor problems with this pattern, but the end result is actually quite nice and wearable. It was my first time knitting with Malabrigo Arroyo, and so far I'm very happy with this yarn - makes really soft garments and the colours are stunning. It did grow a couple of inches lengthwise after blocking, but I suspected it would so I knit the body and sleeves a bit shorter than usual.

Pattern: Larch Cardigan, by Amy Christoffers
Yarn: Malabrigo Arroyo, in Reflecting Pool (about 3.8 skeins)
Ravelry project page here

Changes: knit seamless set-in sleeves from the top down as detailed here


Thursday, November 13, 2014

a sunny cardigan

The yarn Sara chose for her cardigan when we went yarn shopping in Ulm was this soft yellow superwash merino from Wolle Rodel. When we got home I gave her several patterns to choose from, but in the end she said she wanted the same cardigan I knit her last year, so although I don't like repeating patterns I obliged by casting on another Springtime in Hollis. The yarn was just enough to finish the collar, so I didn't have any to make the i-cord. I decided instead to make a fabric ribbon and used the same fabric to cover the buttons.
Pattern: Springtime in Hollis, by Teresa Cole
Yarn: Wolle Rodel Soft Merino, Color 364, 5 skeins
Size: 4T
Raverly project page

Thursday, January 30, 2014

cosy (me)

 
Outro casaco tricotado com um dos meus fios preferidos (novamente madelinetosh DK). Este modelo foi fácil e super rápido de tricotar (acabado em cerca de um mês), e fiquei agora com vontade de tricotar a versão criança para a S.

Another cardigan in one of my favorite  yarns (madelinetosh DK again). This pattern was easy and super quick to knit (finished in about a month), and I'm now planning to knit the child version for S.
Modelo / Pattern: cosy (me), by  Nadia Crétin-Léchenne
Fio / Yarn: Madelinetosh DK in Byzantine (4 skeins). Leftover yarn was just a tiny ball. 
Agulhas / Needles: 4 mmm
Tamanho / Size: S with smaller gauge
Ravelry project page
 
Changes made were very few: 
  • made an extra button hole
  • picked up 60 stitches on each armhole (because I used smaller needles), basically 3 out of every 4 rows

Final measurements after blocking were more like the XS size (32” chest)

Tuesday, January 21, 2014

pomme de pin

Um casaco que foi amor à primeira vista assim que o padrão foi publicado. E escolhi fazer em amarelo mostarda, uma cor de que cada vez gosto mais, principalmente nestes dias de inverno frios e chuvosos.
Optei por alterar a gola do padrão original, que apesar de ser bastante interessante achei que iria ser pouco prática.
 
A cardigan that was love at first sight as soon as the pattern was released. And I chose to knit a mustard yellow version, a color that has quickly become a favorite, especially during these cold and rainy winter days.
I changed the collar from the original pattern which despite being quite interesting wouldn't be so practical to wear.
 
Pattern / Padrão: Pomme de pin, by Amy Christoffers
Yarn / Fio: Madelinetosh DK in Nutmeg, 3.8 skeins (from Laine et Tricot)
Needles / Agulhas: 3.75 + 4.00 mm
Size / Tamanho: 39'' with some changes (see details on Ravelry project page)
 

Monday, December 30, 2013

um casaquinho de Natal :: a Christmas cardi


E no meio das mil e uma coisas que tinha de fazer no Natal decidi que a S. precisava de um casaquinho novo ...  Tinha este padrão comprado na minha lista já há quase 2 anos, e finalmente foi esta a desculpa perfeita para o tricotar. A lã tinha vindo da nossa viagem a Ghent (e um novelo extra que comprei depois em Viena), e deu para quase tudo menos para as mangas, que ficaram um pouco mais curtas do que tinha planeado. De resto, adorei o resultado final e voltarei de certeza a tricotar este padrão novamente.

And in the midst of the million things I had to make for Christmas I decided that S. needed a new handmade cardigan... I had this pattern on my queue for almost 2 years now, and this was finally the perfect excuse to knit it. The yarn came from our trip to Ghent (and an extra skein purchased in Vienna), and it was almost enough for the whole cardigan except the sleeves, which as a result turned out a bit shorter than I had planned. But I really like the final result and will definitely knit this again for her in the future.
 
Padrão / Pattern: Springtime in Hollis
Fio / Yarn: Lana Grossa Bingo, 4 skeins
Agulhas / Needles: 5 mm
Tamanho / Size: 2T 
Projecto no Ravelry / Ravelry project page

Monday, October 28, 2013

finished :: the Ursula Cardigan

Estou apaixonada por este casaco. É provavelmente a peça mais bonita que tricotei até agora (eu sei que digo sempre isto, mas acho que até é um bom sinal, certo ?). E com este projecto fiquei rendida (i) ao fair isle, (ii) ao steeking e (iii) às lãs Jamieson & Smith.

O padrão: instruções detalhadas e muito precisas, como sempre (este é já o 6º projecto da Kate Davies que tricoto e continuo a ser grande fã) e tive de fazer apenas pequenas modificações:
- não faço amostras, e apesar de neste padrão a autora realçar que é muito importante medir uma amostra, arrisquei fazer o meu tamanho normal como faço sempre. Após a primeira repetição percebi que o meu stitch gauge estava perfeito, mas o row gauge era maior. Como queria um casaco ligeiramente mais comprido não seria problemático mas mesmo assim tive de omitir uma repetição para que ficasse com o comprimento pretendido. Da mesma forma nas cavas tive de tricotar menos uma repetição do que o padrão pedia.
- mangas mais compridas e finas

Depois de lavado e bloqueado a lã ficou ainda mais macia e a peça cresceu um pouco em comprimento (uns 2 cm), o que tornou o resultado final ainda melhor.

Finalmente, apenas uma pequena nota que gostaria de realçar: para o tamanho que fiz (o 2º mais pequeno) o padrão especifica que são necessários 12 novelos da cor principal. No entanto, apenas utilizei 9 (o que era exactamente o número que tinha), mesmo apesar de o ter feito um pouco mais comprido.

I'm in love with this cardigan. Seriously, this must be the nicest thing I've ever knit so far (I know, I always say that when I show a new knit, but then I guess that's a good thing right ?). And with this project I am finally a convert to (i) fair isle (ii) steeking and (iii) Jamieson & Smith yarns.

The pattern: very precise and detailed instructions, as always (this is the sixth Kate Davies pattern that I knit and I'm an even bigger fan now) and I only had to make a few changes:
- I don't swatch, and although Kate specifically says in her pattern that it's important to do so, I decided to simply go for it and knit my usual size. After the first pattern repeat I realised my stitch gauge was spot on but my row gauge was larger. Since I wanted a slightly longer cardigan this would actually not be a problem but even so I had to knit one less color repeat to make it the length I wanted. Also for the armholes I knit one less repeat than the pattern asked for.
- made sleeves longer and more snug

After washed and blocked the yarn turned even more soft and the cardigan grew a bit lengthwise (about 2 cm), which made it even better.

Finally just a small note on yardage: the size I made asked for 12 skeins. however I only used 9 (luckily that was exactly the number I had, since I used the yarn I had bought to make a Puffin Sweater), even though I made it a bit longer. Of course the fact that my gauge was off is probably the reason but I've found that on Kate's patterns I usually end up using less yarn than what's asked for.

Pattern / Padrão: Ursula Cardigan, by Kate Davies
Needles / Agulhas: 2.75 and 3.0 mm
Yarn / Fio: Jamieson & Smith 2-ply Jumper Weight
Ravelry project page here / página do project no Ravelry aqui


Thursday, October 17, 2013

steeking for beginners :: the Ursula Cardigan

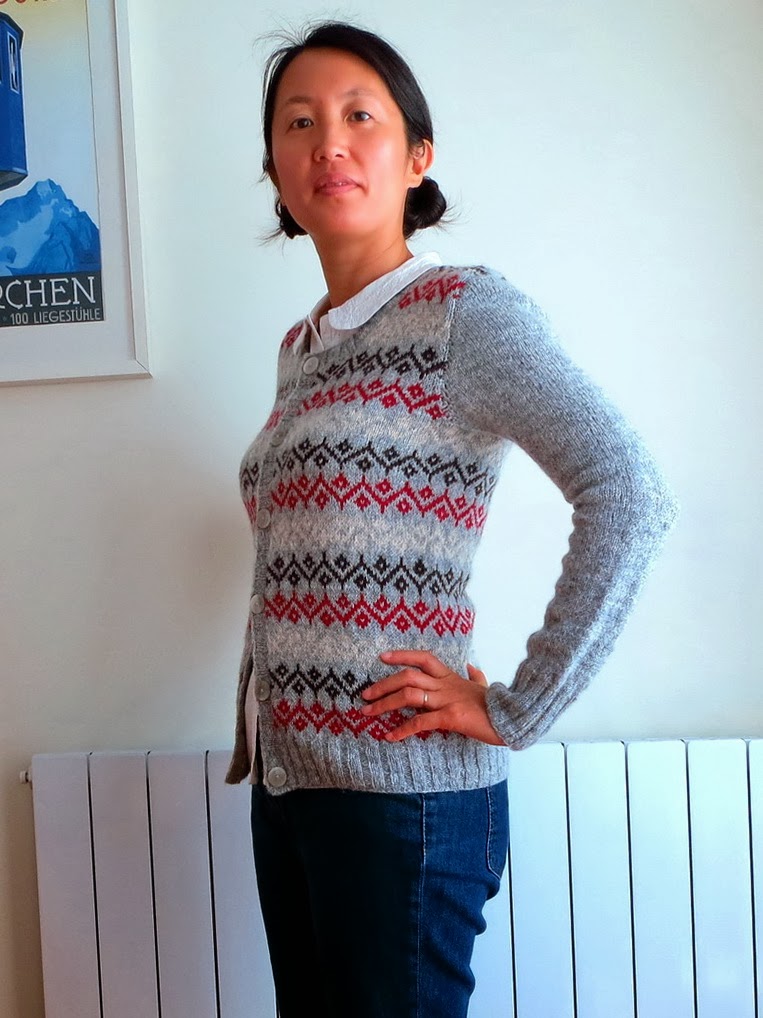
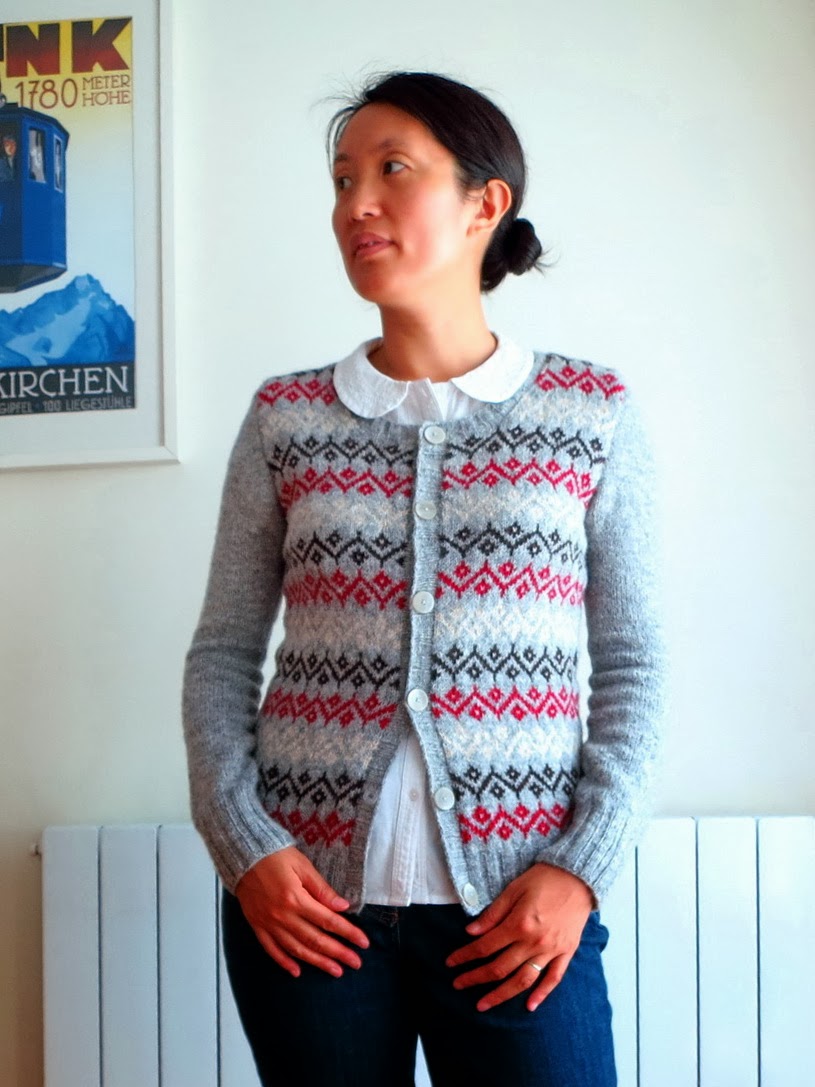
In the beginning of August I started knitting this cardigan. It's the Ursula Cardigan by Kate Davies, one of my favorite designers, and it's featured on her recent book Colours of Shetland. I've been knitting it almost non stop since then  (with a little break to work on some Christmas ornaments ...) and finally I was done with the main body and it was time to steek.

Now, I've never steeked before so this scared the hell out of me, and I wasn' exactly looking forward to it. I mean, who in their right senses would make holes into their knitting, especially something that took me almost 2 months to finish ? But it had to be done, so I gathered my courage and decided to go for it. I followed Kate's wonderful tutorial which really explains everything beautifully.
I decided to start with the collar, since it was the smallest steek and therefore less chances of getting it wrong. I first made my crochet  reinforcements using a sock yarn that was similar to the main color of my cardigan, as you can see here:
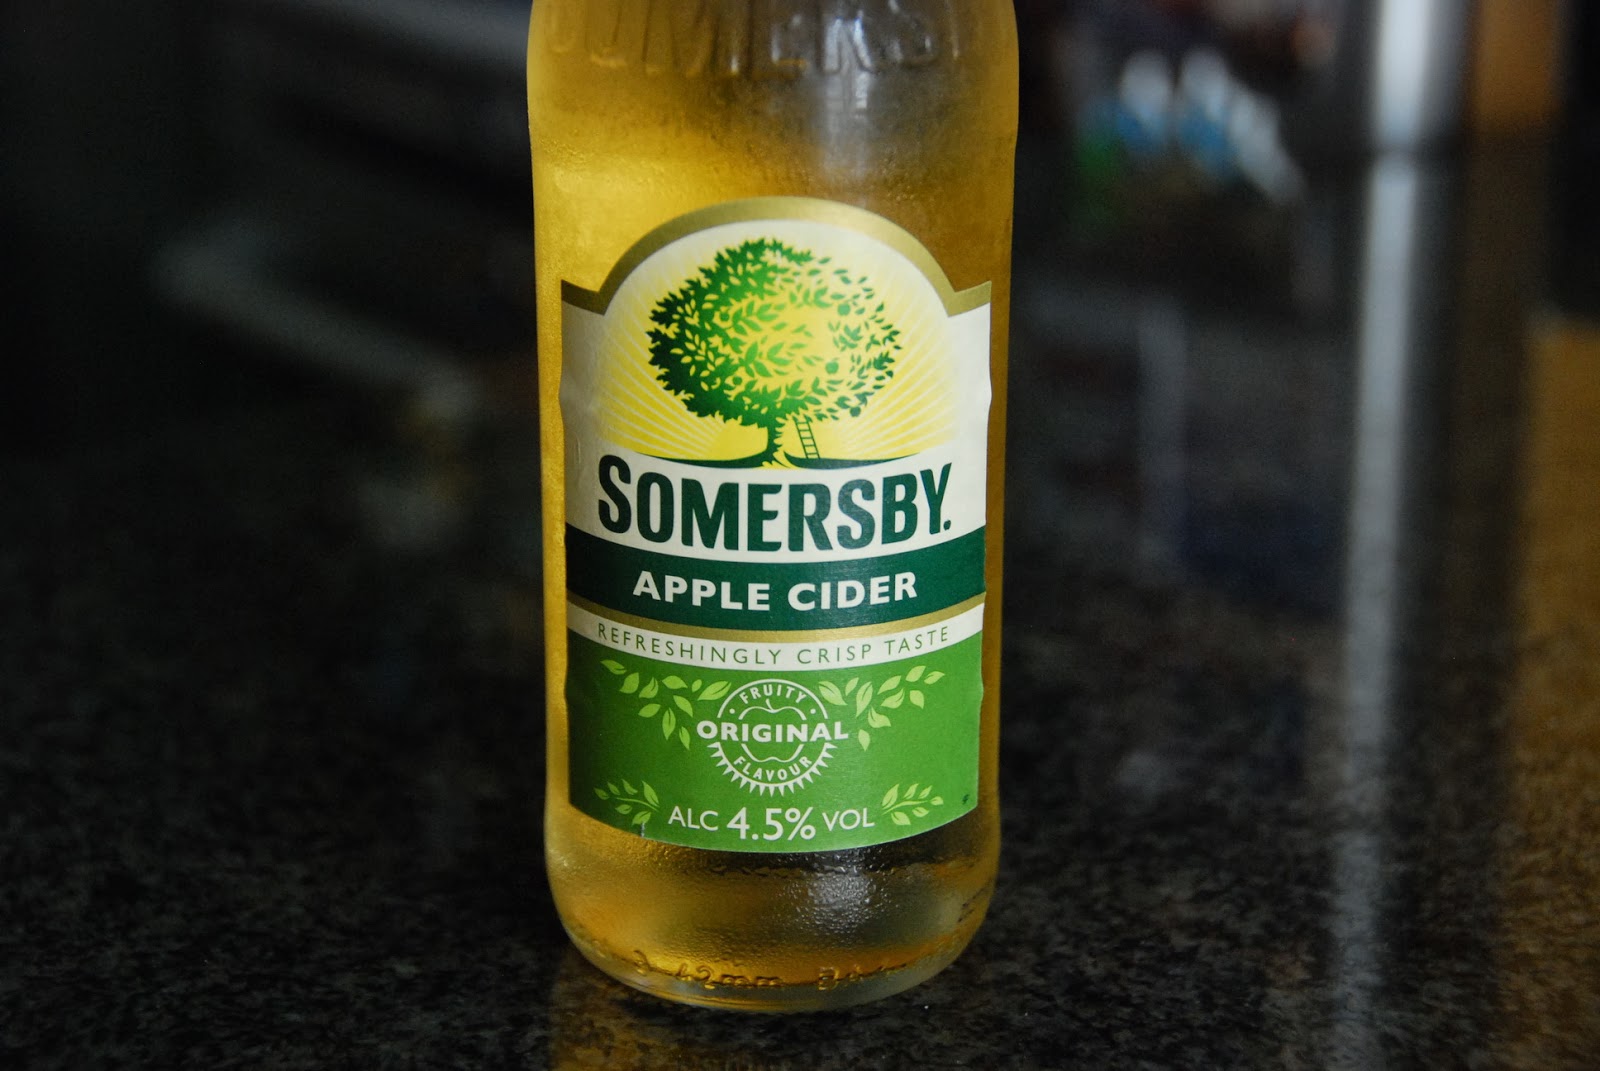
All the tutorials I read usually say that before your first cut you should have a glass of wine. I don't drink much wine so I decided to have this instead ...
And voilá ... it actually works !
Then I did the armholes and left the front opening till last
This is how the crochet reinforcements look after they're done
See how it's easy to see where to cut ?
After you cut your first steek, the rest don't seem so daunting...
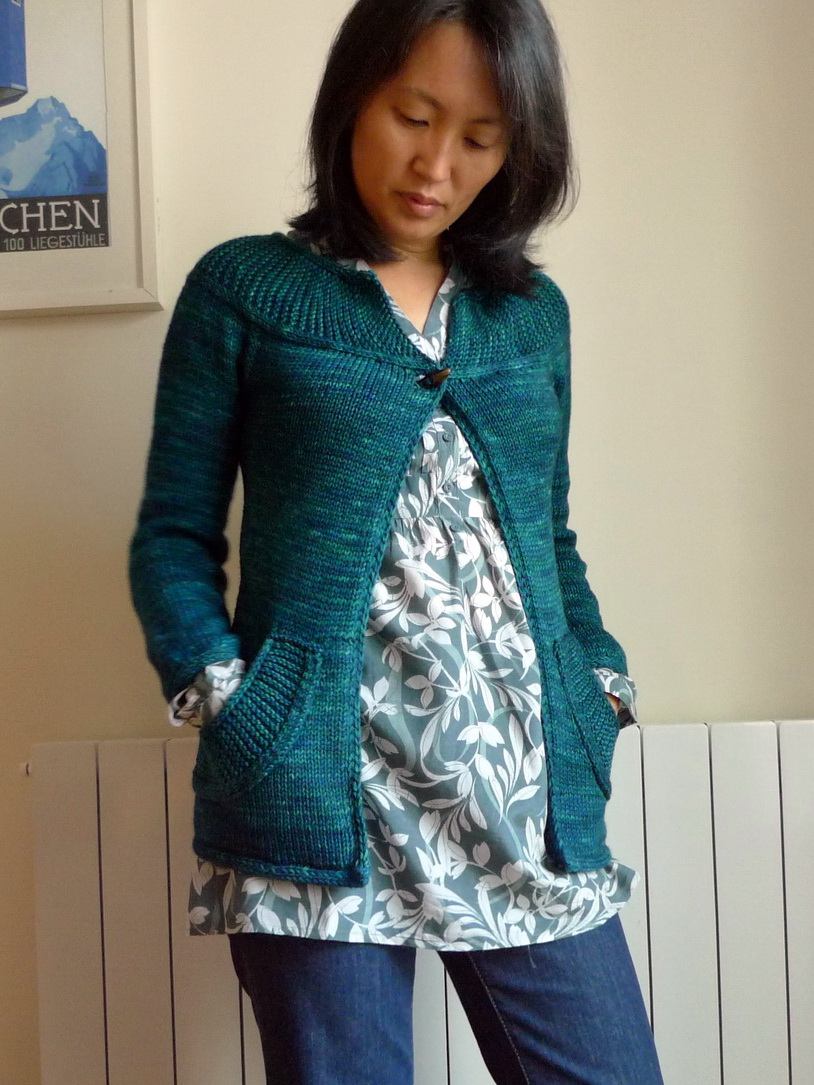
And this is how it looks on the right side - quite neat looking
And even the reverse side doesn't look very bad.

So I did it, my first steeking project. And it was definitely worth it ! This cardigan is now blocking and I still need to sew the buttons, snaps and trims, but I should be able to post some photos this next weekend. And I very much think it's going to become a favorite :-)

Friday, June 28, 2013

Atelier

 
Pattern: Atelier, by Heidi Kirrmaier
Yarn: Madelinetosh DK in Tart (5 skeins, leftover yarn: about 30 gr)
Needles: 3.5 and 3.75 mm
Ravelry project page
 
Changes:
I rarely swatch so of course my gauge was off … I started knitting the S size but then realized it was too big and decreased to XS.
 
Also:
  • made three back decreases, one right after starting the body and the other two spaced about 1 inch apart
  • lowered the waistband by 2 cm (to match my natural waist position)
  • knit full length sleeves
  • knit longer garter stitch bottom hem: 8 ridges in total
  • after starting the pockets didn’t make any more increases or decreases
Pockets were also made smaller, cast-on 28 stitches and put 22 sts on hold.

The yarn: Madtosh DK blocked beautifully and grew a bit lengthwise which made this even more perfect. The color is my favorite madtosh base, and although it ran quite a bit when wet blocking it didn't seem to alter the lovely red tone.

The pattern: Ingenious is probably the best word for it. I love the way this cardigan is constructed, especially the yoke and the biased fronts. And although it's a lot of stockinette knitting, it's quite worth the effort.


Monday, August 27, 2012

Harvest Moon

I fell in love with this pattern because of the pockets.
And then later I fell in love with the yarn. It was my first project using Madelinetosh yarn, and I think I might have a new obsession. The colors are exquisite, and the yarn itself is just a dream to knit with, doesn't really compare to anything else. It's also the most expensive yarn I've ever used, so I guess it lived up to my expectations so far.

The pattern was very easy to follow, but my gauge was off, so although I initially started with a size S, I had to change to a smaller size afterwards.
A summary of the changes I made: 
- Only increased to 220 sts (between markers), knit till 19 cm yoke length and divided the body and sleeves according to this: 32 (right front) + 44 (sleeve) + 68 (back) + 44 (sleeve) + 32 (left front)
- Didn’t make the decreases on the sleeves as written, instead made the following on the last 2 rows:
R1: k2tog every 5 sts
R2: k2tog every 8 sts

The yarn bled somewhat when washed but it didn't seem to affect the original color. Also, the cardigan grew lengthwise with blocking (about 2 or 3 cm) which for this pattern was actually a good thing.

Note: not sure if it’s a fault of the pattern, the yarn or my loose knitting, but the yoke feels too loose and stretchy when wearing it, like it’s going to fall down any minute. To remedy this, I had to secure it with some extra bit of yarn at the top and bottom of the yoke so it wouldn’t stretch.

 
Pattern: Harvest Moon, by Heidi Kirrmaier
Yarn: Madelinetosh Vintage in Cousteau (5 skeins)
Ravelry project page