Showing posts with label Benches. Show all posts

27 August 2011

Dog Days of Summer

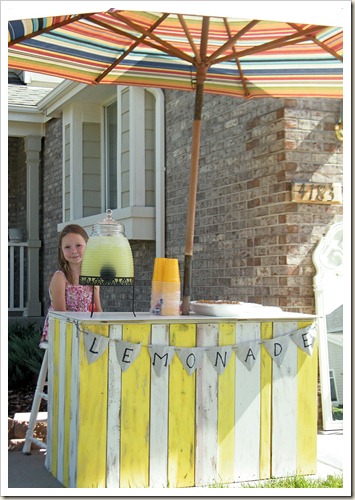
While planning to set up shop and take advantage of all the garage sale goers during the neighborhood sale I came across a darling lemonade stand on another blog.  I have always wanted to build one for my kids.  I got the general concept but I was limited to working with what I had on hand. 

DSCF5362C

So I’m not giving any tips on building this sucker because honestly after building the first 85% of it I still wasn’t sure that it wasn’t going to collapse and crush my children to smithereens.

22 August 2011

The Whole New World Of ASCP

I told many of you that I was going to get some Annie Sloan Chalk Paint last weekend.  I was about ready to hit the floor break dancing I was so excited.  When I got home I wasted no time.  I went to town.

IMG_7455


04 January 2011

Bench Makeover Surprise

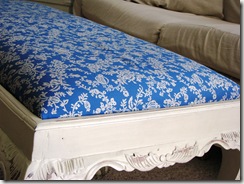
While delivering furniture to a client last summer I was downtown with the hubby heading home when I saw something out of the corner of my eye.  On a lawn on the side of the road, there was a white and blue something that looked like it was worth a second look. 
So naturally I shouted at Mr. Garden to “TURN AROUND!” and he laughs and says, “Gee, did you want me to turn around?”. 
I found a beautiful three legged antique bench seat.   Two men were having a yard sale which I found a bit on the odd side for the types of items they were selling, maybe they were a couple.   I asked how much for the bench.  He tells me they started the price at $240 that morning but after spending all day in the hot yard and having a few beers already he’d be happy with $50.  I told him I’d give him half, cash and carry on the spot.  $30 later I walked away with this beauty.
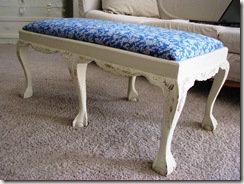
IMG_5741
IMG_5743
So I knew at some point when I found the perfect fabric for the perfect price I would change it out.  It sat at the end of my bed for a while and has served it’s place in front of my sofa until I find the perfect coffee table for the perfect price =)
Fast forward to present day…. We had the carpets cleaned the other day.  First time since we moved in last spring.  Don’t you love fresh cleaned carpets?
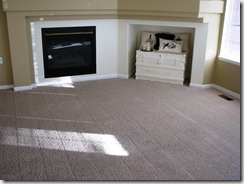
IMG_5739
IMG_5740
All the furniture was stacked up in the entry and the kitchen while the carpets were getting their bath.  And that’s when I saw it…
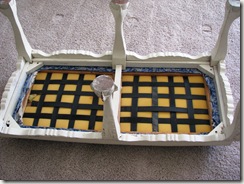
IMG_5745
No?  You don’t see it?  Okay look closer.
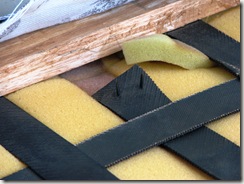
IMG_5746
One of the tension straps popped out.  So while I fiddled with it to see if I would have to tear the bench apart to fix it I noticed this…
IMG_5749
What in the world is that fantastic fabric under the blue stuff?  Oh my, it was exciting just thinking about it as my main color pallet in my home is black and white.  So…. naturally I started tearing it apart.  The next day of course because the carpets were soaking wet.  Do you know how long that day seemed?  FOREVER!
I pulled out my big girl toys.  I didn’t need anything fancy for this.
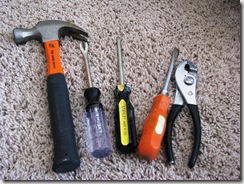
IMG_5750
I love my staple remover, this is a must have for re-upholstering.
IMG_5751
I took the screws out of each corner brace.
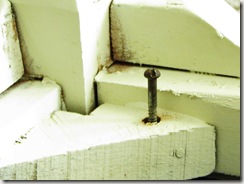
IMG_5754
Popped the cushion off and took out all the staples.  My heart started beating a little fast.  I couldn’t wait to see it.  But oh, would it be torn?  Stained perhaps?  I hoped someone just changed their decor and the fabric underneath would be perfect.
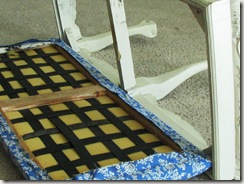
IMG_5756
Want to see what I found?
IMG_5757
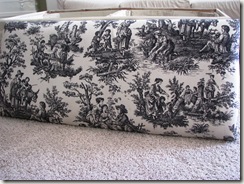
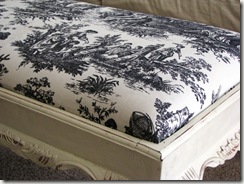
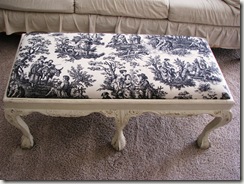
Can you believe it?  This beautiful black and white Toile fabric!!  Of course my instincts were correct.  There were some minor imperfections…
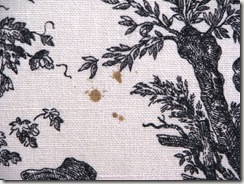
IMG_5758
But with a little stain stick and some warm water later… I have a beautiful bench with no additional cost!
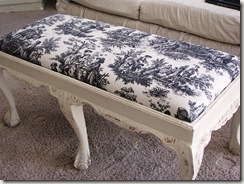
IMG_5760
IMG_5761
Yep this was the part where the angels came down and rejoiced.  Happy dance!!!
IMG_5762
IMG_5763
~Sommer

16 June 2010

Repurposed Crib Bench

For those of you waiting on the completion of the green beast sexy beast, join the club.  I can't wait to finish her.  In the mean time I had this unfinished project lying around in the garage and when I had company and explained to them what the plans were for it I suddenly found myself with a contract to finish it for them =)  This person obviously saw what I saw before it was even started.  This has by far been my most favorite project. 

 
Remember this free find?  I originally wanted to make a chalk board easel out of it until I realized the foot board was curved.
 
First we had to saw off the pretty little feet since the entire leg was lathed in one piece.  There were wheels on it that I removed, and to get an idea of the age of this crib... the wheels were made of wood!
 
Did I mention I had dh work with me on this one?  I had my plan all ready in my head on how to tackle this project but being fairly inexperienced I was glad he was there to give me pointers.
 
This part made me cringe.  We cut the foot board down the middle to create the arms of the bench.  I was so afraid of messing something up and having to scrap the entire thing!  Such a chicken I tell you ha!
 
Assembly started =)  Thus far I had measured and made all the cuts.  This is where dh's help came in handy.  I had to level and keep it square.  Then he started throwing out numbers and measurements and I got kinda woozy.
 
Break time.  I learned how to sharpen some tools.  Cool huh?  Just make sure there is nothing flammable nearby.
 
Then we had a little mishap.  This is where I'll tell you the most important piece of advice you'll ever get on my blog.  Don't by BLACK AND DECKER.  Our orbital sander was running full speed when it came unhinged from the screw plate and exploded into about ten pieces flying throughout the garage at high speed.  It hit my husband and my 9yr old son.  They were okay but it stung and could definitely have been worse.  This picture is of our new Rigid palm sander.  It's the Home Depot brand and the only one with a lifetime warranty =)  I'll take that over an over priced Dewalt any day.
 
Seat framed.  I was really getting excited now!
 
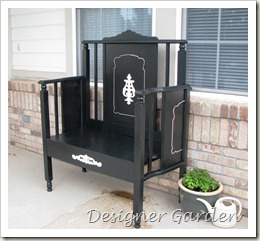
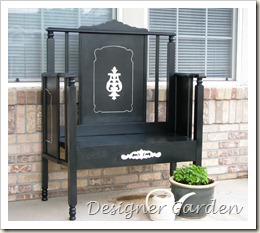
Construction complete!  Can I just say wow? 
 
Are you getting the feel for the end result yet?
 
Once it was painted it was beautiful but just not complete.  There were some fine engravings in the wood of the crib that we wanted to highlight since they got lost in all the black paint.  Well go figure I couldn't find a brush small enough to get in there!
 
So we re-invented the wheel with what I like to call needle point needle paint!  Yes... We ended up using a 5ml syringe filled with paint and a long 18 gauge needle to squirt the paint into the channel.  Talk about a steady hand!
 
And now I introduce you to....  "Her Majesty"
IMG_3636
 
IMG_3634
 
My client saw her today while the poly was drying and fell madly in love.  I'm so pleased that my client is also my mother in this case because now I can visit her majesty anytime I want =)  Being my first re purposed furniture piece I feel some sentimental attachment.

07 June 2010

Repurposed Crib Bench

For those of you waiting on the completion of the green beast sexy beast, join the club.  I can't wait to finish her.  In the mean time I had this unfinished project lying around in the garage and when I had company and explained to them what the plans were for it I suddenly found myself with a contract to finish it for them =)  This person obviously saw what I saw before it was even started.  This has by far been my most favorite project. 
Remember this free find?  I originally wanted to make a chalk board easel out of it until I realized the foot board was curved.
 
First we had to saw off the pretty little feet since the entire leg was lathed in one piece.  There were wheels on it that I removed, and to get an idea of the age of this crib... the wheels were made of wood!

Did I mention I had dh work with me on this one?  I had my plan all ready in my head on how to tackle this project but being fairly inexperienced I was glad he was there to give me pointers.

This part made me cringe.  We cut the foot board down the middle to create the arms of the bench.  I was so afraid of messing something up and having to scrap the entire thing!  Such a chicken I tell you ha!

Assembly started =)  Thus far I had measured and made all the cuts.  This is where dh's help came in handy.  I had to level and keep it square.  Then he started throwing out numbers and measurements and I got kinda woozy.

Break time.  I learned how to sharpen some tools.  Cool huh?  Just make sure there is nothing flammable nearby.

Then we had a little mishap.  This is where I'll tell you the most important piece of advice you'll ever get on my blog.  Don't by BLACK AND DECKER.  Our orbital sander was running full speed when it came unhinged from the screw plate and exploded into about ten pieces flying throughout the garage at high speed.  It hit my husband and my 9yr old son.  They were okay but it stung and could definitely have been worse.  This picture is of our new Rigid palm sander.  It's the Home Depot brand and the only one with a lifetime warranty =)  I'll take that over an over priced Dewalt any day.

Seat framed.  I was really getting excited now!

Construction complete!  Can I just say wow? 

Are you getting the feel for the end result yet?

Once it was painted it was beautiful but just not complete.  There were some fine engravings in the wood of the crib that we wanted to highlight since they got lost in all the black paint.  Well go figure I couldn't find a brush small enough to get in there!

So we re-invented the wheel with what I like to call needle point needle paint!  Yes... We ended up using a 5ml syringe filled with paint and a long 18 gauge needle to squirt the paint into the channel.  Talk about a steady hand!

And now I introduce you to....  "Her Majesty"


My client saw her today while the polly was drying and fell madly in love.  I'm so pleased that my client is also my mother in this case because now I can visit her majesty anytime I want =)  Being my first re purposed furniture piece I feel some sentimental attachment.

You might also like

Related Posts with Thumbnails