Nellie"s Needles
Showing posts with label Crinkle Quilts. Show all posts

Sunday, May 24, 2009

Scrap Quilts +

I looooove scraps! My eyes see a world of potential in each piece ... whether it's the tiniest bit trimmed from a seam, a cut off selvage, or the excess from an over-sized quilt or block. Mine and those "gifted" from friends are readily waiting for use in both of my studios. There's enough that I don't need to haul any back and forth between Michigan and Tennessee. Here are five quilts representative of the way I use these scraps in quilts and fiber art.

N-Block - 40"x 30" - 1994
This is the second piece made back at the beginning of my adventure into the world of quilting ... back when I had declared my intention to use only scraps and re-purposed fabric for my quilts. It makes me smile when I remember the surprised look on faces at that statement. How naive, though well intentioned, I was then. There's NO way to resist buying fabrics when I go into a shop ... and it certainly didn't take long for my tune to change. Both studios have more yardage than I'll ever use in my lifetime. Now I resist going into the fabric shops to keep from adding to those stashes. Go here to read more about this quilt.

Criss Cross - 60"x60" - 1995
This is the third quilt I made in the fifteen years that I've been quilting. There are silk and wool fabric samples along with cotton ones in this. The centers of the squares were made from an old batik blouse given to me by a friend. The sashing and borders are made with purchased yardage. Go here to read more about it.

Every once in while between projects I make up blocks such as this from my scrap bags. It's the method of sewing small pieces to a long strip (usually cuttoffs from an oversized quilt), cutting those apart then sewing those to another long strip. This is repeated until I can cut an 8" block.
Of course, the trimmings go back into the bag or onto the edge of another block to make big enough. By the time there are a dozen or so blocks finished I can't resist playing with them and they end up being "something".
Most usually a cuddle quilt for a sick child. Go here to read the special story behing this one.

Four of those blocks ended up becoming one of my "Crinkle" quilts.
Circle 'Round - 24"x24" - 2006
Go here to read about the finishing and mounting of this art piece which is the first of four in a series. Each piece is made from the trimmings from the previous one. The photo below is the first step for the second piece, "Squared Off".
Four more of those scrap blocks were pieced together. The black fabric that had been trimmed from from behind the scrap blocks in "Circle 'round" were appliqued on top. The fabric from this set of scrap blocks was trimmed away behind the black pieces ... they were the beginning of the third piece in this series which I'm still quilting.
Squared Off - 17"x17" -2006
Number four made with the trimmed away pieces from #3 is also being worked on. They're my hand work pieces for when I go to Bee, travel, or am watching TV.

Be sure to visit Michele of With Heart and Hands. It is she who has sparked my posting about the scrap quilts I've made. You'll find links to other blogs that are also featuring scrap(y) quilts for an online show this Memorial weekend.

Thursday, February 19, 2009

Today's Title is "Stitched Up"

A blog to which I contribute every week is "Today's Title is ..." This week's subject is "Stitched Up".
Here's a photo of my contribution. Click on the title of that blog to read more. For additional information on my art piece from which this detail is taken go here.

If you'd like to see even more there's an album featuring all of my crinkle quilt art pieces in the sidebar.

Thursday, January 18, 2007

"Ode to the South Pacific" - The Beginning

This is the piece that started my journey into making "crinkle quilts".

"Ode To The South Pacific" - 30"x30" - 2003

Five years ago we took a wonderful two week cruise along the north and south coasts of New Zealand plus a week in Tahiti to celebrate my 60th birthday. I cannot go anywhere without needlework ... especially a trip that involves long periods of sitting. The prohibition of scissors on airplanes had been invoked just a few months before. I was desperate for a sewing project to take on that trip.
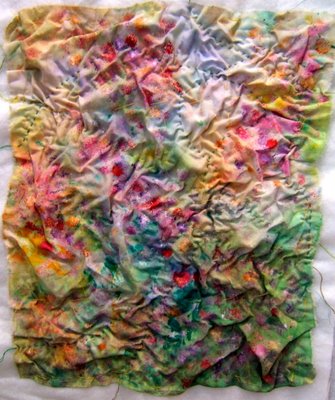
Three years earlier I had sewn this top together. I was just playing with blocks that had been cut from every piece of fabric in my stash (it was rather limited at that time). The ones I put together looked like a painting. I knew then that someday I'd figure out a way to make it look like a picture painted with a palette knife. To get that kind of texture I wet it, scrunched it up into a ball, secured it with rubberbands and let it dry. Then it sat balled up in the corner of a storage chest until I needed this project.

I called my quilting friends who had taken workshops at Paducah and Houston asking for advice about setting wrinkles into a quilt top. With the results of accumulated information, I spot adhered the piece to batiste cotton with iron-on adhesive (Wonder Under, I think) using the tip of the iron

My wrinkled top was layered with batting and a muslin backing then basted together. I determined at this point that a frame would not be required to do the quilting. To solve the ban on scissors problem, I cut 24" lengths of about 100 different colors of 6-ply embroidery floss. I packed a few needles with my basted quilt plus the hank of floss. Put it all into a plastic baggy and I was ready to GO.
I used 2-ply strands of floss to stitch meandering rows across the piece between the lumps and bumps of the quilt that I held freely in my hands. I also added areas of seed stitching with a 1-ply strand to help distribute or emphasize spots of color in the compostition. I stitched on the airplanes, on board the masted ship, in the tropical paradise of Tahiti, as well as in the car driving between Knoxville and Chicago (we flew out of O'Hare).

The title came to me while I was stitching on the south seas. I felt the elements of fire, water, air, and earth so strongly in that part of the world. We sailed past an active volcano and walked in long dormant ones. And then of course not only were we on the water, but it seemed to be everywhere ... even when we ventured on land. Land was always visible as we sailed along the coastline ... and it felt so good to stand on firm ground when we went ashore. It seems as though we lived in the open air while on ship ... very little time was spent in our really nice cabin.

The wrinkling and stitching gave an irregular shape to the piece that I really liked. The only way I could figure out to finish this piece was to reverse applique it to a larger piece that I hand quilted. I laid the "crinkle quilt" on the large outer piece then traced around it and drew radiating lines out to the edges with chalk. The "crinkle quilt" was machine sewn to the large piece that had the quilted borders. The excess background quilt was trimmed away from behind the "crinkle quilt". The raw edges on the front were finished with couched yarn while those on the backside got bias tubes sewn over them.
There are many joyful memories as well as the pleasure of stitching in this piece. It is the only "crinkle quilt" that I've kept. It is one of the few quilts that's in the rotation for the one quilt hanging spot in our livingroom.

I thoroughly enjoy every step of creating these quilts and can picture myself making them for a long time to come. Since making this first one I've refined the wrinkling and stitching techniques and have mounted them in frames and more recently on plexiglass. To see all my pieces and read more about the technique click on the label, "crinkle quilts".

*All photos are clickable for you to view a larger version in a separate window. Click the back arrow icon of your server to get back to this post.

Thursday, January 11, 2007

"Gemstones"

Gemstones - 17"x16" - 2006

I had been given 6" blocks of fabric that were patterned with what I thought were semi-precious stones. I was just playing when I cut and sewed and then recut and resewed them together several times ala Ricky Tims "Harmonic Convergence" technique. It is quilted with a neutral palette of thread colors.

It is exhibited at MB Gallery in Chicago, Illinois.

All photos are clickable for you to view a larger version in a separate window. Click the back arrow icon of your server to get back to this post.

Wednesday, January 10, 2007

"Tumbling Block"

Tumbling Block - 24"x24" - 2006

The colored fabric is a crayon transfer piece that I had purchased from the Holland Arts Council in Michigan about 10 years ago. Crayon art transferred onto fabric that had been made by students was sold to raise money for community art programs. I was impressed that someone naturally chose the secondary colors from the color wheel as well as by the proportions used for each hue. Also the simple design of a block within a block within a block appealed to me. It took a while to find its place in my work.


The "Tumbling Block" title for this crinkle art piece is a play on words of the name for a traditional quilt block pattern. I cut the crayon transfer fabric into four irregular pieces. Each of those had two strips of black fabric printed with tumbling stick figures inserted. The four sections were sewn back together separated by strips of those tumbling figures. I surrounded this center piece with elongated triangles of fabric that was printed with what I interpreted as tumbling rocks. This addition set the center askew adding even more tumbling to the theme.


This piece is mounted on acrylic that has spacers attached to the back so it hangs a 1/2" away from the wall, making it appear to be tumbling in space. I very much like the shadows created on the wall by the angle of the lighting of the fabric edges and and extended threads .


Here it is being viewed at MB Gallery in Chicago, Illinois.

All photos are clickable for you to view a larger version in a separate window. Click the back arrow icon of your server to get back to this post.

Friday, November 24, 2006

"Crinkle Quilts" List/Location in Weblog/Galleries

There is interest in viewing just my "Crinkle Quilt" art pieces. Click on a title to go the posting to see photos and read descriptions. All photos are clickable to view a larger picture. Click on the "back arrow" of your server to get back to a posting after viewing the enlarged version. The list is in the order of when they were created. Enjoy!

"Wild By Design"
"Passing Storm"**
"Burning Tree"***

"In the Spirit of Gee's Bend" Series of 3
"In the Spirit of Gee's Bend"*
"Magic Carpet"
"The Spirit of Africa"**

"Faceted Spectrum"***
"Joyful Noise"
"In the Garden"**
"Reflections II"
"Gemstones"**
"Tumbling Block"**

Sliced Series:
"Circle 'round"***
"Squared Off"*

Technique:
"Wrinkles In My Crinkle Quilts"

* At Good Goods Gallery - Saugatuck, Michigan
**At MB Gallery - 407 N. Elizabeth Street
Chicago, IL
***Sold

list will be updated as postings and changes are made

Sunday, October 01, 2006

Squared Off

"Squared Off" - 17"x17" -2006
This is the second artwork in my sliced series. I couldn't bear to just discard the black pieces of fabric that were trimmed from behind the patches I had appliqued onto "Circle Round". The photo below was taken mid-process of that cutting away.
For the "Squared Off" piece I stitched four of my 8" patched squares together. The black pieces that were trimmed away from the wrong side of "Circle 'Round" were machine appliqued to this "4 patch" with invisible thread using a tiny zig-zag stitch.
Then it went the wrinkling process. Here's the piece after the quilting was finished.
And a detail of the painting that accentuates the squares within the pattern.
I'm nearly finished quilting the third piece of this series. Can you guess how it's related to "Squared Off"?

All photos are clickable for you to view a larger version in a separate window. Click the back arrow icon of your server to get back to this post. The highlighted text is also clickable to take you to the link or posting that is being referenced.

Friday, September 29, 2006

Wrinkles in my "Crinkle Quilts"

There has been much curiosity as to how I get the wrinkles in my "crinkle quilts". I'll take you through the process using "Circle Round". That piece is the first of five pieces in a what I call my sliced series.
I started out with four 8" squares of pieced together scrap fabrics. I make these up whenever the mood strikes. Up until this series they have all gone into quilts that I make for sick children.
I had layered the four 8" squares right side up and then sliced them diagonally into four pieces. Because the four pieces within each square are the same shape they are interchangeable. I rearranged those pieces to achieve a better balance of colors. Here you see those pieces pinned onto a large square of black fabric on my design wall. The next step was to sew. I machine top-stitched around the cut shapes with a small zig-zag appliqueing them to the black fabric. I then cut away the black fabric from behind the pieced sections (the first step toward making a series).
I then saturated the sewn together piece with spray starch and then stuffed it firmly down into a coffee mug. I use my fist and a wooden spoon to pack it firm. It then sits in the mug for about a week. By then it is nearly dry and the wrinkles are well set.
I gently stretch it out to continue the drying process.
After it is dry, I pat it into place over a layer of batting and backing fabric (these two layers are flat). The three layers are basted together and ready for quilting.

My next posting will be about the second piece in this sliced series.

All photos are clickable for you to view a larger version in a separate window. Click the back arrow icon of your server to get back to this post. The highlighted text is also clickable to take you to the link or posting that is being referenced.

Wednesday, September 20, 2006

Circle ' Round

This is my first "crinkle quilt" mounted on acrylic. I love that the piece isn't flattened out, the shadows, and how it appears to float off the wall.

"Circle 'Round" - 24"x24" - 2006
I came up with the presentation as a result of a comment made by a friend who was holding this piece that was still in the process of being quilted while I was showing her some of my framed "crinkle quilts". She asked, "Why aren't I seeing what I feel in my hands?" Her reference was to the soft and flexible cloth she was holding as apposed to the hard and stiff pieces in the frames.

This got me thinking and wondering how else I could mount these pieces to better present the qualtities of cloth. Somewhere in my thinking was the tradition of "tied" quilts. This led to the thought of tying my quilts to a surface. My solution was to drill evenly spaced "buttonholes" into the acrylic. The quilted piece is tied onto the surface with 6-ply strands of floss. The knots show on the back, while on the front there just appears to be another stitch.
I had to come up with a different way to handle those thread ends that frame my "crinkle quilts". I didn't want to loose that aura of color around the piece. However, I couldn't figure out a way to control those threads. Dots of glue on the acrylic just made a mess. On the day that I was really struggling with what to do with all those long floppy threads I had been describing Dottie Moore's short spiky hair (along with her other amazing attributes) to a friend. It suddenly occured to me that look was my solution. Dottie surely had to use a product to get her short hair to stand up, so I used gel medium on my threads for the same purpose. (Dottie got a kick out of this story).
The piece before mounting on acrylic, adding paint, and controlling the thread ends.

"Circle'Round" was purchased and is hanging in Holland, Michigan.

All photos are clickable for you to view a larger version in a separate window. Click the back arrow icon of your server to get back to this post. The highlighted text is also clickable to take you to the link or posting that is being referenced.

Saturday, September 09, 2006

Joyful Noise

The title for this piece comes from one of my favorite cd's, "Joyful Noise", by my favorite quitar player, Bill Mize. Click on his name to get to his home page and you can even hear a clip of that particular song. Much of my work is influenced by music. I listen to NPR classical and jazz music as well as to cd's in my studios.

"Joyful Noise" - 14"x17" - 2006
This is a whole cloth piece. It began as a clean up cloth for another fabric painted project. I reuse my clean up pieces of fabric until they have interesting patterns of paint. Then they go into my stash of fabrics. That is unless I'm so intriqued with them that they immediately inspire me to make them into something RIGHT NOW. As had happened with this piece as well as with the center piece of "Into the Light" the background for "Doors", and the whole of "Burning Tree".

Even though I had very much liked the original serendipitous pattern of paint, "Joyful Noise" demanded that I add up swinging arcs of many colors to it. I used paint, oil stick pastels, fabric markers, and crayons. Of course, I was listening to Bill Mize's "Joyful Noise" while doing it. The aura of threads around the outside just had to continue those "smile" lines, too.

The black fabric mat was painted. I pounced the square end of a make up sponge to the beat of music as well. The striped border fabric just happened to be part of my stash. I couldn't have found any more perfect if I had gone shopping for it.

This piece is in the gallery at Good Goods in Saugatuck, Michigan. It is the last "crinkle quilt" that I have mounted in a frame. Next posting I'll describe my new way of presenting them.

All photos are clickable for you to view a larger version in a separate window. Click the back arrow icon of your server to get back to this post. The highlighted text is also clickable to take you to the link or posting that is being referenced.

Thursday, August 31, 2006

Reflections II

"Reflections II" - 20"x28" - 2006

This piece began as an exercise, a personal challenge, to get across the color wheel from blue to yellow. A young decorator friend had given me books of fabric samples. The pieces from one in particular had a lot of blues and yellows with wonderful textures and plaids that I couldn't resist playing with.

I cut all the pieces the same rectangular size and played with their arrangements on my design board. Some of the pieces were cut in half to make a better composition and to help me obtain my goal. The plaids were a great transition between those two complementary colors. The orientation was horizontal in this process. It wasn't until the I was quilting that the piece began to reveal itself to be a city skyline reflected in a river with a smoggy sunset sky. You can see the added paint and pastels that emphasize the buildings and their reflections. I also used oil stick pastels to blend the upper pieces in the sky. Pastels were also used to extend lines of color into the backgound mat of moire fabric. The raised outside border is covered with the excess fabric trimmed from the four sides, so it too has the extension of pastel color lines.

The extended strands of floss (2-ply strands) that are the beginning and ending of each line of stitchings get one tiny dot of glue under it to hold it in place. This aura of colored threads is just as much a part of the composition as any other element and I want control of where they lie. Without it, those thread ends are a tangled mess. In the photo below they've been separated, but not yet adhered.

"Reflections II" is exhibited and for sale at MB Gallery in Chicago, Illinois.

All photos are clickable for you to view a larger version in a separate window. Click the back arrow icon of your server to get back to this post. The highlighted text is also clickable to take you to the link or posting that is being referenced.

Saturday, August 19, 2006

In the Garden

"In the Garden" - 14"x17" - 2005

This work began by "just playing" with Seta Color fabric paints. At some point I saw a tree developing and the hint of either flowers or fruit appearing. I began adding more dots of color and limbs to the tree. I stopped before developing a too complete picture. Because the quilting process changes and distorts, I knew I would have more control of the composition if I waited until that stitching was finished.

Before it's quilted, the wrinkled piece looks like a topographical map.

Here you can see the added spots of paint and oil stick pastels.

I also added warm colors with pastels to the painted green fabric background mat. This "matting" covers a foam core foundation. I sew a "pillow case", slip the foam core inside and blindstitch the open side shut. The crinkle quilt piece is secured to the matting fabric surface with stitches that look like my quilting stitches.

"In the Garden" is for sale at Good Goods gallery.

All photos are clickable for you to view a larger version in a separate window. Click the back arrow icon of your server to get back to this post. The highlighted text is also clickable to take you to the link or posting that is being referenced.

Friday, August 18, 2006

Faceted Spectrum

"Faceted Spectrum" - 35"x35" - 2004

This crinkle quilt is pieced from several color-ways of a striped batik fabric (couldn't choose just one piece when they were all so "yummy"). I had cut a lot of squares, each were divided into four triangles, and then the fun of playing with arrangements began on the design board. I was delighted with the fractured log cabin block pattern that "happened".

After the quilting is completed, the crinkle quilts re-enter the design process. Usually something more needs to be added or there are areas that need to be emphasized or DEemphasized. Paint or oil stick pastels are what gets used most often ... sometimes crayons. I use whichever medium will best serve the purpose to get the effect "demanded by the piece".


For this work, additional lines of silver acrylic paint emphasize the log cabin structure. Also, I used pastels to adjust colors in the stripes ... either to blend in a too prominant color, or to add another to balance the colors within a row or block or visual section of the piece. As you can imagine, this part does not go quickly. There's a lot of contemplating and looking at the work through a "viewing glass" or my favorite tool, the wrong end of a pair of binnoculars. Seeing the work through these obscures the details. Values and design lines are most visible.

The quilts are "shadow-boxed" within the frame. Initially, this was so the glass would not crush against the quilt. I cut and stack strips of foam core which are then covered with fabric. These now serve the purpose as an additional design transition between the frame and the quilt (the fabric matting is the other). The fabric that covers those strips for this one is the "other" (wrong) side of a black mono-stripe. The color is added with pastels.

I'm pleased to tell you that Good Goods sold this one.

All photos are clickable for you to view a larger version in a separate window. Click the back arrow icon of your server to get back to this post. The highlighted text is also clickable to take you to the link or posting that is being referenced.

Wednesday, August 16, 2006

Wild By Design

"Wild By Design" - 20"x 24" - 2003
This was the first crinkle quilt to be framed. Initially, it had non-glare glass to protect the surface. It was accepted and shown in a juried ART show with the glass. However, the texture and details of the stitches and patterns were obscured ... even when viewed up close.

This piece also was the first to feature the tail ends of the two-ply floss I use to do the quilting. This was my "airplane project" to work on while traveling to and from the "Wild By Design" symposium in Lincoln, Nebraska (hence the title for this work) in February, 2003. The beginning knot was near the end of the strand, but I had to leave a longer tail when I knotted off at the end of each line of stitching.
I could hardly wait to get it up on my design wall when I got home. Thankfully I was impatient and got it up before I had a chance to trim those scraggly tails away. I liked the aura of color that happened around the outside of the piece. Since then, I leave a long tail at the beginning knot as well as at the ending one.

"Wild By Design" is exhibited and for sale at MB Gallery in Chicago, Illinois.

All photos are clickable for you to view a larger version in a separate window. Click the back arrow icon of your server to get back to this post. The highlighted text is also clickable to take you to the link or posting that is being referenced.

Tuesday, August 15, 2006

Wine Reception at Good Goods Gallery

Now, it seems the reception for my "crinkle quilt" art took place so long ago. It was held in conjunction with the Convergence symposium that took place in Grand Rapids at the end of June. That event was a biennial, international conference sponsored by the Handweavers Guild of America, Inc. (HGA). One of the tours offered by the symposium was a gallery tour in Saugatuck and the town of Douglas that is located just across the river. I'm most pleased to have shared my work with all who came to view it during that time.

There were twelve pieces displayed on two walls that were about 12' apart.


Some of these pieces have been featured in previous postings:
Passing Storm
In The Spirit of Gee's Bend Quilt Series
Burning Tree
I'll post descriptions of the others in future postings ... promise!

All photos are clickable for you to view a larger version in a separate window. Click the back arrow icon of your server to get back to this post. The highlighted text is also clickable to take you to the link or posting that is being referenced.