Viser innlegg med etiketten Book card. Vis alle innlegg

søndag 5. april 2015

DT Copic Marker Europe- Coloring Tutorial


Hi crafty friends,
Here's a coloring tutorial I made for Copic Marker Europe.
I remember when I first started coloring, I was so afraid to use the darker colors . I bought them...lol...but I rarely used them. So afraid to ruin my image.

So I thought I would show you what a difference it makes to get some contrast in the image to create depth. If you are a beginner you can easily find the darker matching color by looking at the copic color wheel and choosing a higher spesific value in the same color family and color group (the last number on the marker). For example if you use R81 you can add R83- R85- R89.


On this image by Saturated Canary I used two or three markers in each blending group. Only the lighter ones.

Some people prefer the lighter colors, and thats okay if you do. But what happends if you add the darker colors?

First I added E49 to the hair to define the deepest shadows. And more E44 to blend. Finally I went over with E40 to smothen it up. 
+

Next the face. I had colored using E000 and E21 and E93 for the cheeks and lips.
Here I added E13- E11and R20 for the cheeks and lips. The face looks a lot less flat than before.
(And by the way a tip is to color the face before the hair, it is so easy to drag some of the darker browns into the face and ruin your image - learning the hard way...lol) 
+

Originally I used R81 and V000 for the pinks.
I added E89-85-83 ont the flowers, t-shirt and skirt. 
                      
 +

I used E41 and 43 for the apron and parts of the skirt. Here I added E47 and 44, and some more E43, E42 and E41 for a good blend. 
 +
 On the basket I originally used E33-E31 and E30
I added E37 and E35, and used the other three again to blend. 
 +

For the gloves and legs I used C1 and C00.
I added C7- C5 and C3 for deeper shadows and used C1 and C00 again. 

               
 +
 On the leaves I originally used G43 and G40.
I added G99 and G46 and G43 and G40 again. 
                
 +


Here are the two images. Look how different they are.

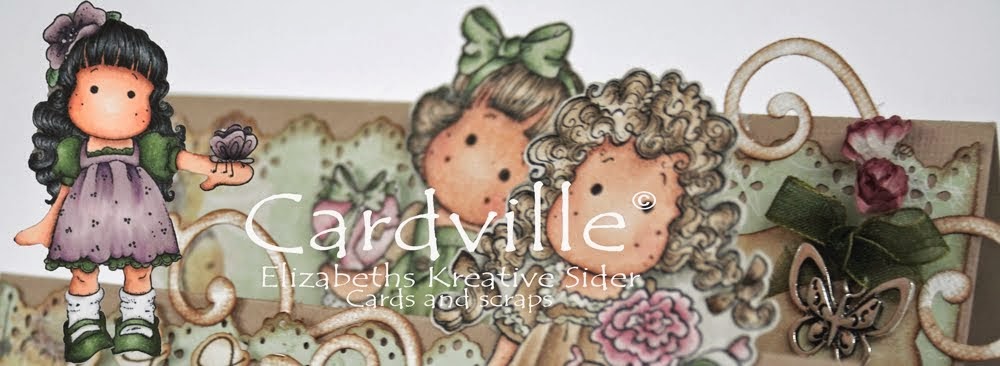
And here is my finished card: 
Papers are Pion Design. Flowers are by WOC and Kort og Godt. Butterfly by Magnolia. 
Sentiment stamps by Norsk Stempelblad AS.

And here's the inside of my book card.

Hope you'll challenge yourself to try!

Hugs, Elizabeth


tirsdag 23. september 2014

Konfirmasjonskort/ Confirmation card

Hi peeps, hope you are doing well. Hope you find the time to join our CMN blog hop and fall challenge, you will find it in THIS post!

Here's a card I made for a family members confirmation earlier this year. I love the green/pink color combo and the beautiful papers (I'm a total "Majamaniac"- lol, can you say that?) I used a sketch for this card, made by Åshild Halvorsen for Ett Trykk Magazine.

Håper du finner tid til å bli med i bloghoppen vi har hos CMN. Innlegget finner du HER!
Her er et konfirmasjonskort jeg laget til en av familiens konfirmanter tildligere i år. Du har kanskje sett det i augustutgaven av Ett Trykk.

 Papers are kraft and white cardboard, dp from Maja Design Sofiero and Autumn Basic collection. Flowers by WOC, Memorybox swirl and some shabby seam binding from the Live & Love craft store. I used a swirl stamp by Stempelglede for the edges of the image. The sentiment is by Norsk Stempelblad AS. I distressed all edges using Walnut Stain and my sewing machine.


The image is Fancy by Saturated Canary. I colored her with my Copic markers.
I didn't write down the colors used but it looks like: 
Motivet er Fancy fra Saturated Canary. Jeg skrev ikke ned fargene, men det ser ut som jeg har brukt:
Skin/Hud: E000-11-21-04, R20
Hair/Hår: E49-44-43-41
Dress/Kjole: RV99-95-93-91, W7
Greens/Grønne detaljer: G99, BG99-96-93-90

 This card is has a book card fold. I used a Martha Stewart punch on the edges of the "book pages" and pocket. The beatuiful sentiments are from the new stamps sets from Norsk Stempelblad; Clearstamps Konf1and Clearstamps Konf2.

Here it is again. Hope you like it! 

Thanks for stopping by my blog today! Wishing you a wonderful week!
Takk for at du stikker innom bloggen min! Ønsker deg en fantastisk høst- uke! 


Crafty hugs,


onsdag 18. juni 2014

Wedding Card

Hello crafting friends,
Here is a custom card I made a while back that I haven't shown you. It's a wedding book card using lots of die cuts and punches. Summer is wedding season so here goes. Sorry about the not-so-good quality of the pictures.

 Papers are Maja design. Dies from Memorybox, Go Create and Spellbinders, flowers by WOC. I used a Martha Stewart punch and the cut couple charm is from the Live & Love craft store. 
Here is the inside of the card. I used a cute Mini- Magnolia bridal couple colored with Copic Markers. 

 Hope you like it!
Thanks for stopping by my blog today, 
wishing you a lovely day! 

I wold like to enter the following challenges: 
Papirdukkene: Vintage/ Shabby chic
Lovely Hanglar or Sweet Magnolia: Bingo (Edwin- Flowers- Tilda or Pearls - Edwin - Dies)

Crafty hugs, 


Follow on Bloglovin

lørdag 9. mars 2013

Book card for Mother's day -DT Ett Trykk

Good morning friends and followers, 
Hope you are enjoying your Saturday! I am so lucky to have the whole day to myself today, and lucky for me the weather is bad so I don't have to feel like I should be outside...lol

I want to show you a mother's day- book card I made for the February- edition of Ett Trykk Magazine. Mother's day is in february here in Norway, and my mum was very happy about this. She loves purple, and she has learned to love the Magnolias after years of receiving Magnolia cards for every occation...lol!


I used the gorgeous Maja Design papers from the 'Skal vi ta en fika/shall we have coffee' collection, I bought them at the Live & Love craft store.These are called 'Två Frøknor 'and 'Mandelkake med Plommor'.
the flowers are Kort og Godt, and WOC, the pearls are Melissa Frances, the corner die is from La la land Crafts and I also used Spellbinder dies and Martha Steward punch- around- the- page. I distressed the edges with Walnut Stain distress ink.

I made the bookcard inspired by many bloggers and my own experience. If you need a tutorial, you can find one here at my DT colleague's blog: Wenches Kort og Papir.


The image is the 'Tilda sending loveletter', I colored it with distress ink pads and markers.
Colors used: Vintage Photo, Tattered rose, Antique Linen, Dusty Concord, Black Sooth, Peeled Paint. 


 The sentiment means "dear mother" and it's from Norsk Stempelblad AS.

That's it for today, I'm off to dive into my crafting stuff now...lol...
Wishing you a wonderful crafty weekend!

Hugs, 

tirsdag 5. februar 2013

Anonyme Timeglass- del 3


This project is for a Norwegian challengeblog so I will be posting in Norwegian today! I made a book card with a Make it Crafty image. I love coloring those folds -so much fun!!!
Thanks for stopping by my blog today♥

Det er tid for enda en oppgave i  Anonyme Timeglass hos oss i Anonyme Scrappere!
Ta en titt i bloggen for å få masse inspirasjon og selvsagt....neste oppgave! Selv om du ikke har meldt deg på så burde du stikke innom for å ta en titt på alle de flotte inspirasjonsbidragene fra designteamet!

Jeg har laget et bokkort denne gangen: 

Jeg har brukt mønsterark fra Bildmålarna, dies fra Spellbinder, Roser fra WOC og Kort og Godt, perleraden er fra Live & Love Craft Store. blonder og perler er fra stashet mitt:) Jeg har glitterlim på vingene, og maling på rosene: Crackle paint fra Tim Holts- Picket Fence. 

 Dette er mitt første Make it Crafty motiv, og jeg kan love deg at det ikke blir mitt siste! Utrolig gøy å fargelegge den kjolen! Jeg har brukt Copic markers (what else) Fargene er: Hud: E13-11-00-000, Hår, kjole, sko,pakke: E77-74-71-70, W5, Vinger, Bånd: RV97-95-93-91, Gult bånd: YR24-23-20, E33, Hvitt: C5-3-1-00. Jeg har lagt stickles/ glitterlim på vingene. 
 her får du litt inntrykk av boka-
Rosa hele veien:)

"Boksidene" er laget med akvarellpapir som er brettet og limt i hjørnene. Enkelt og effektfullt.

I would like to enter the
Crafts and ME 
challenge:  Favorite embellishments (pearls and flowers of course...lol)

Ikke glem å ta turen innom Anonyme Scrappere for å se på alt det lekre designteamet har laget til inspirasjon, og ikke minst- for å se hvor mye lekkert folk har laget til konkurransen!
Takk for at du titter innom bloggen min i dag!

Ha en fin og kreativ dag! 
Klem fra 

fredag 10. august 2012

Just Magnolia Pearls and Swirls!


Good Morning Friends and Followers!

It's Friday, and time for a new challenge over at 
Just Magnolia and hAnglar & stAnglar challenge blog.

The theme this time is
Pearls and Swirls.

I made a book- card with my little Tilda With Floating Hearts: 

 I used papers from Maja Design. The swirls are from Memorybox ( a heart I cut into two), Punch from Martha Steward, the die around Tilda is from Quick Qutz. Flowers are from WOC, and butterfly from iamroses. The pearlstring is from the Live& Love Craft Store. Stamps around the image are from Prima. Ribbon, cheesecloth are from stash. I distressed the edges with Tim Holtz distress ink.

I colored my Tilda with floating hearts with distress ink pads. I made a tutorial  with this image on how I make the legs stay outside the diecut, you can view it here.

This is the inside of the book card. The swirl stamps and journalling- stamp are from Prima, the sentiment stamp is from Kreativ Hobby. Pearls are form Panduro. 


Pop over to the Just Magnolia challeng blog to get lots of inspiration from the rest of the DT and join in!

***

I would like to enter my card into the following challenges:
Addicted to stamps challenge: #36 Pearls and lace
That craft place challenge blog: Things with wings
The Ribbon Girl: BINGO (Ribbon- pearls- Image)
Wishing you all a wonderful weekend!
Thank you for stopping by!

Hugs,