well campers... are you ready for some old school fun?
how about some tic tac toe... on the go!
this project was inspired by a few friends of mine & their kids...
we were out to eat and the kids quickly used up every inch of space on their paper place mats... out came a pad of post it notes which was also quickly used up... these kids needed something that could be erased!!
{ liz i'm talking about you... and our trip to ida mae's!}
so when
lizzy house asked me to be a camp counselor... i knew i had the perfect plan!
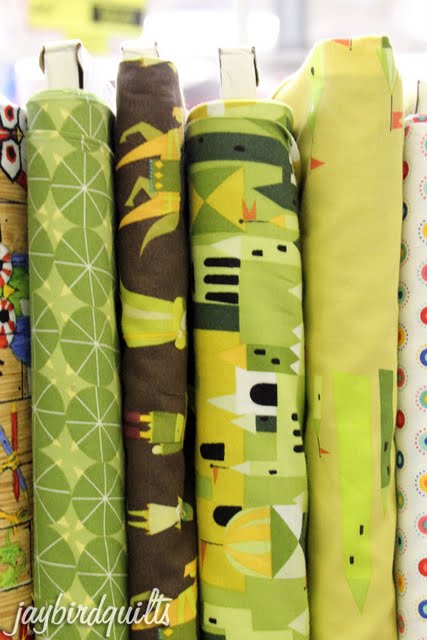
so grab some castle peeps...
{lizzy's current fabric line from andover}
and join in on the fun!
Supplies
1/4 yd of Castle Flags in Yellow for Binding
1/2 yd of Castle Heraldry in Gallant Green for sashing
2/3 yd of Castle Town in Gallant Green for backing
1/3 yd of Chalk Cloth
Low Loft Batting {at least 22" x 22"}
Basting safety pins
Chalk
A few notes on working with Chalk Cloth
1. Do NOT iron the Chalk Cloth. You cannot iron the chalk cloth. Even if it doesn't melt it ruins the ability to work as a chalk board.... trust me I tested it out!
2. Limit your pinning as all pin holes in the Chalk Cloth will be permanent. I did all of my piecing for this project without the use of a single straight pin.
3. Sew carefully! Just like pin holes leave marks.. so does your needle... if you sew a seam too large and take it out the holes will be there for all to see.
4. Washing - I suggest hand washing your project once it is complete. The Chalk Cloth does wipe clean with a damp cloth.
Chalk Cloth can be found in my shop! (Sorry about that. We sold out!)
You can find some chalk cloth on
Etsy, if you can't find it at your favorite local quilt shop.
1. Cut 9 squares from "chalk" fabric at 5" x 5"
2. Cut 6 small sashing pieces at 2" x 5" from the
Castle Heraldry in Gallant Green print. I fussy cut the print and centered the design.
3. Sew sashing to chalk cloth into rows. DO NOT IRON! You cannot iron the chalk cloth. Even if it doesn't melt it ruins the ability to work as a chalk board.... trust me I tested it out! Finger Press all seams. All seams are pressed away from the Chalk Cloth.
4. Cut 2 large sashing strips at 2" x 17" I again fussy cut these pieces. {I know the strips look like they are too long compared to the pieced strips, but that is only because with finger pressing the strips appear to shrink up a bit in the photo.}
5. Sew rows to sashing. Again finger press your seams.
6. Cut borders. I again fussy cut these pieces. Cut two at 2" x 17" & cut two at 2" x 20"
7. Sew on side borders. Then sew on top and bottom borders. Layer with backing and batting and pin baste with a lot of basting safety pins in all of the non-Chalk Cloth areas. {Good pinning will help combat the lack of ironing.} I used
Castle Town in Gallant Green for backing.
8. I quilted straight lines through all the sashing and border pieces. I did them 3/8" away from the seams so that I was just past the Chalk Cloth in the seam & was only quilting through fabric and batting. {See closeup photo in step 9}
9. Cut 2-3 binding strips from
Castle Flags in Yellow for Binding and bind the tic tac toe board. {Since the tic tac toe board is 20.5"x20.5" you'll need exactly 82" of binding.... which is why I wrote 2-3 binding strips!}
Complete binding directions can be found here.
{the back}
10. Before using your tic tac toe board you will need to "prime" it. Do this by covering each square in chalk with the side of a stick of chalk. Then use a slightly damp cloth or paper towel to wipe the chalk off.
11. Start playing!
12. In between games a dry cloth can be used to wipe each square clean. The previous game may remain very faintly.
13. The board can also be used as 9 small sketch pads!
14. Lastly... I didn't call this "tic tac toe... on the go" for no reason! Fold your board accordion style on itself in between the squares.
15. The fold one side over...
16. ...and the other!
17. Pack in a bag with some chalk... and you have instant entertainment!
...and coming soon... a case for your tic tac toe on the go! In case you are buying your fabric right now... the case will use the remaining fabric from your tic tac toe board and half a yard of Castle Fortress in Gallant Green! Sorry folks, I never did get around to making that carrying case for tic tac toe on the go. If you did, share it online using #jaybirdquilts and tell us all about it. Thanks so much!
If you make this project.. be sure to add a photo to
--
want to link to this tutorial?

{144 x 144}
{250x250}
© 2009-2022 Julie R. Herman. All rights reserved.
No part of this tutorial or pattern may be reproduced without written consent of Jaybird Quilts.
Items from this pattern may not be produced for commercial resale.