I'm a wife, stay-at-home mom, crafter, and blogger living in rural New England. As seen in Martha Stewart Living, Food Network Magazine, and more! | Tutorials, DIY, crafts, parenting tips, recipes, money saving tips, product reviews, local product features, New England living, intentional living, and more! |
A few years ago we built a detached garage on our property which we nicknamed “the barn.” We were on a tight budget when we had it built so we kept everything very basic - basic windows, basic doors, etc. Now that we’ve lived with it for a few years we’re slowly upgrading what we can with easy and cheap DIYs, like this two minute garage door makeover - no tools needed! | This post contains affiliate links |
The front of our barn just looked so plain and boring... it definitely needed "something" to give it more character and the basic builder-grade garage door just wasn't cutting it. One day while I was on Amazon I came across these magnetic faux hinges and handles with amazing reviews and thought that was perfect!
To install them I wiped down the garage door real quick first to remove any dirt and then just stuck the hinges to the door right from the box. There are several magnets on the back of each item so they’re easy to stick on and reposition as needed.
The faux hinges and handles are made from thick plastic so they won’t rust - but they certainly don’t look plastic! Even up close they have a lot of texture and really look like forged metal. The handles even fooled my kids and they totally thought they were real! And if you want to keep your doors more simple you could easily just put the hinges up or just the handles and leave it at that.
This quick addition to our plain garage door really has made a difference in making our “barn” look more finished and giving it better curb appeal. Hopefully next year we’ll get the driveway paved up to it and add some landscaping and then it really will be done.
Looking for more cheap and easy DIY’s? See our previous Blog Post on how I added “window panes” to our basic builder-grade windows and it’s made such a difference. They’re still up years later and look as good as the day I first put them up.
Lately our garage has been kind of a mess - my husband has been rebuilding our rotting deck and the power tools he has have multiplied with no good place to store them. I was getting tired of tripping over sanders and planers so I thought I’d come up with a way to get all the small power tools easily accessible and organized for his project. In my search I came across the perfect locker solution! | This post contains affiliate links |
I realized the space between our garage doors was vastly underutilized. It’s a skinny spot but tall - with a lot of potential for easily-accessible storage. I thought about building shelves there but then it would be open and kind of messy. I tried finding a cabinet that would fit but they were all too wide. Then I realized a locker would fit!
I searched for single-width lockers and found many options and considered doing a single tall locker or a double locker. But then I came across this amazing single-width locker with six doors/tiers! It was perfect for my needs - it fit right in between the garage doors and each tool could have it’s own cubby. This locker fit perfectly in our garage but make sure to measure your space first as you may have a narrower (or wider) space to work with. There was assembly required for the locker but it went together easily and then it was ready to use!
One important thing to consider before you put a locker in your garage is how you will contend with wet floors. We live in New England and in the winters especially our garage floors get quite wet when the snow melts off our cars… in order to protect the bottom of your locker from rusting you probably want to raise it up off the floor. For us we used a thick paving stone that fit well under the locker - though we did have to level it some with
composite shims (similar ones linked)
because our garage floors are slightly uneven. (Just slide the shim under the paver and break off when it's the right height - so easy!) You may also want to consider attaching your locker to the wall in some way if you’re concerned about it tipping.
Once we had our locker level and secured I labeled each cubby with what it contained (“Drills & Bits”, “Orbital Sander”, etc). To make the labels I just typed them up on my computer, printed them out on a sheet of cardstock, and cut them out.
This was an awesome and very easy project to do in our garage. We love how organized and accessible the tools are while still keeping them out of sight.
It’s that season again… Election Season. And it doesn’t matter what party you’re registered for, there’s a good chance you’ll have door-to-door canvassers knocking on your door at some point to try to persuade you to vote for their favorite candidate or for themselves if it’s a local election. I don’t know about you, but we do not appreciate our day getting interrupted by solicitors or canvassers. We do our own research and make up our minds on our own. Not to mention, having a stranger knock on our door or ring our doorbell sends the dogs into a tizzy and interrupts my husband’s phone calls and remote meetings since he works from home. (And if you have a baby sleeping you know how frustrating it is to have someone ring your doorbell during that precious nap time!)
We already have a "No Soliciting" Sign (affiliate link) over our doorbell but it's always hit-or-miss whether the Political Canvassers respect it.. in order to make it very clear we aren't interested in political solicitation either I made this sign for our door.
This file is a PDF and sized for 4”x6” - I printed mine directly on a plain 4”x6” index card on my printer. If your printer doesn’t print on small formats like that you could just print on a regular sheet of computer paper and cut it down. We taped our sign inside the window of our storm door, so it can’t be missed. We’ve used this sign for the last few election seasons and it’s made a big difference! I think we’ve only had one person ignore it, everyone else has read it and then left - I’ll consider that a success!
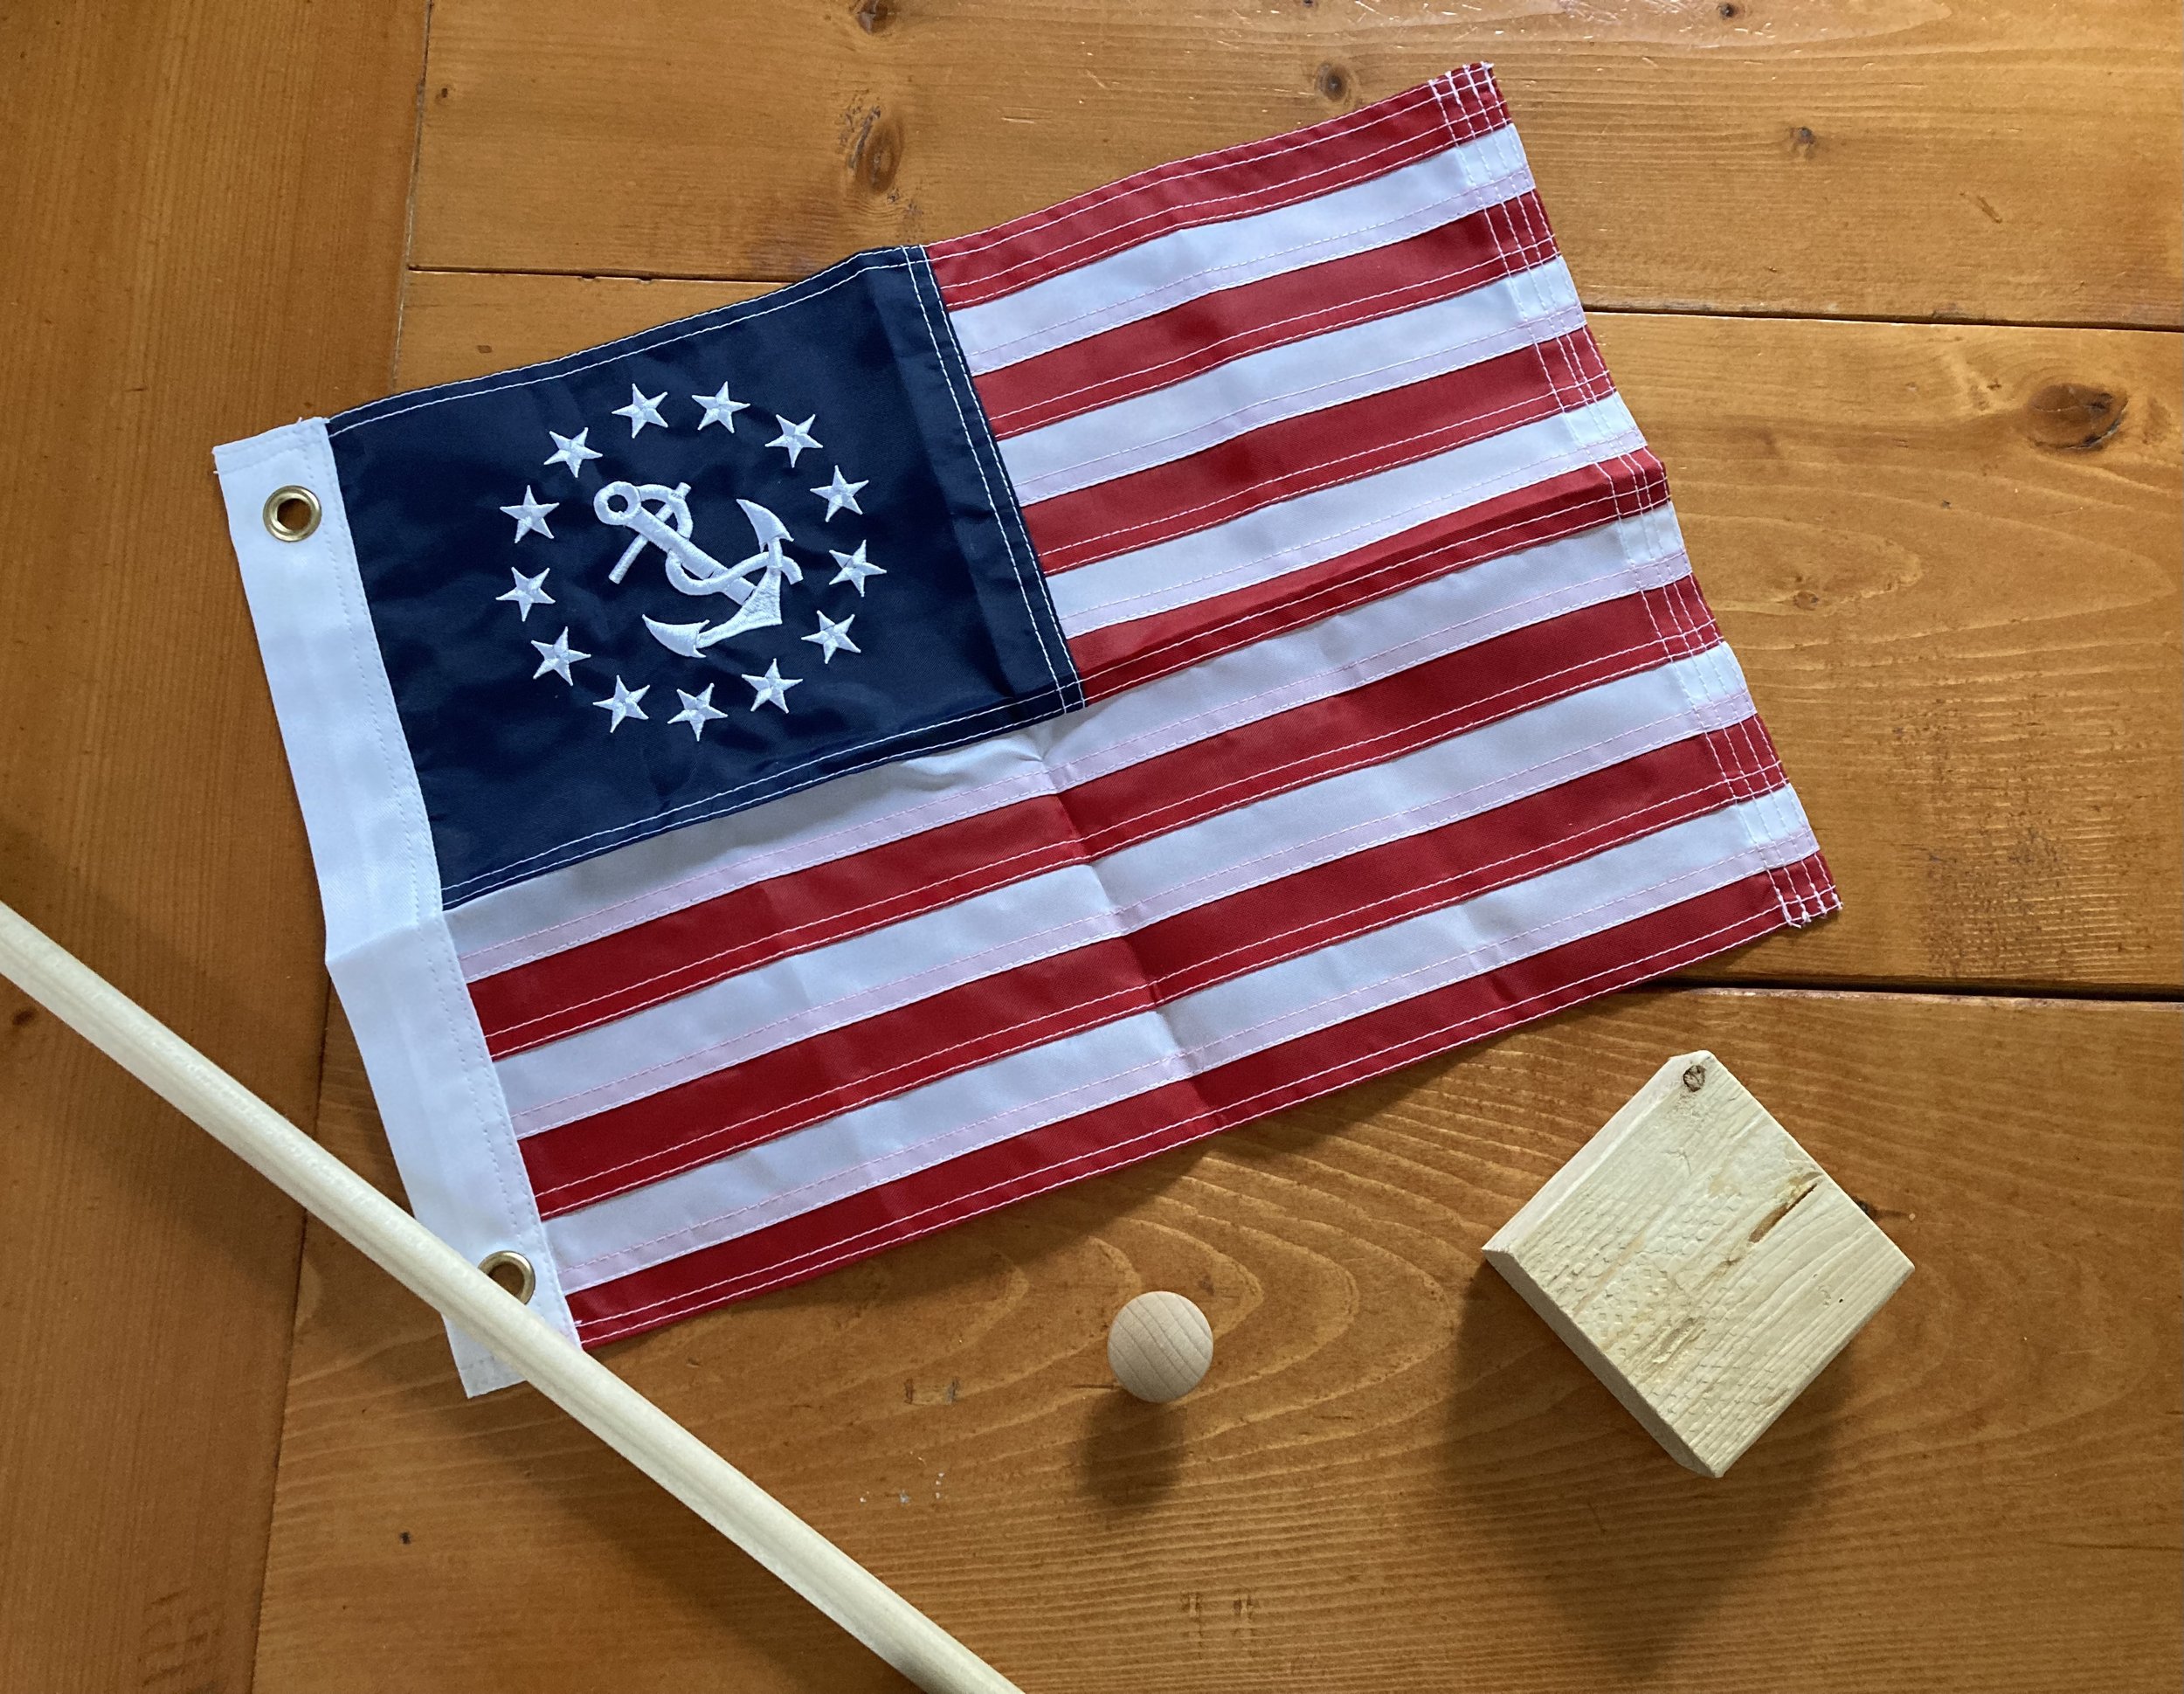
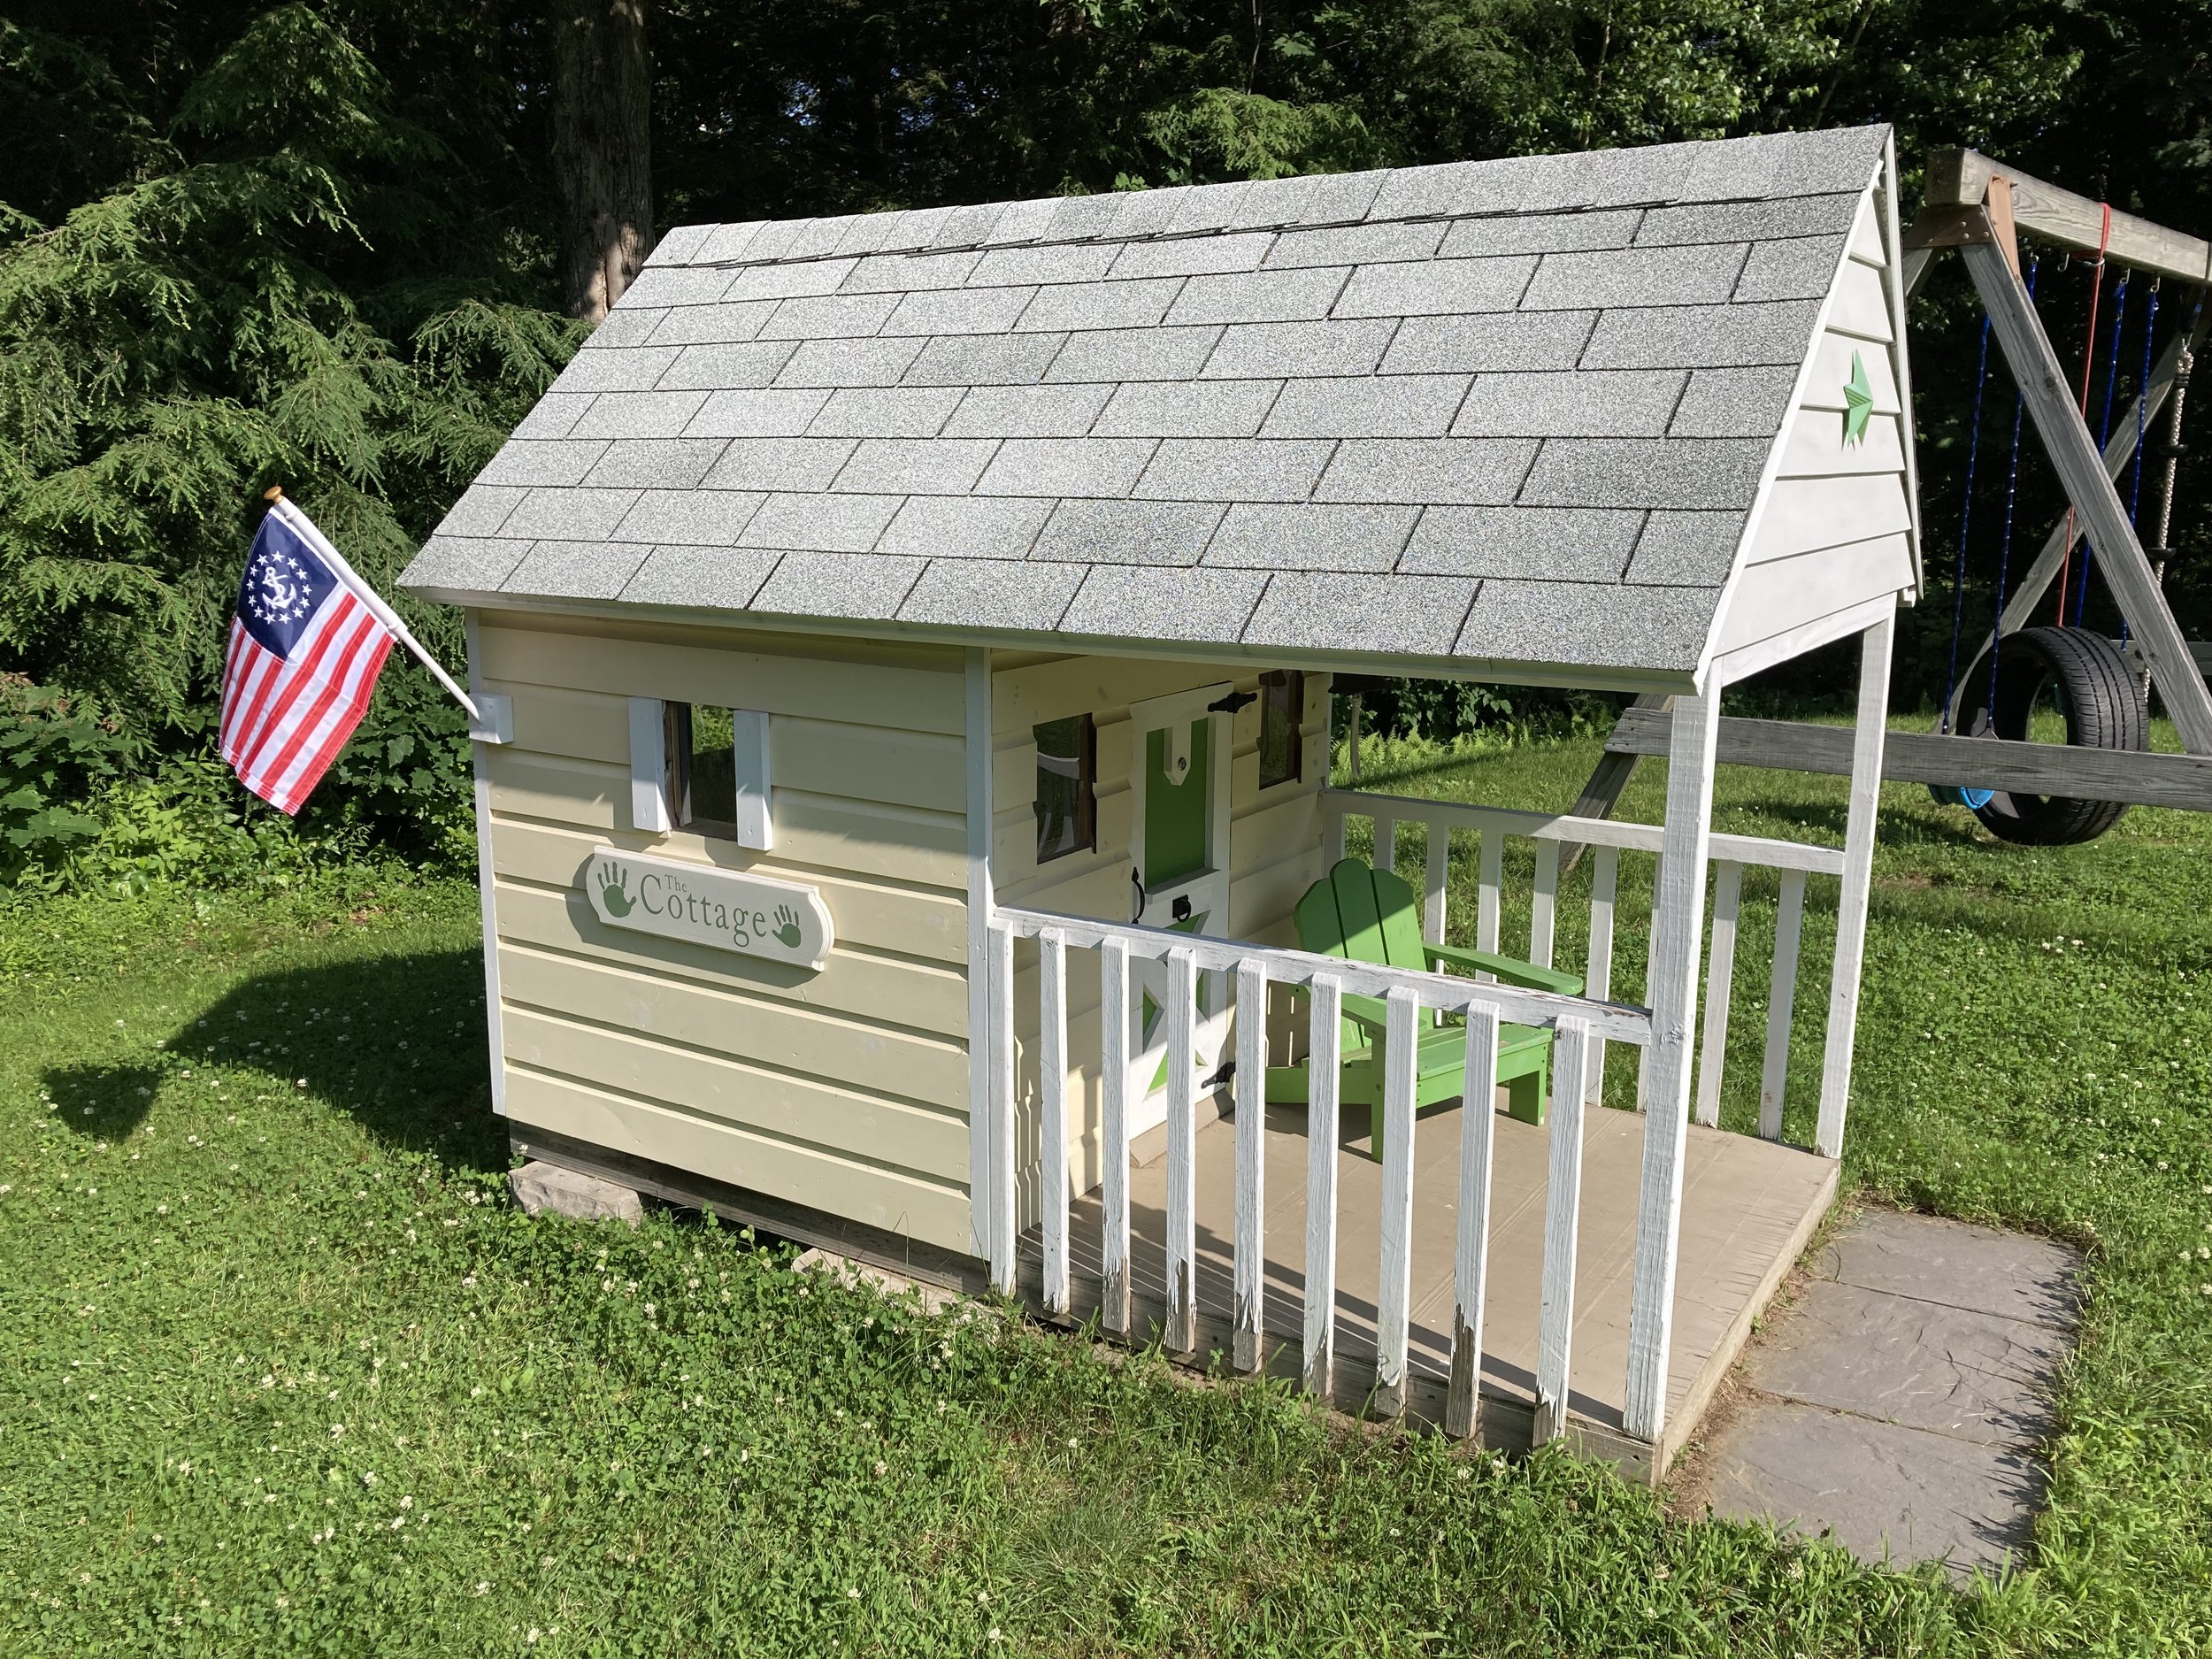
Our kids’ playhouse is pretty special - it was built for them by their Grandfather and the door was built by their Dad. It’s a special spot that has gotten a lot of use over the years and is always a hit when they have friends over. For awhile now I’ve wanted to add a little flagpole but wasn’t able to find an affordable boat flagpole in the dimensions I needed so I decided to make one myself. | This post contains affiliate links |
optional: you could use a boat flagpole and bracket kit if you wanted to make this quick and easy, but I was trying to make this project as inexpensively as possible and opted to make it myself with scrap wood we already had - I also wanted more control over the length of the pole and the angle which is another reason why I decided to make it myself.
How-To:
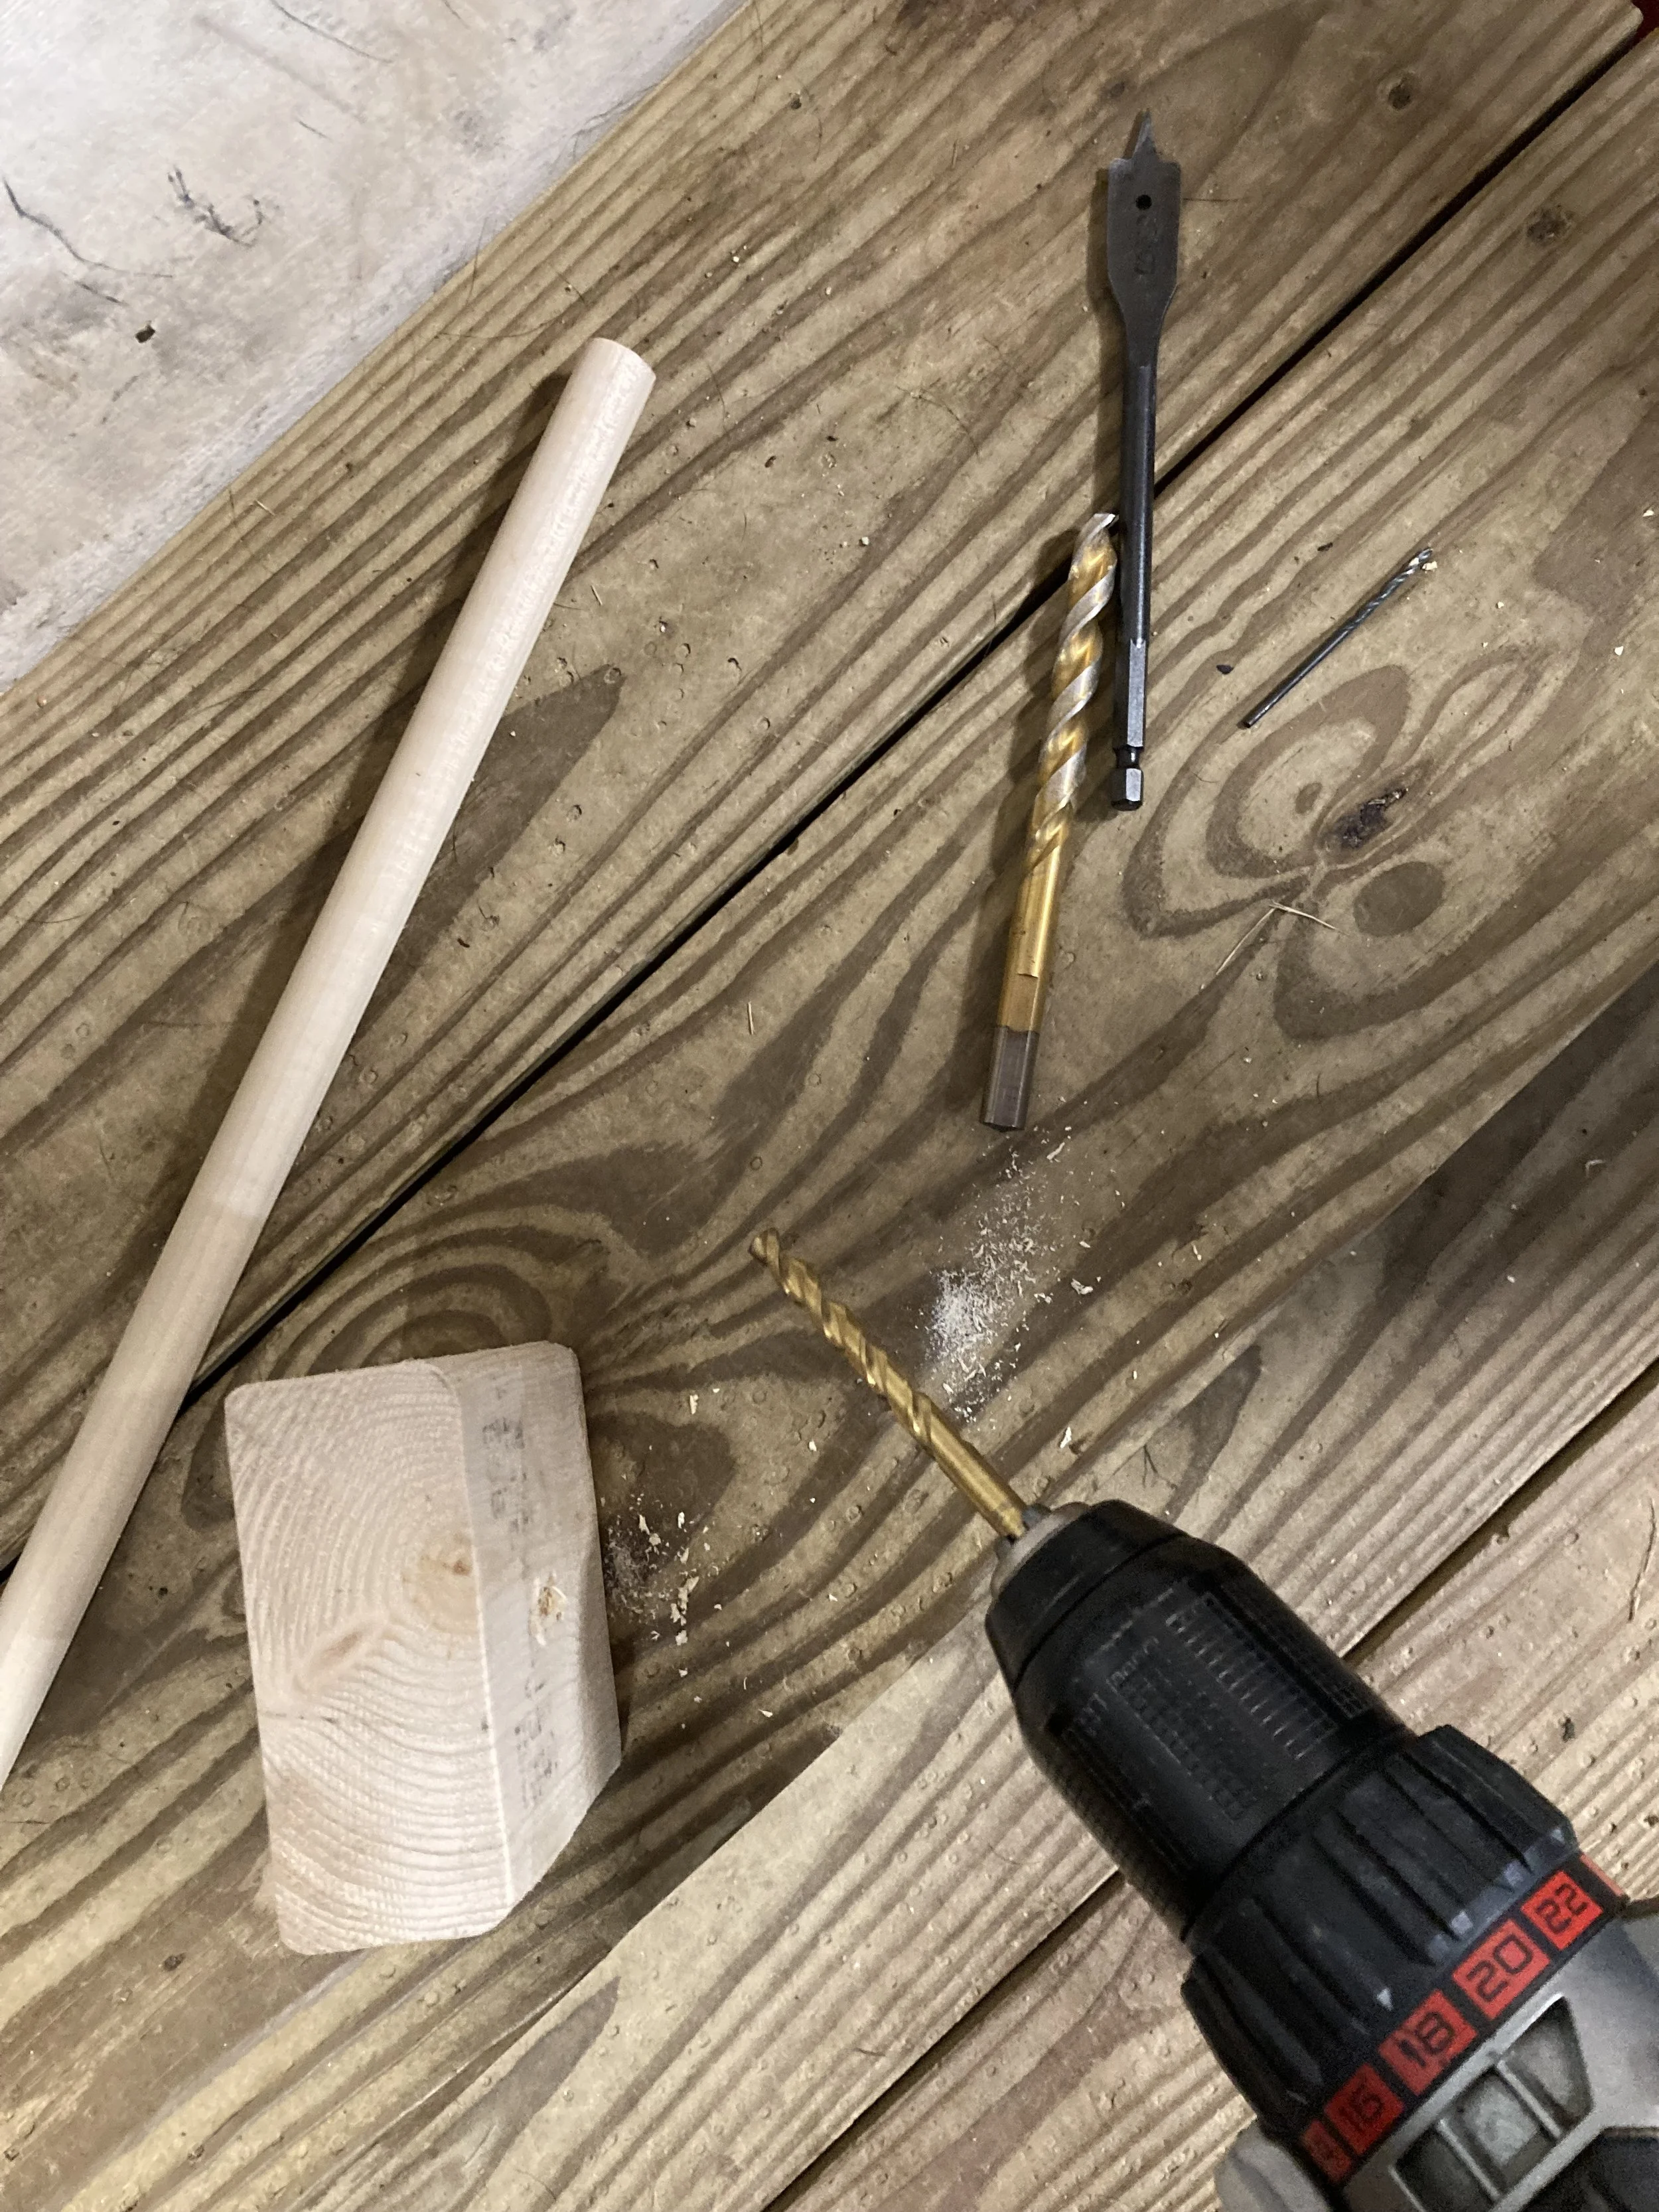
First, I decided on the angle of the dowel into the scrap piece of 2x4 and made a pilot hole at that angle with a small drill. Then I kept going up in drill sizes to make the hole the correct diameter. (Note: I do not recommend using a spade bit.. I tried that and it was terrible going in at an angle. We ended up borrowing a drill bit in correct final size to finish the hole.)
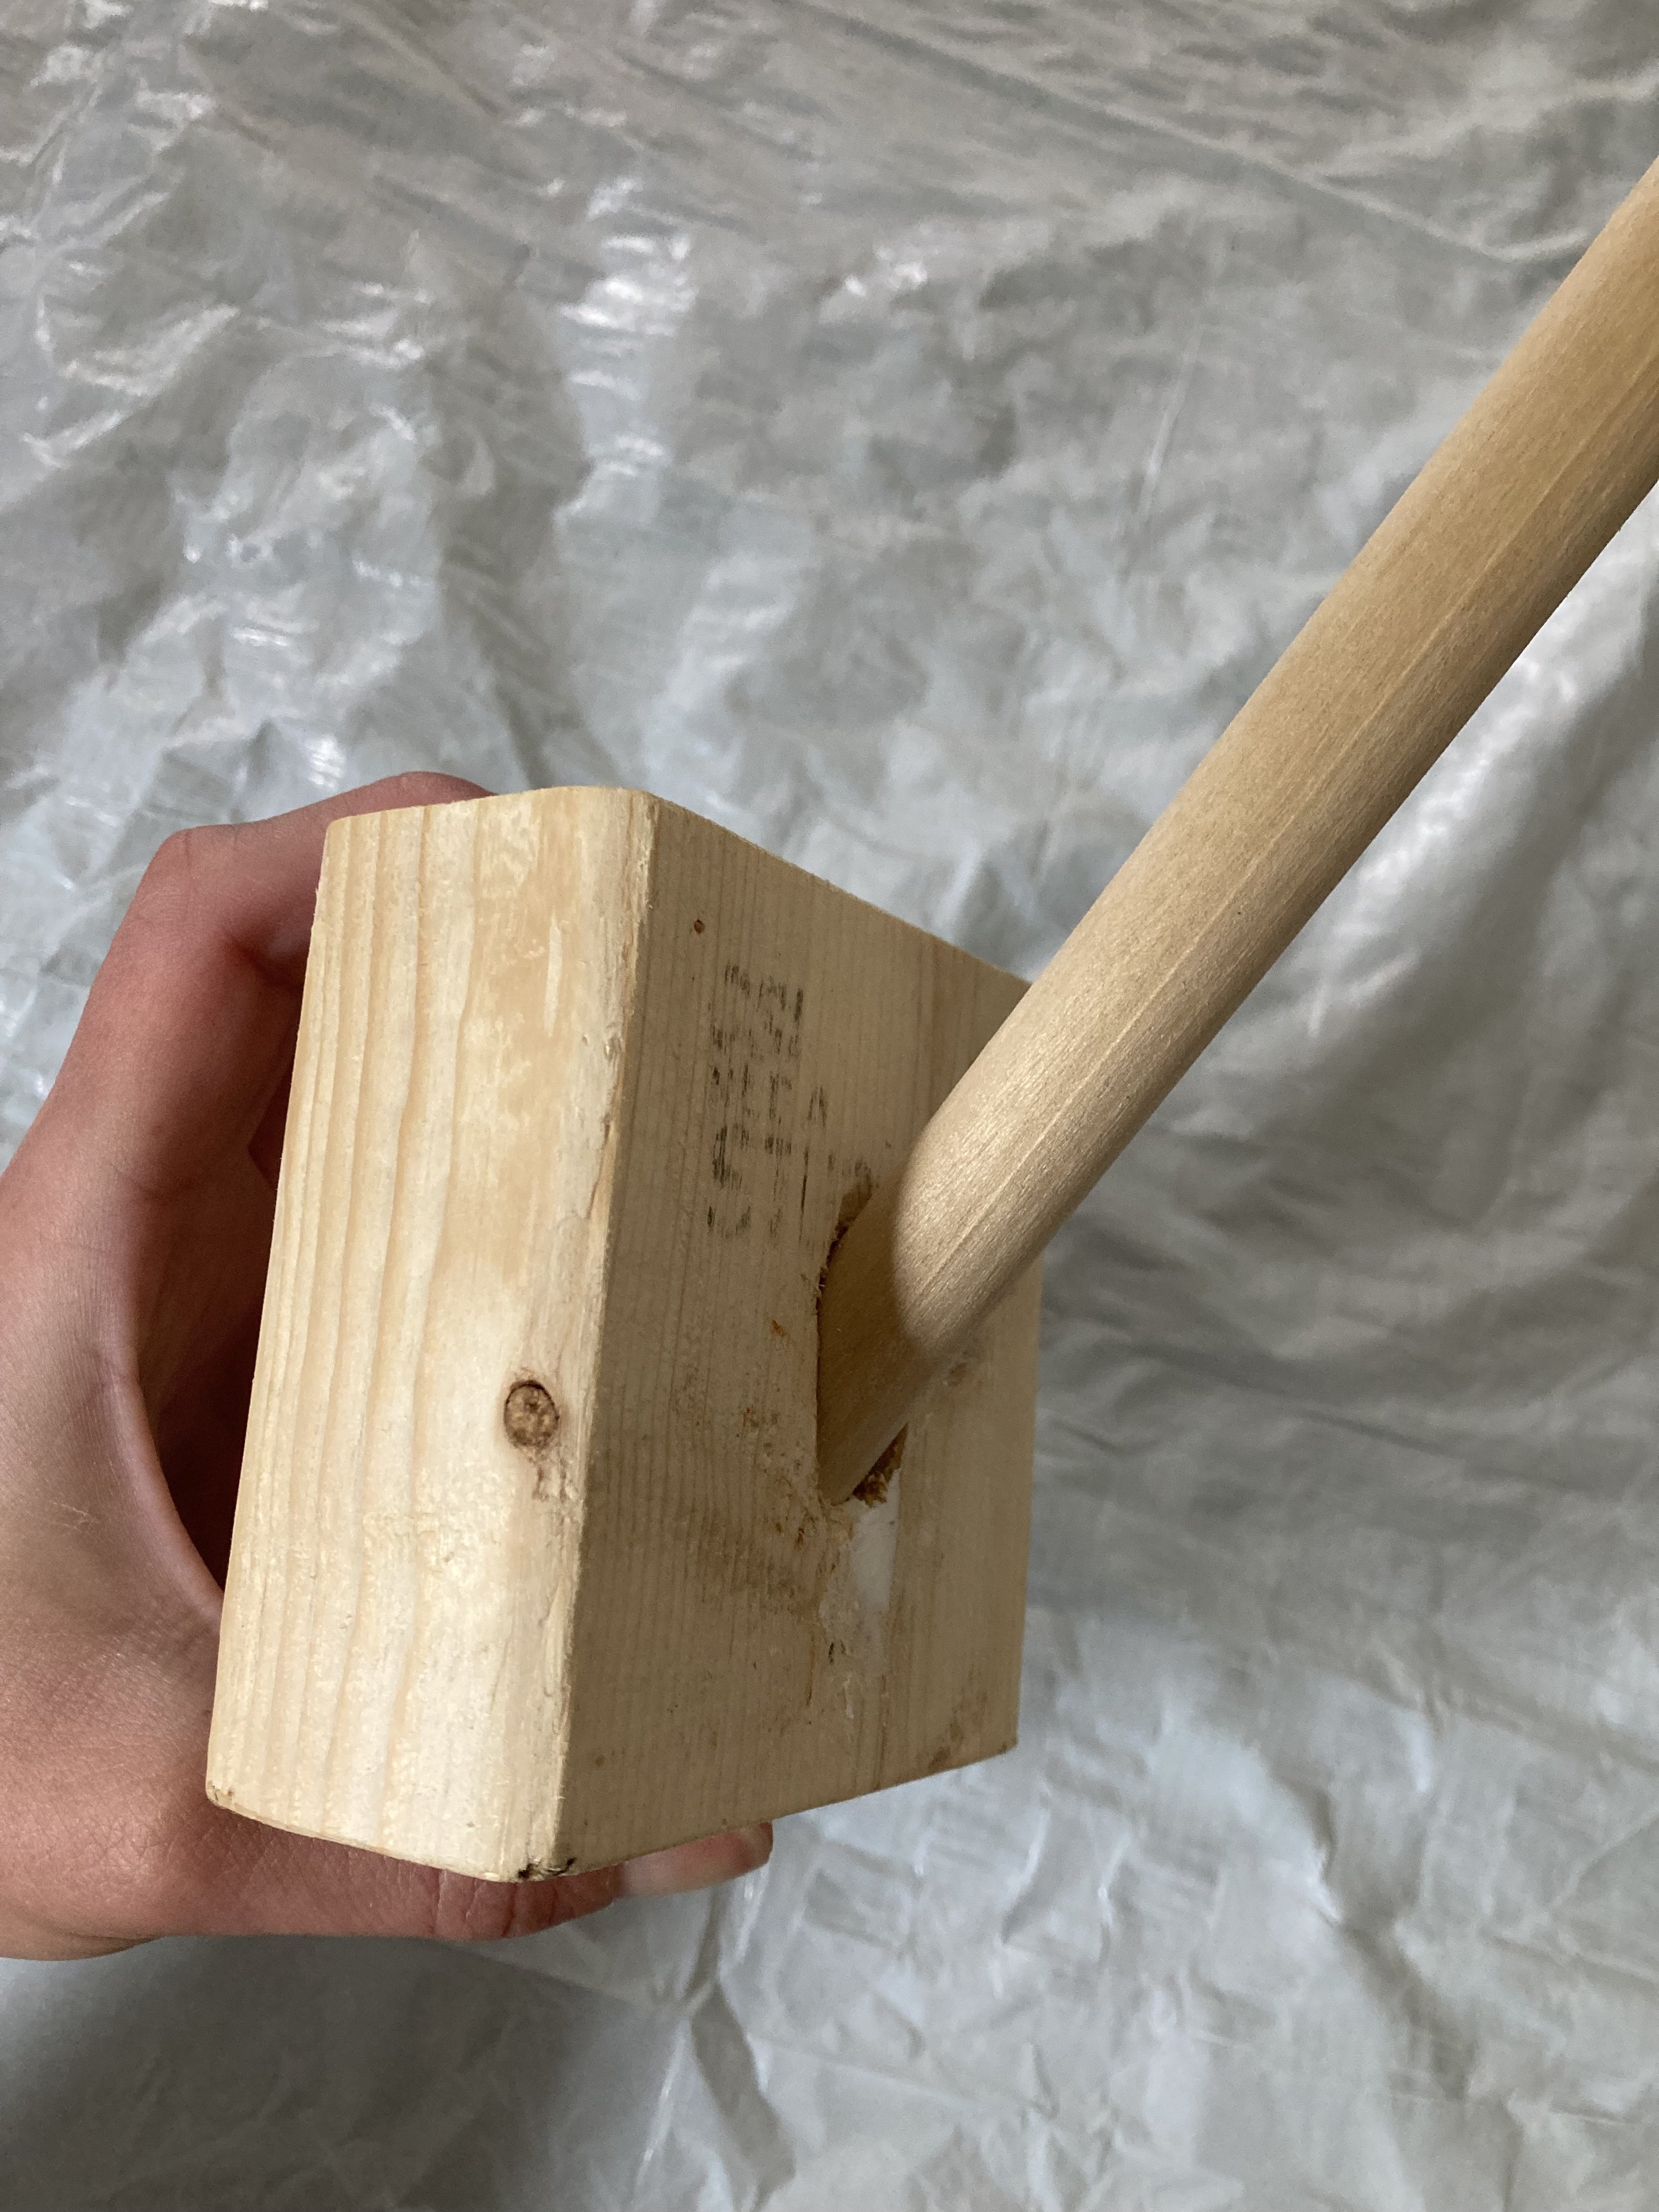
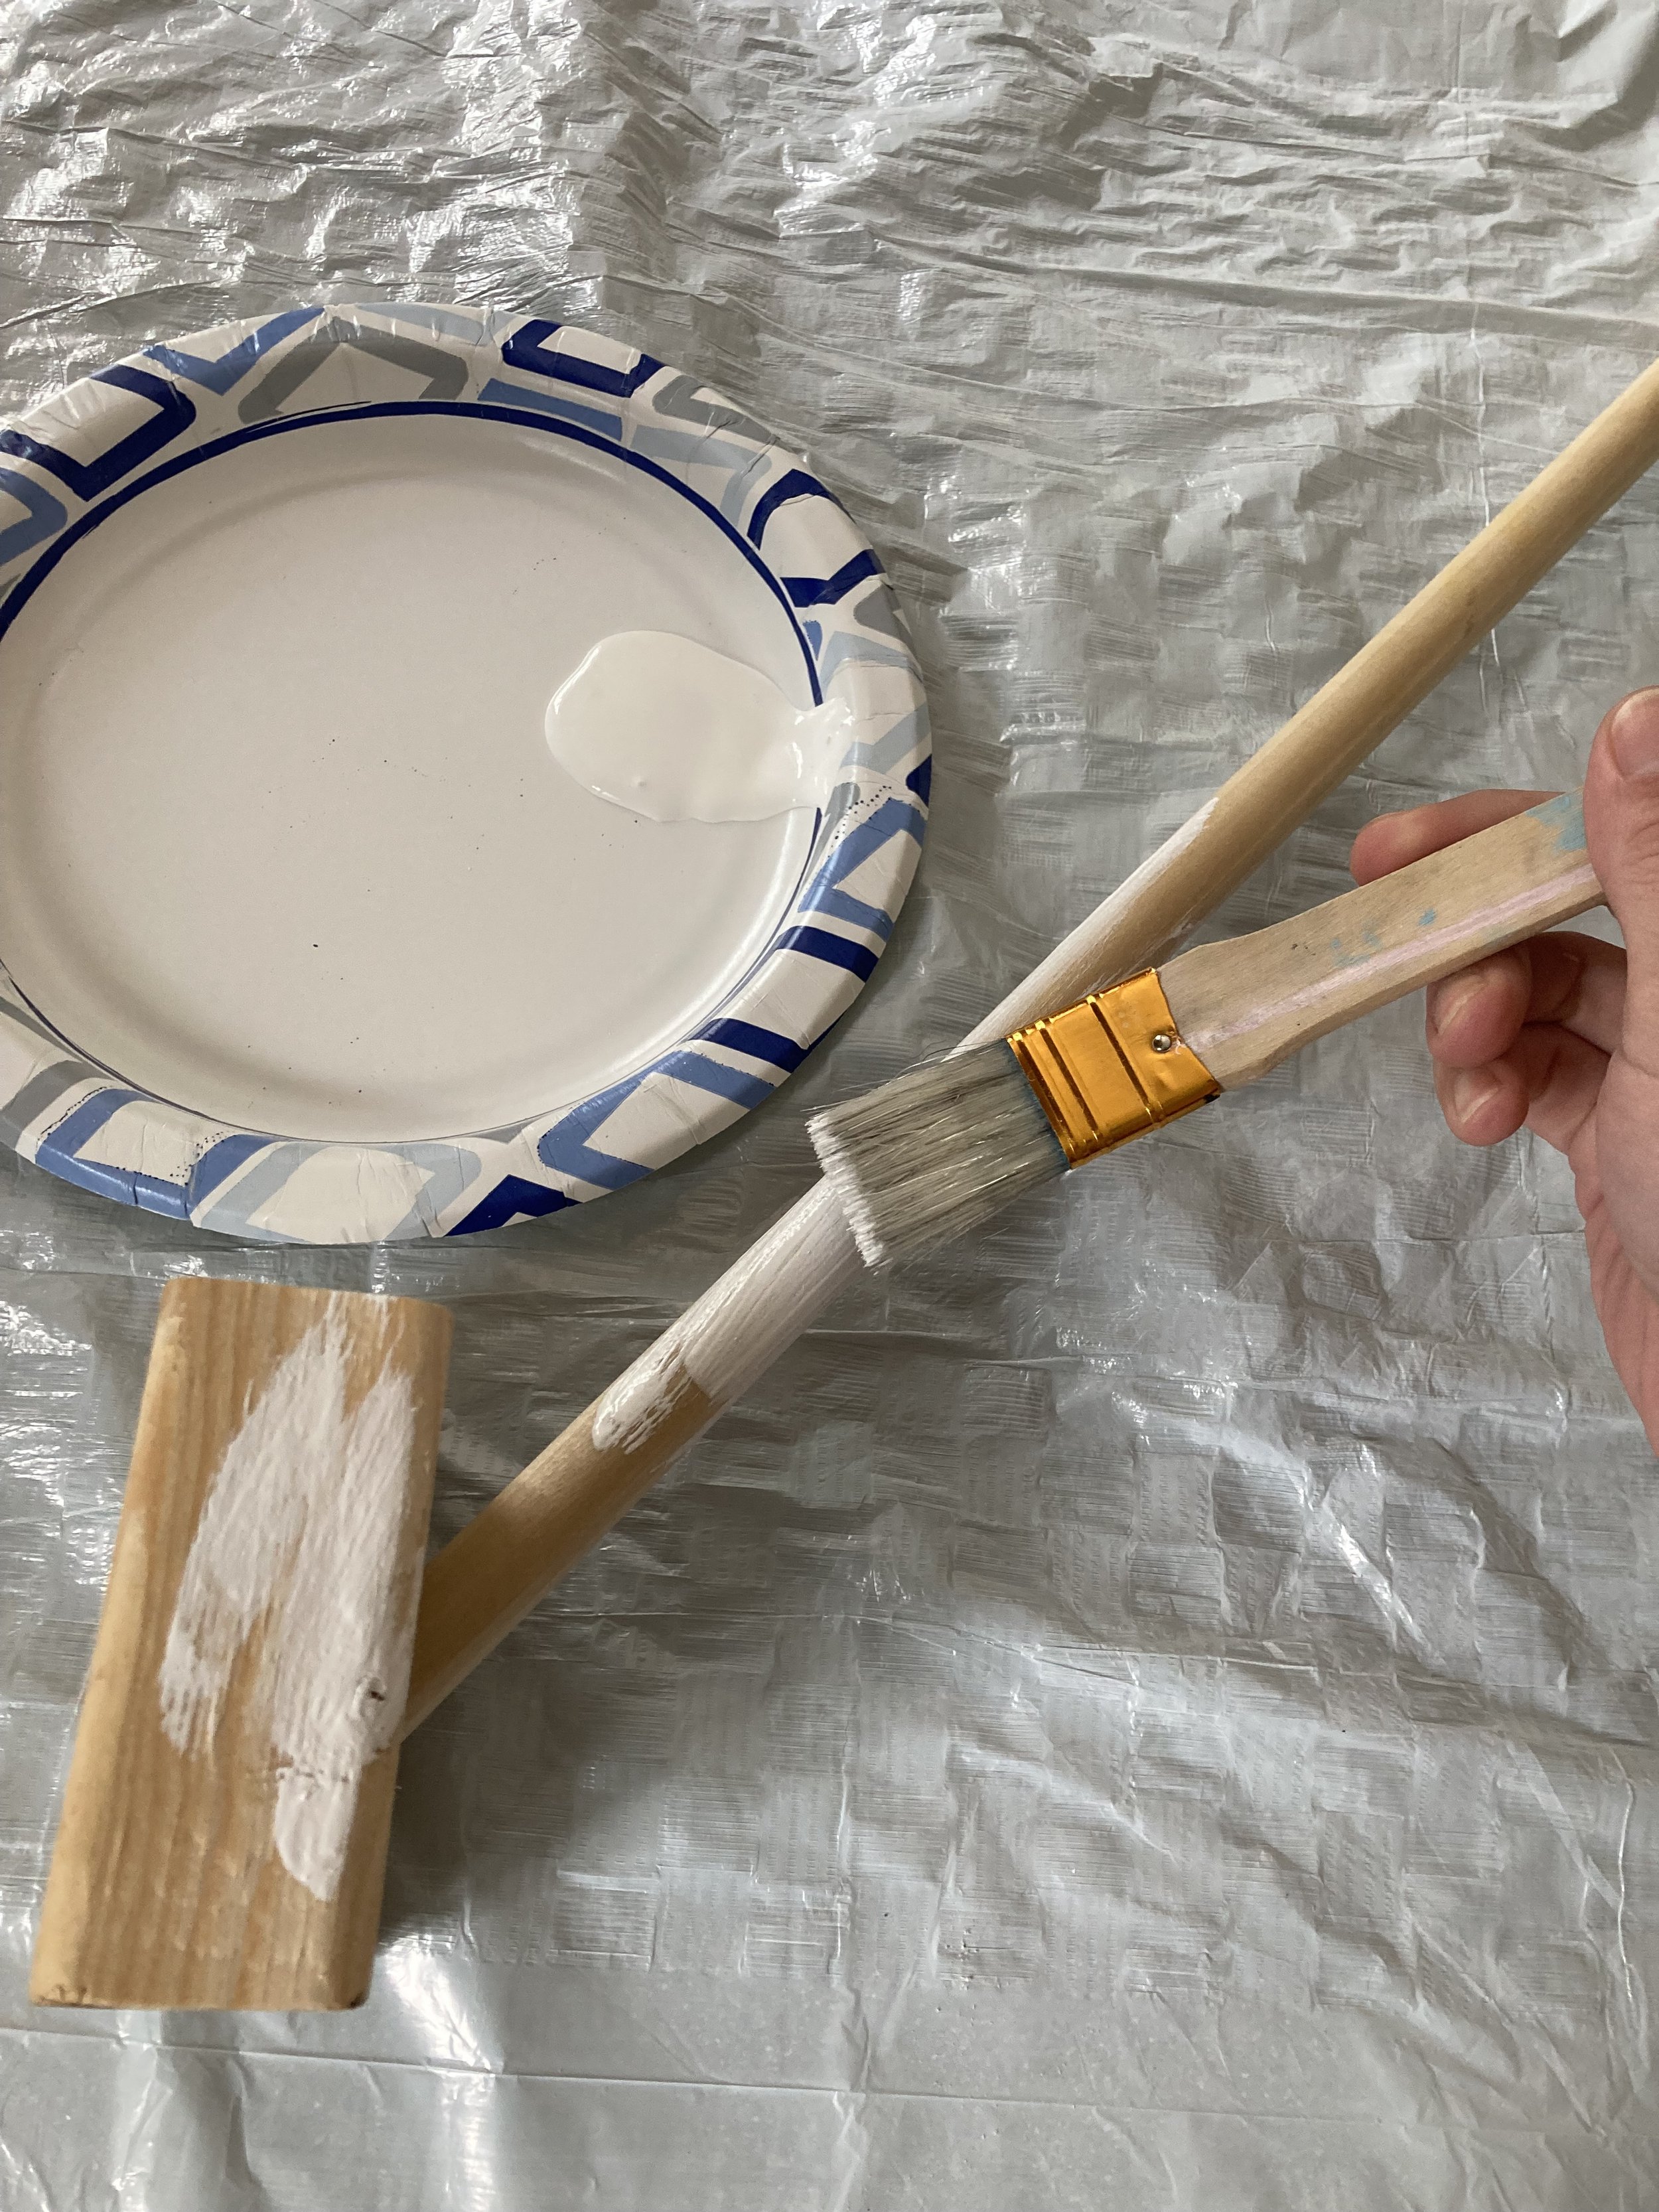
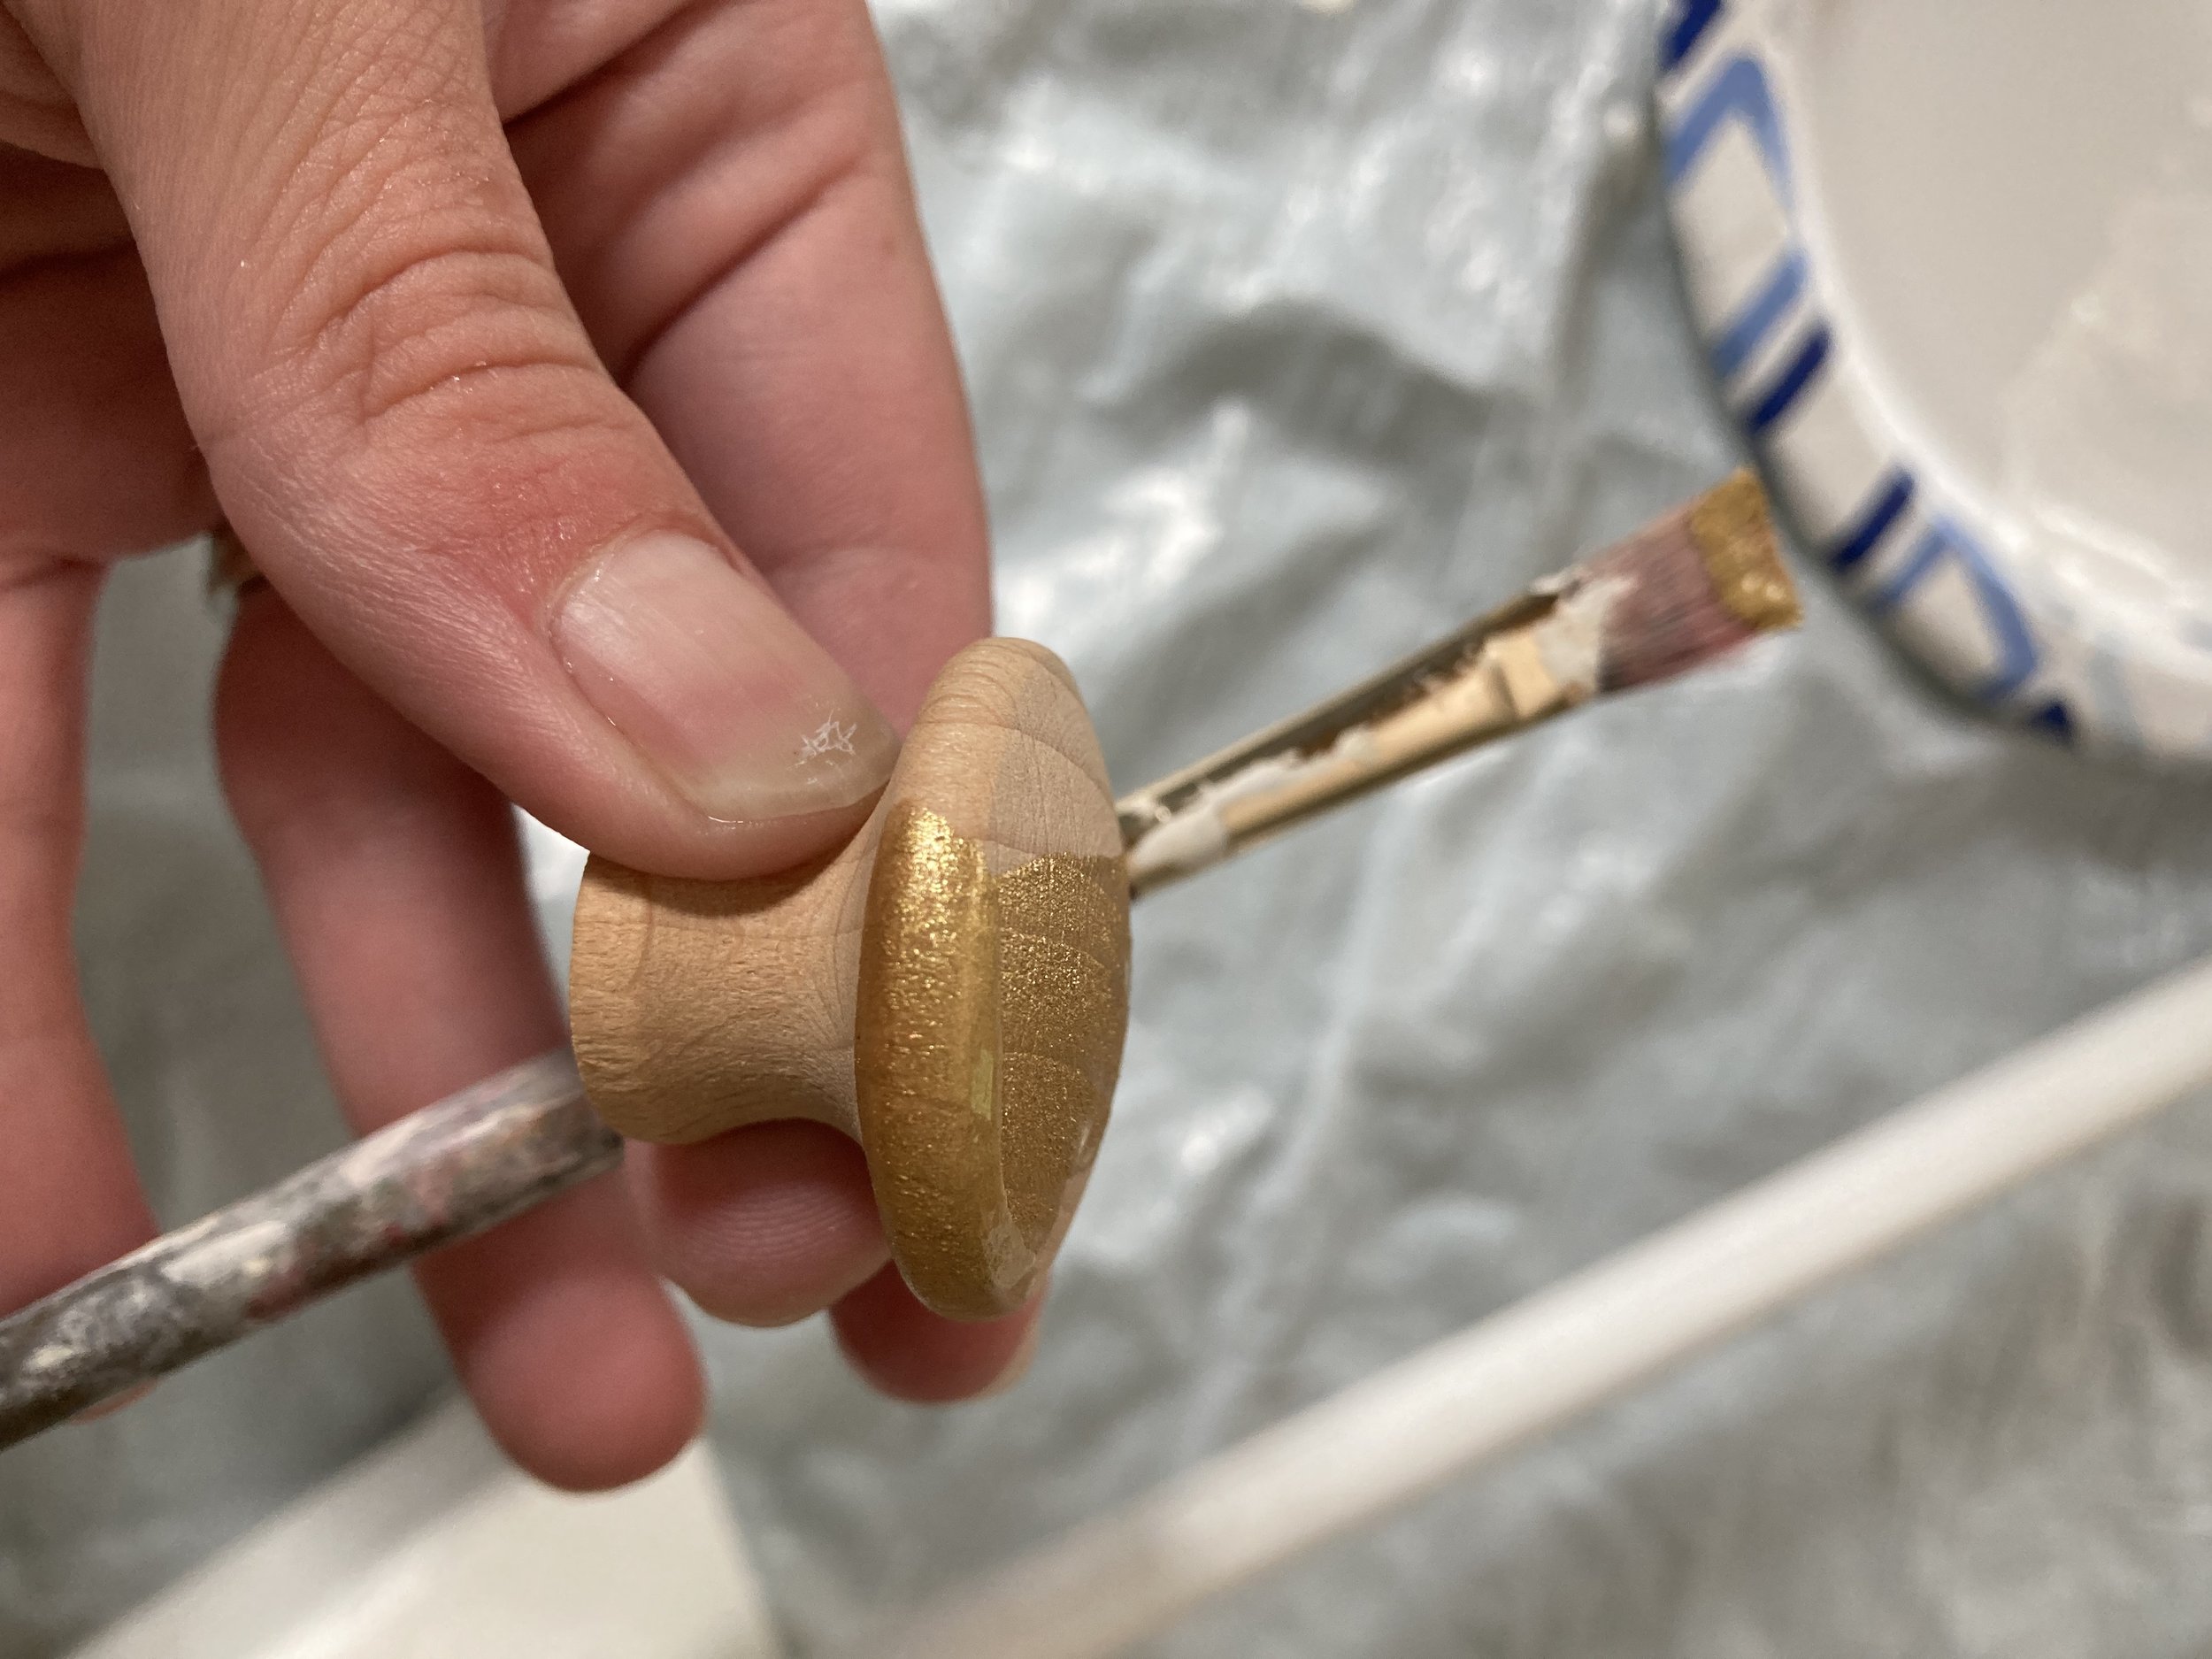
Once the hole was made I glued the dowel into it with some wood glue then painted it white with several coats of paint. While I was waiting for that to dry I moved on to painting the wooden knob with several coats of gold paint and then let that dry too.
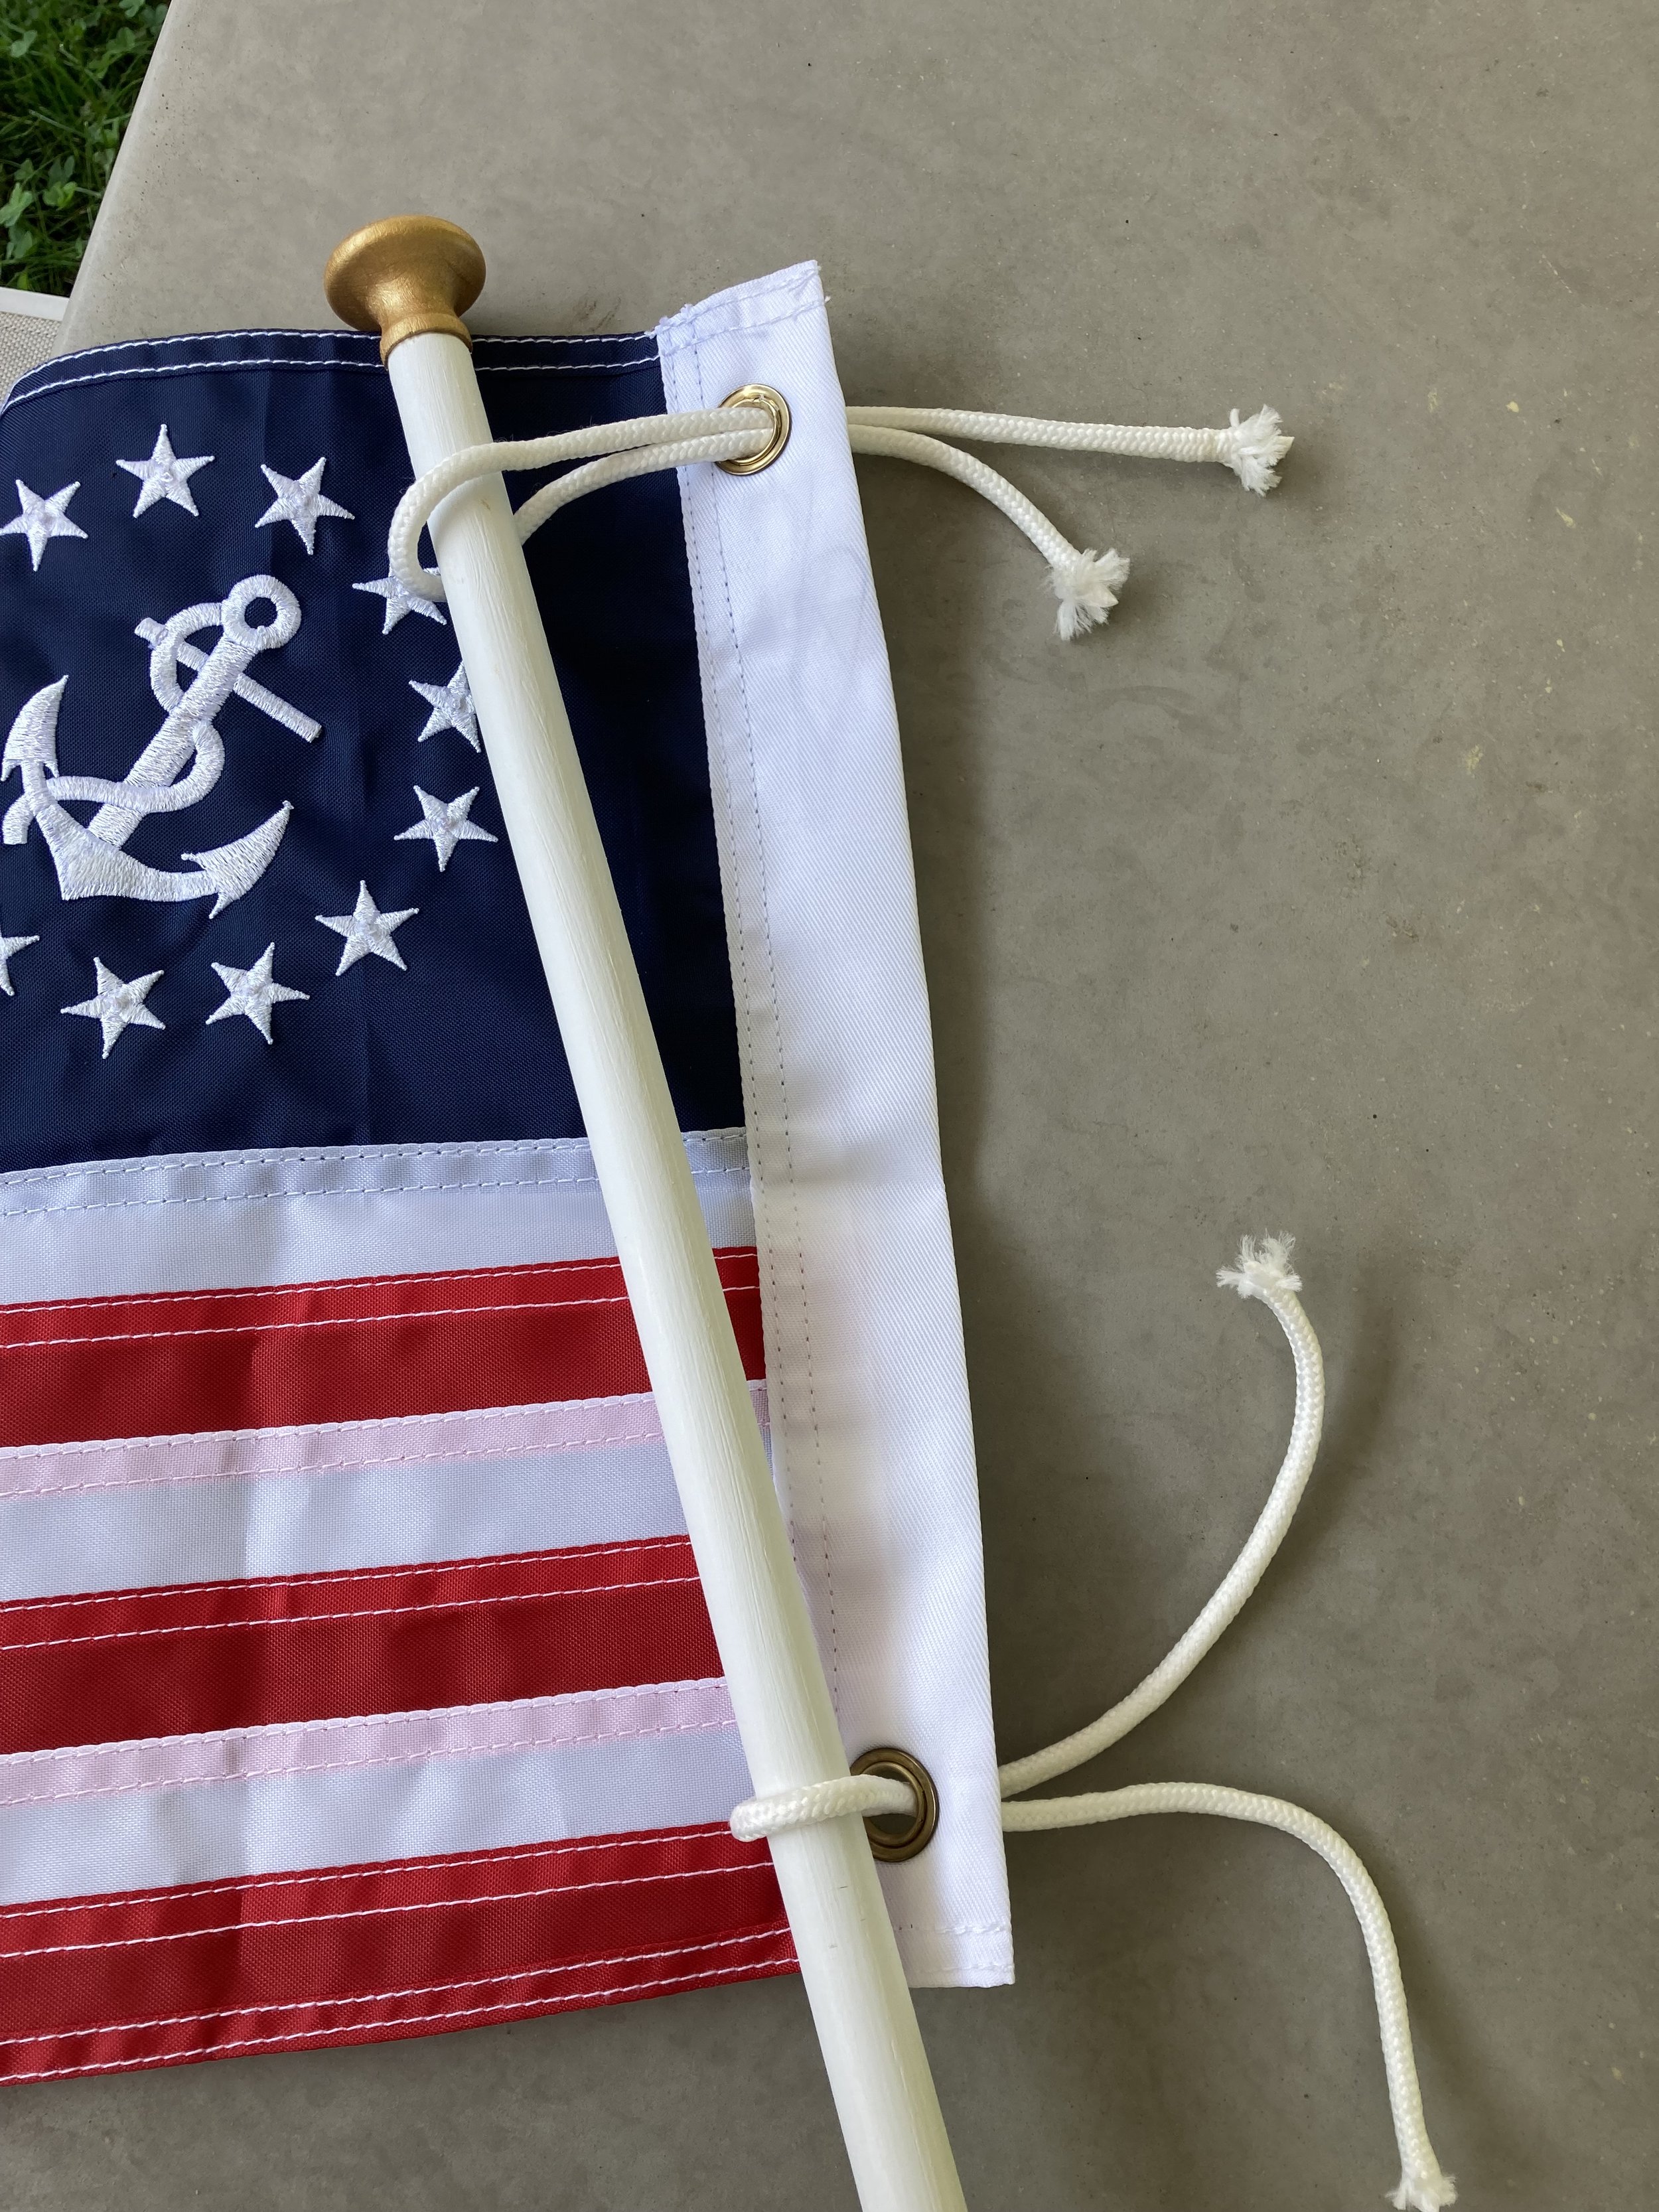
Next I drilled a small hole into the end of the top of the flag pole and cut some toothpicks down to fit inside the hole but stick out far enough to also fit into the hole in the wooden knob. Then I added wood glue and put the knob onto the end of the flagpole. (Note: Using toothpicks to reinforce this joining is key - if just wood glue was used it would be at more risk to break off, but the toothpick reinforcement going through really helps!)
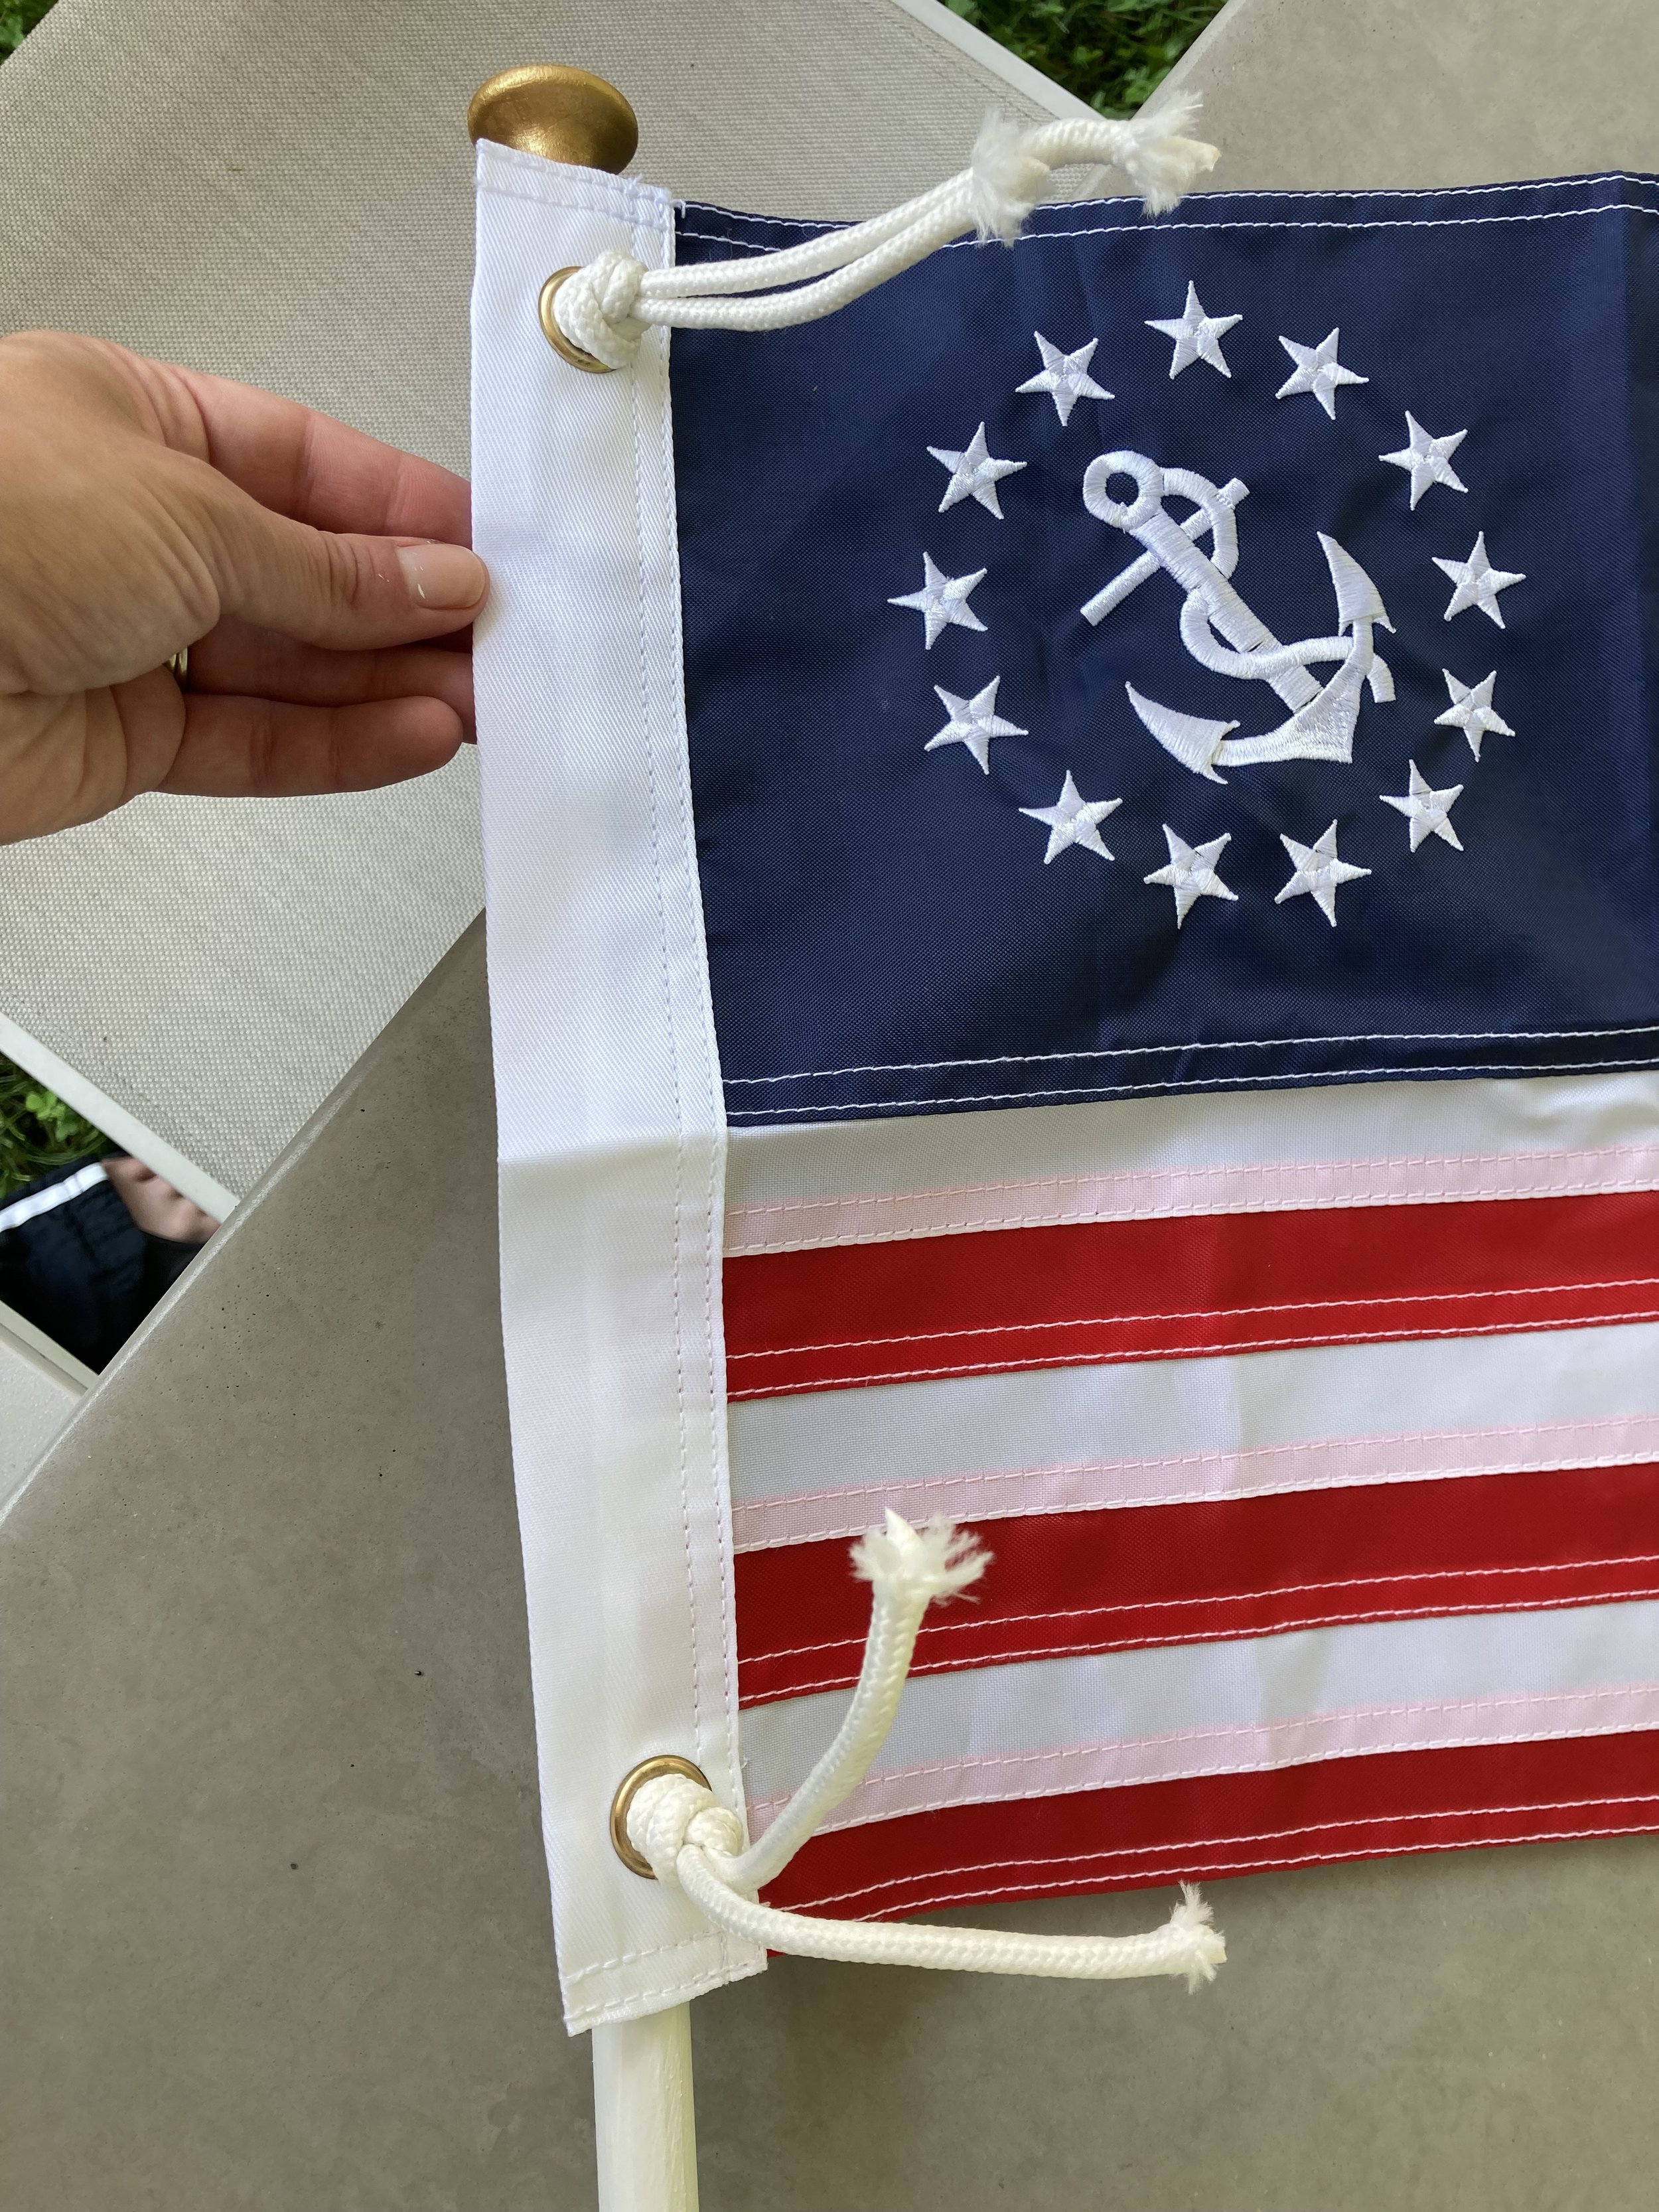
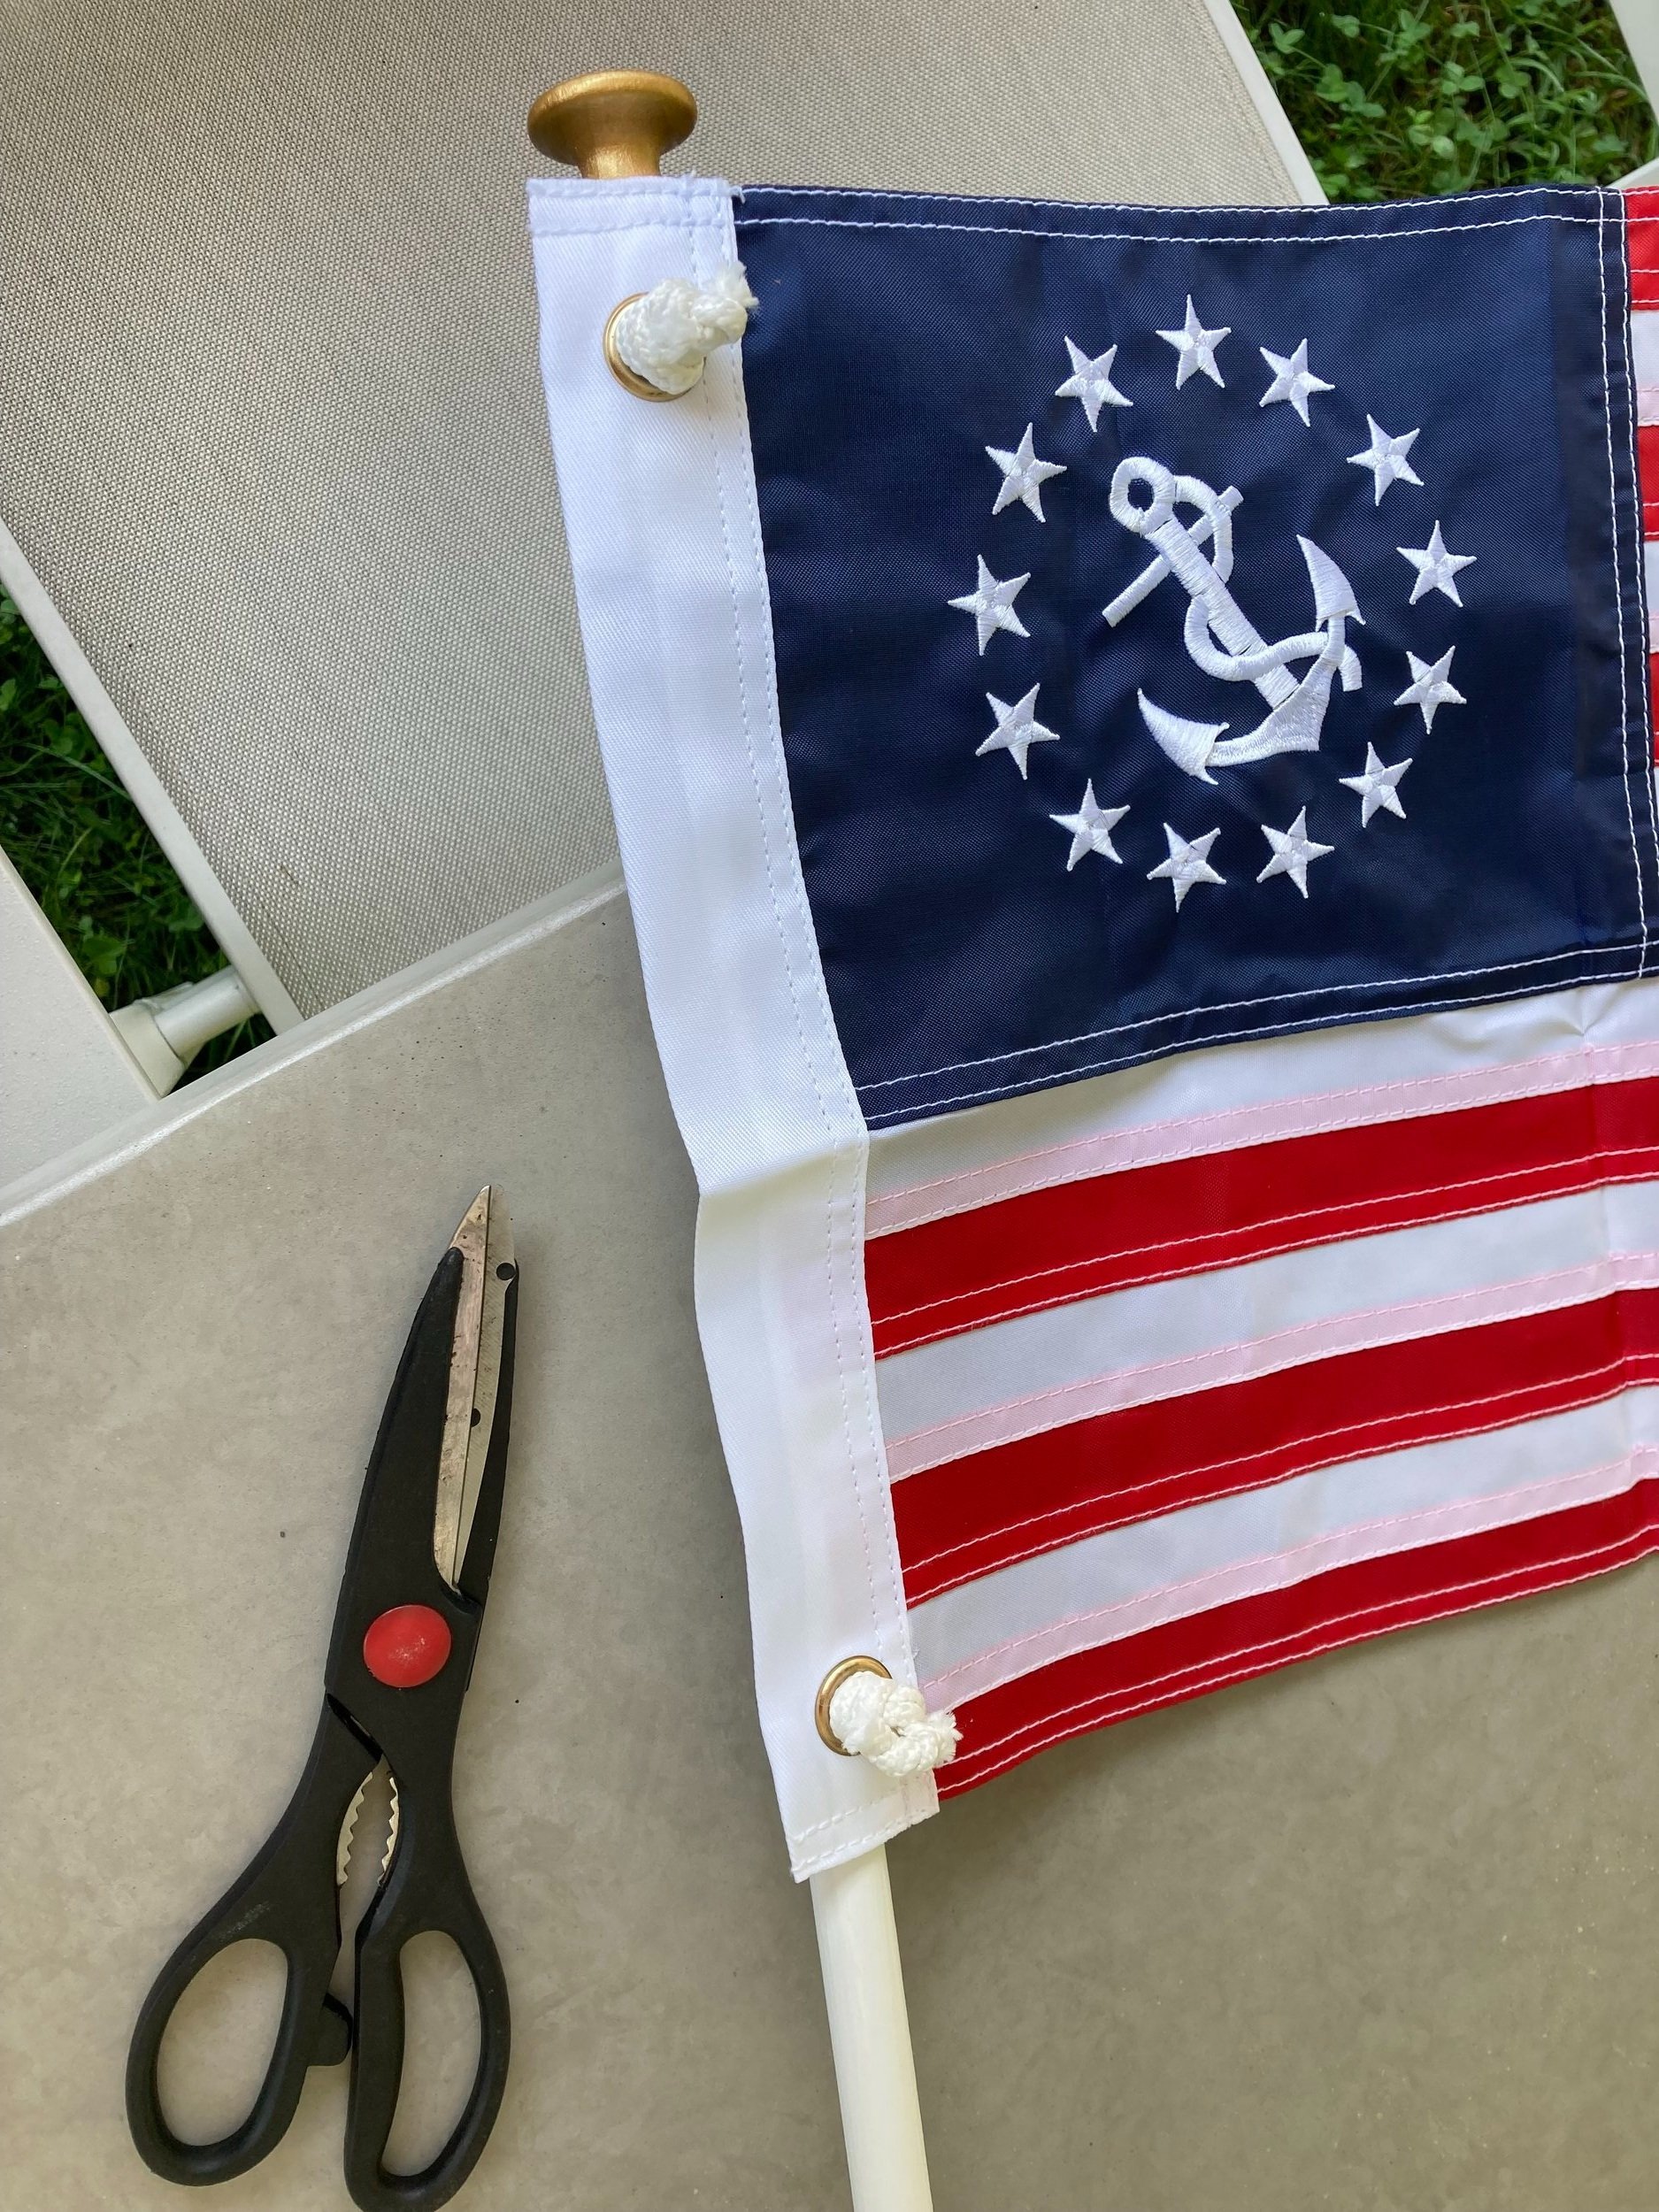
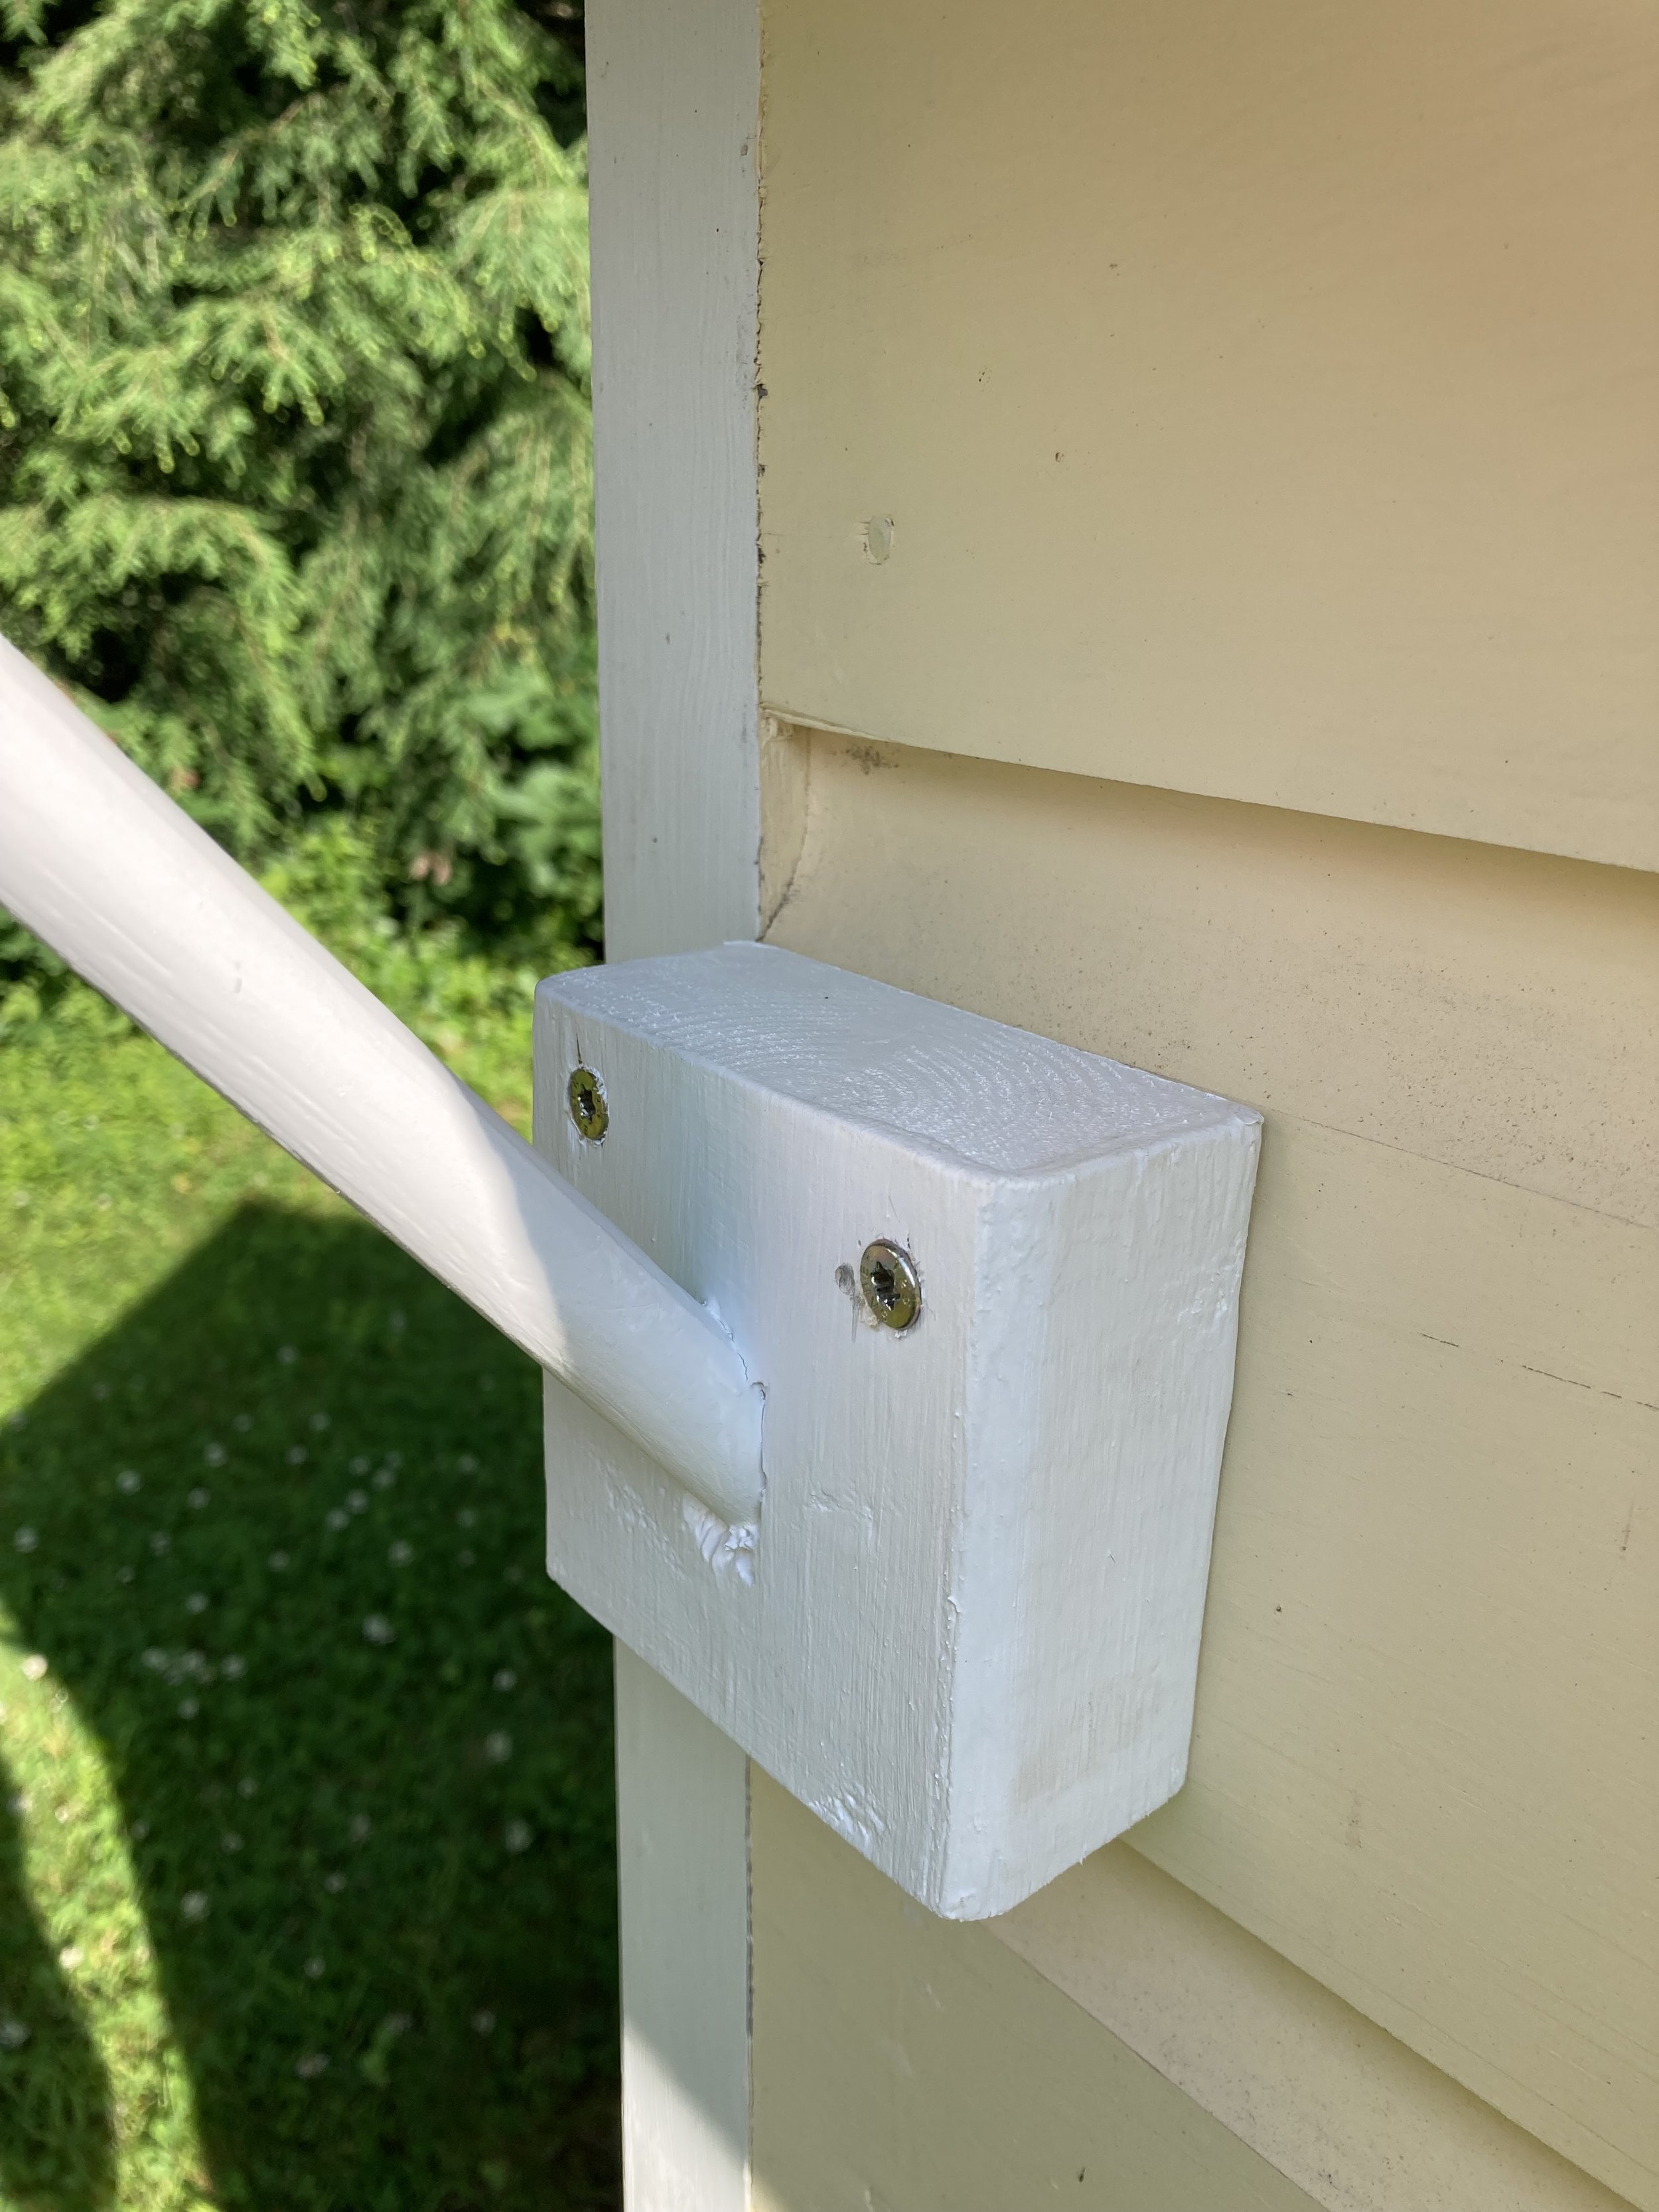
And now we can attach the flag! I just used some cotton clothes line rope to tie the flag to the flagpole. The wooden flagpole has enough grip and the flag is so small that we don’t have any issue with the flag sliding down or moving.
Now that your flag is assembled you just have to mount it. I screwed the base into the side of the playhouse then touched up the screw heads with white paint to help them blend in.
The finished product!
I will probably take the flag down come winter, as our harsh New England winters with heavy snow and ice would likely damage the pole but then I plan to put it right back up in the spring.
| "The Cottage" Sign - I made this a few years ago by making a stencil for the words using my Cricut and having the kids dip their hands in paint for the handprints. |
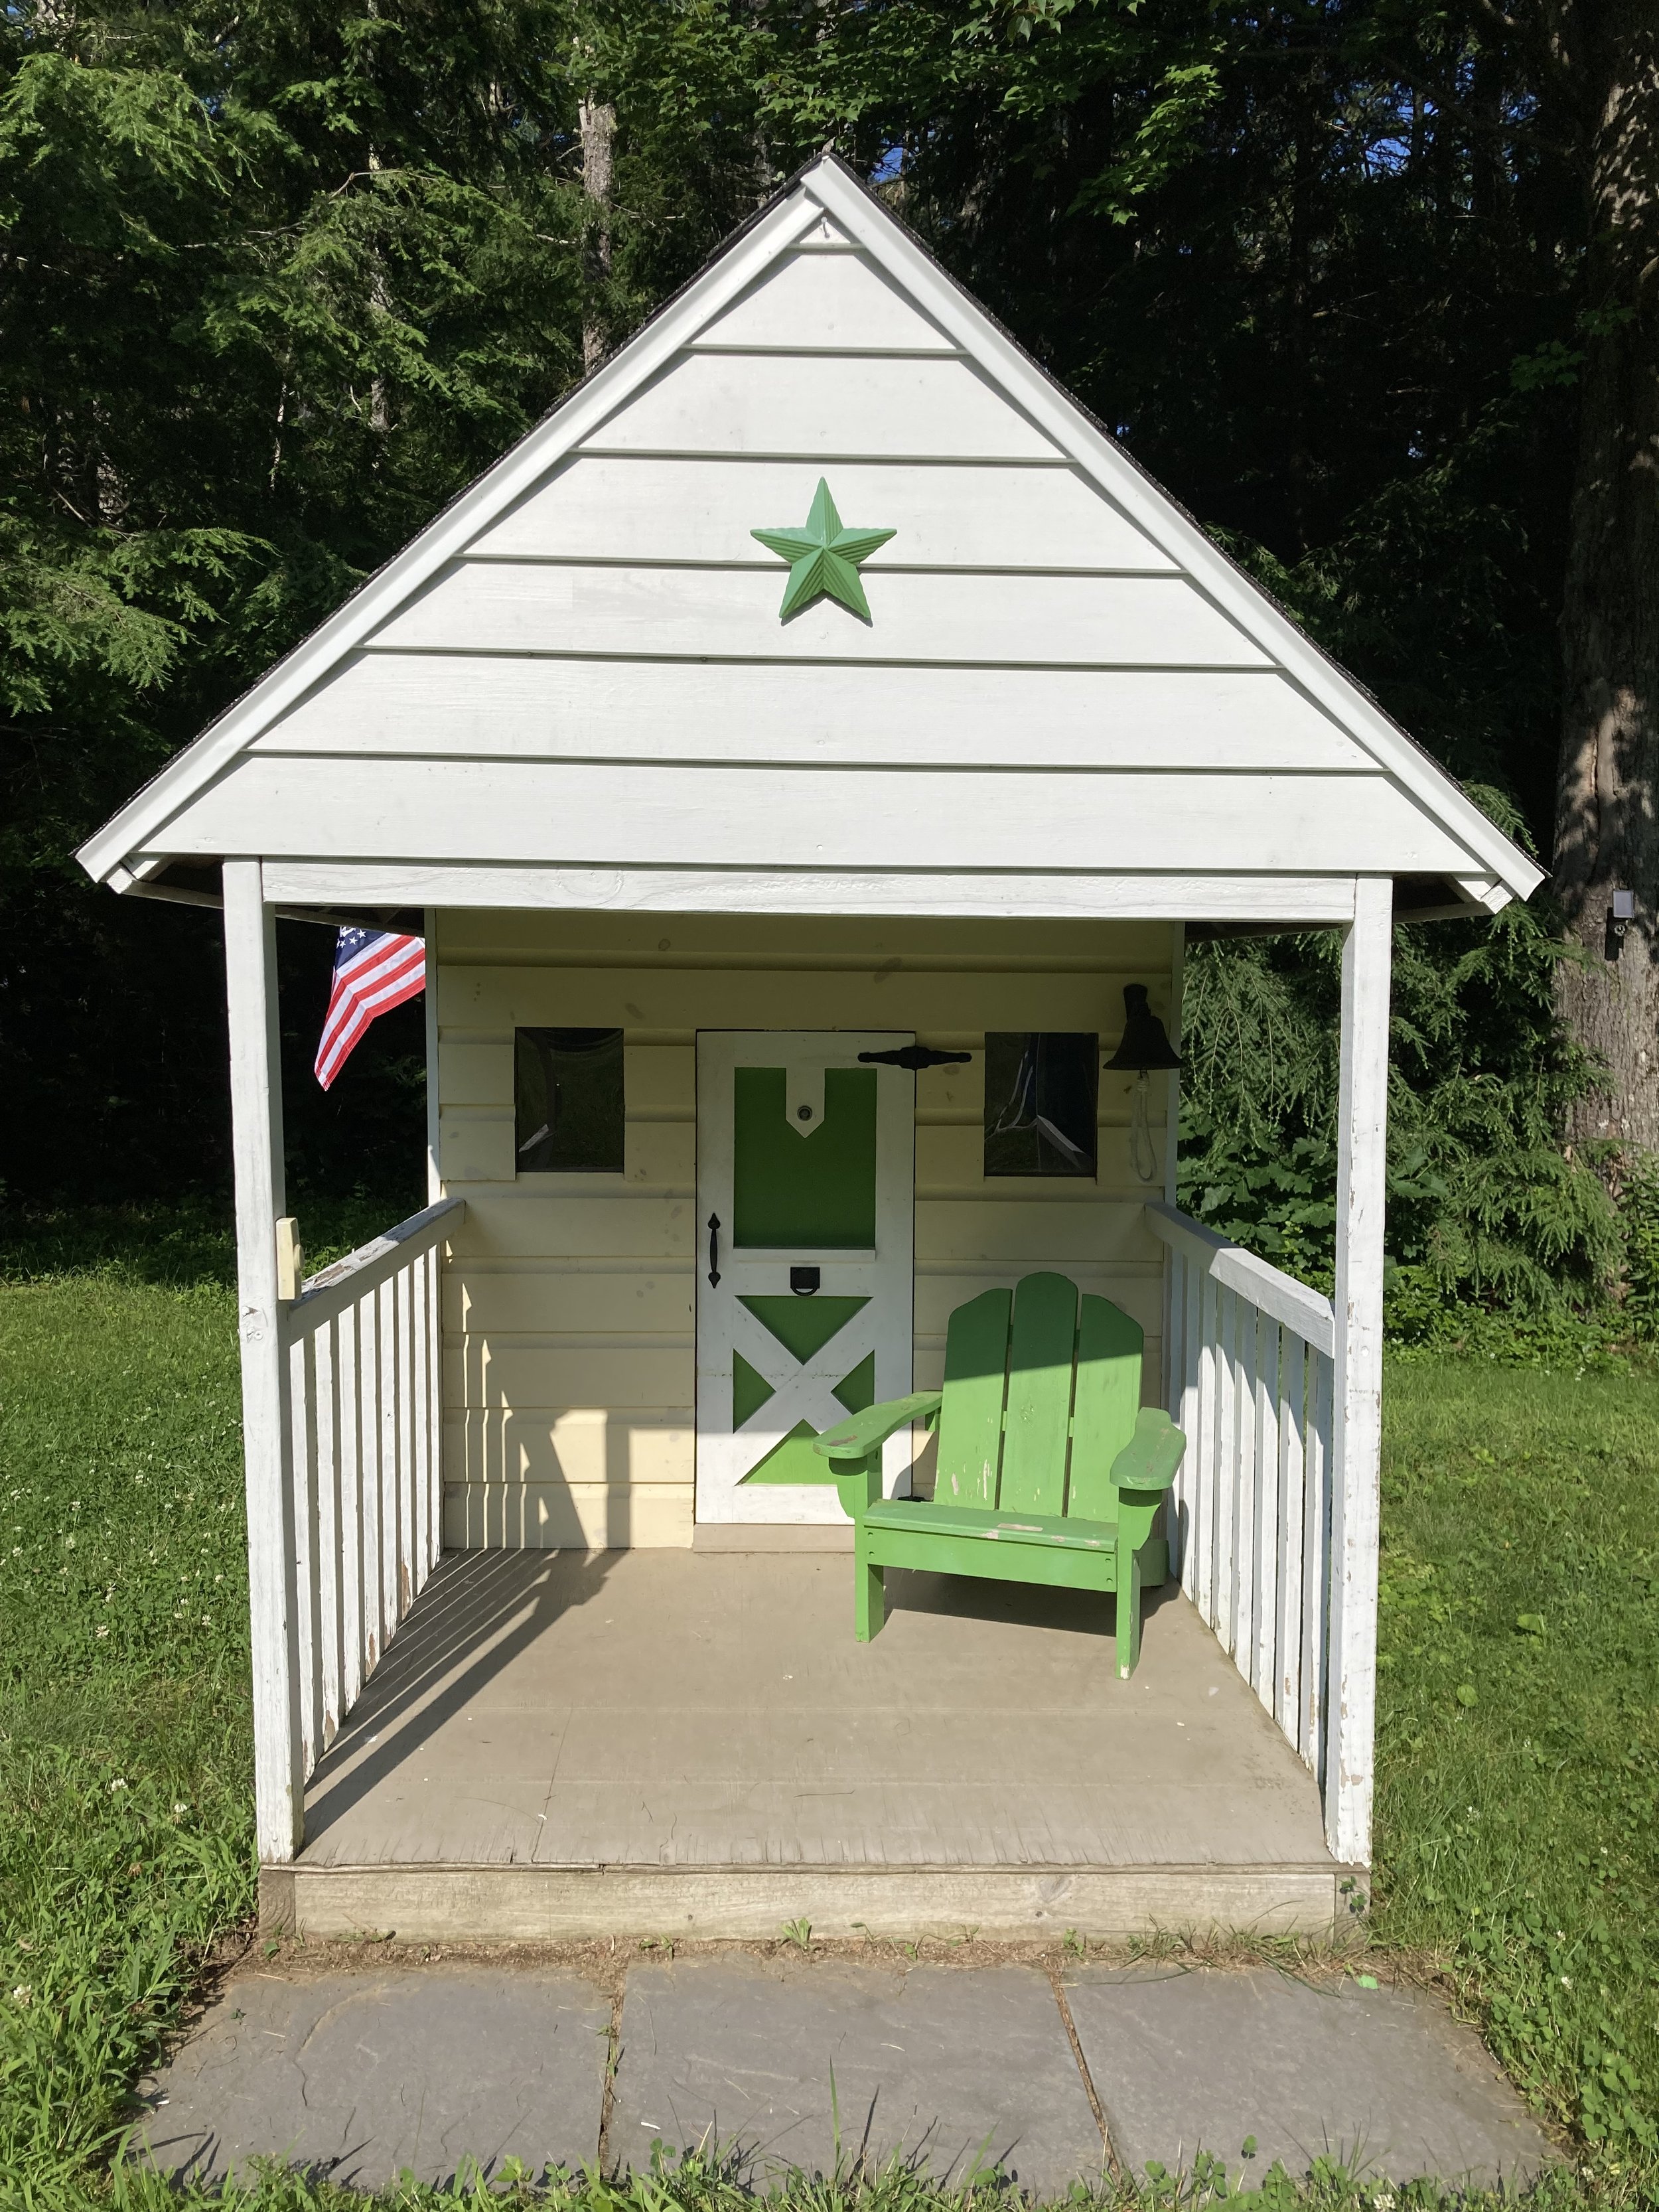
A few other Playhouse details…
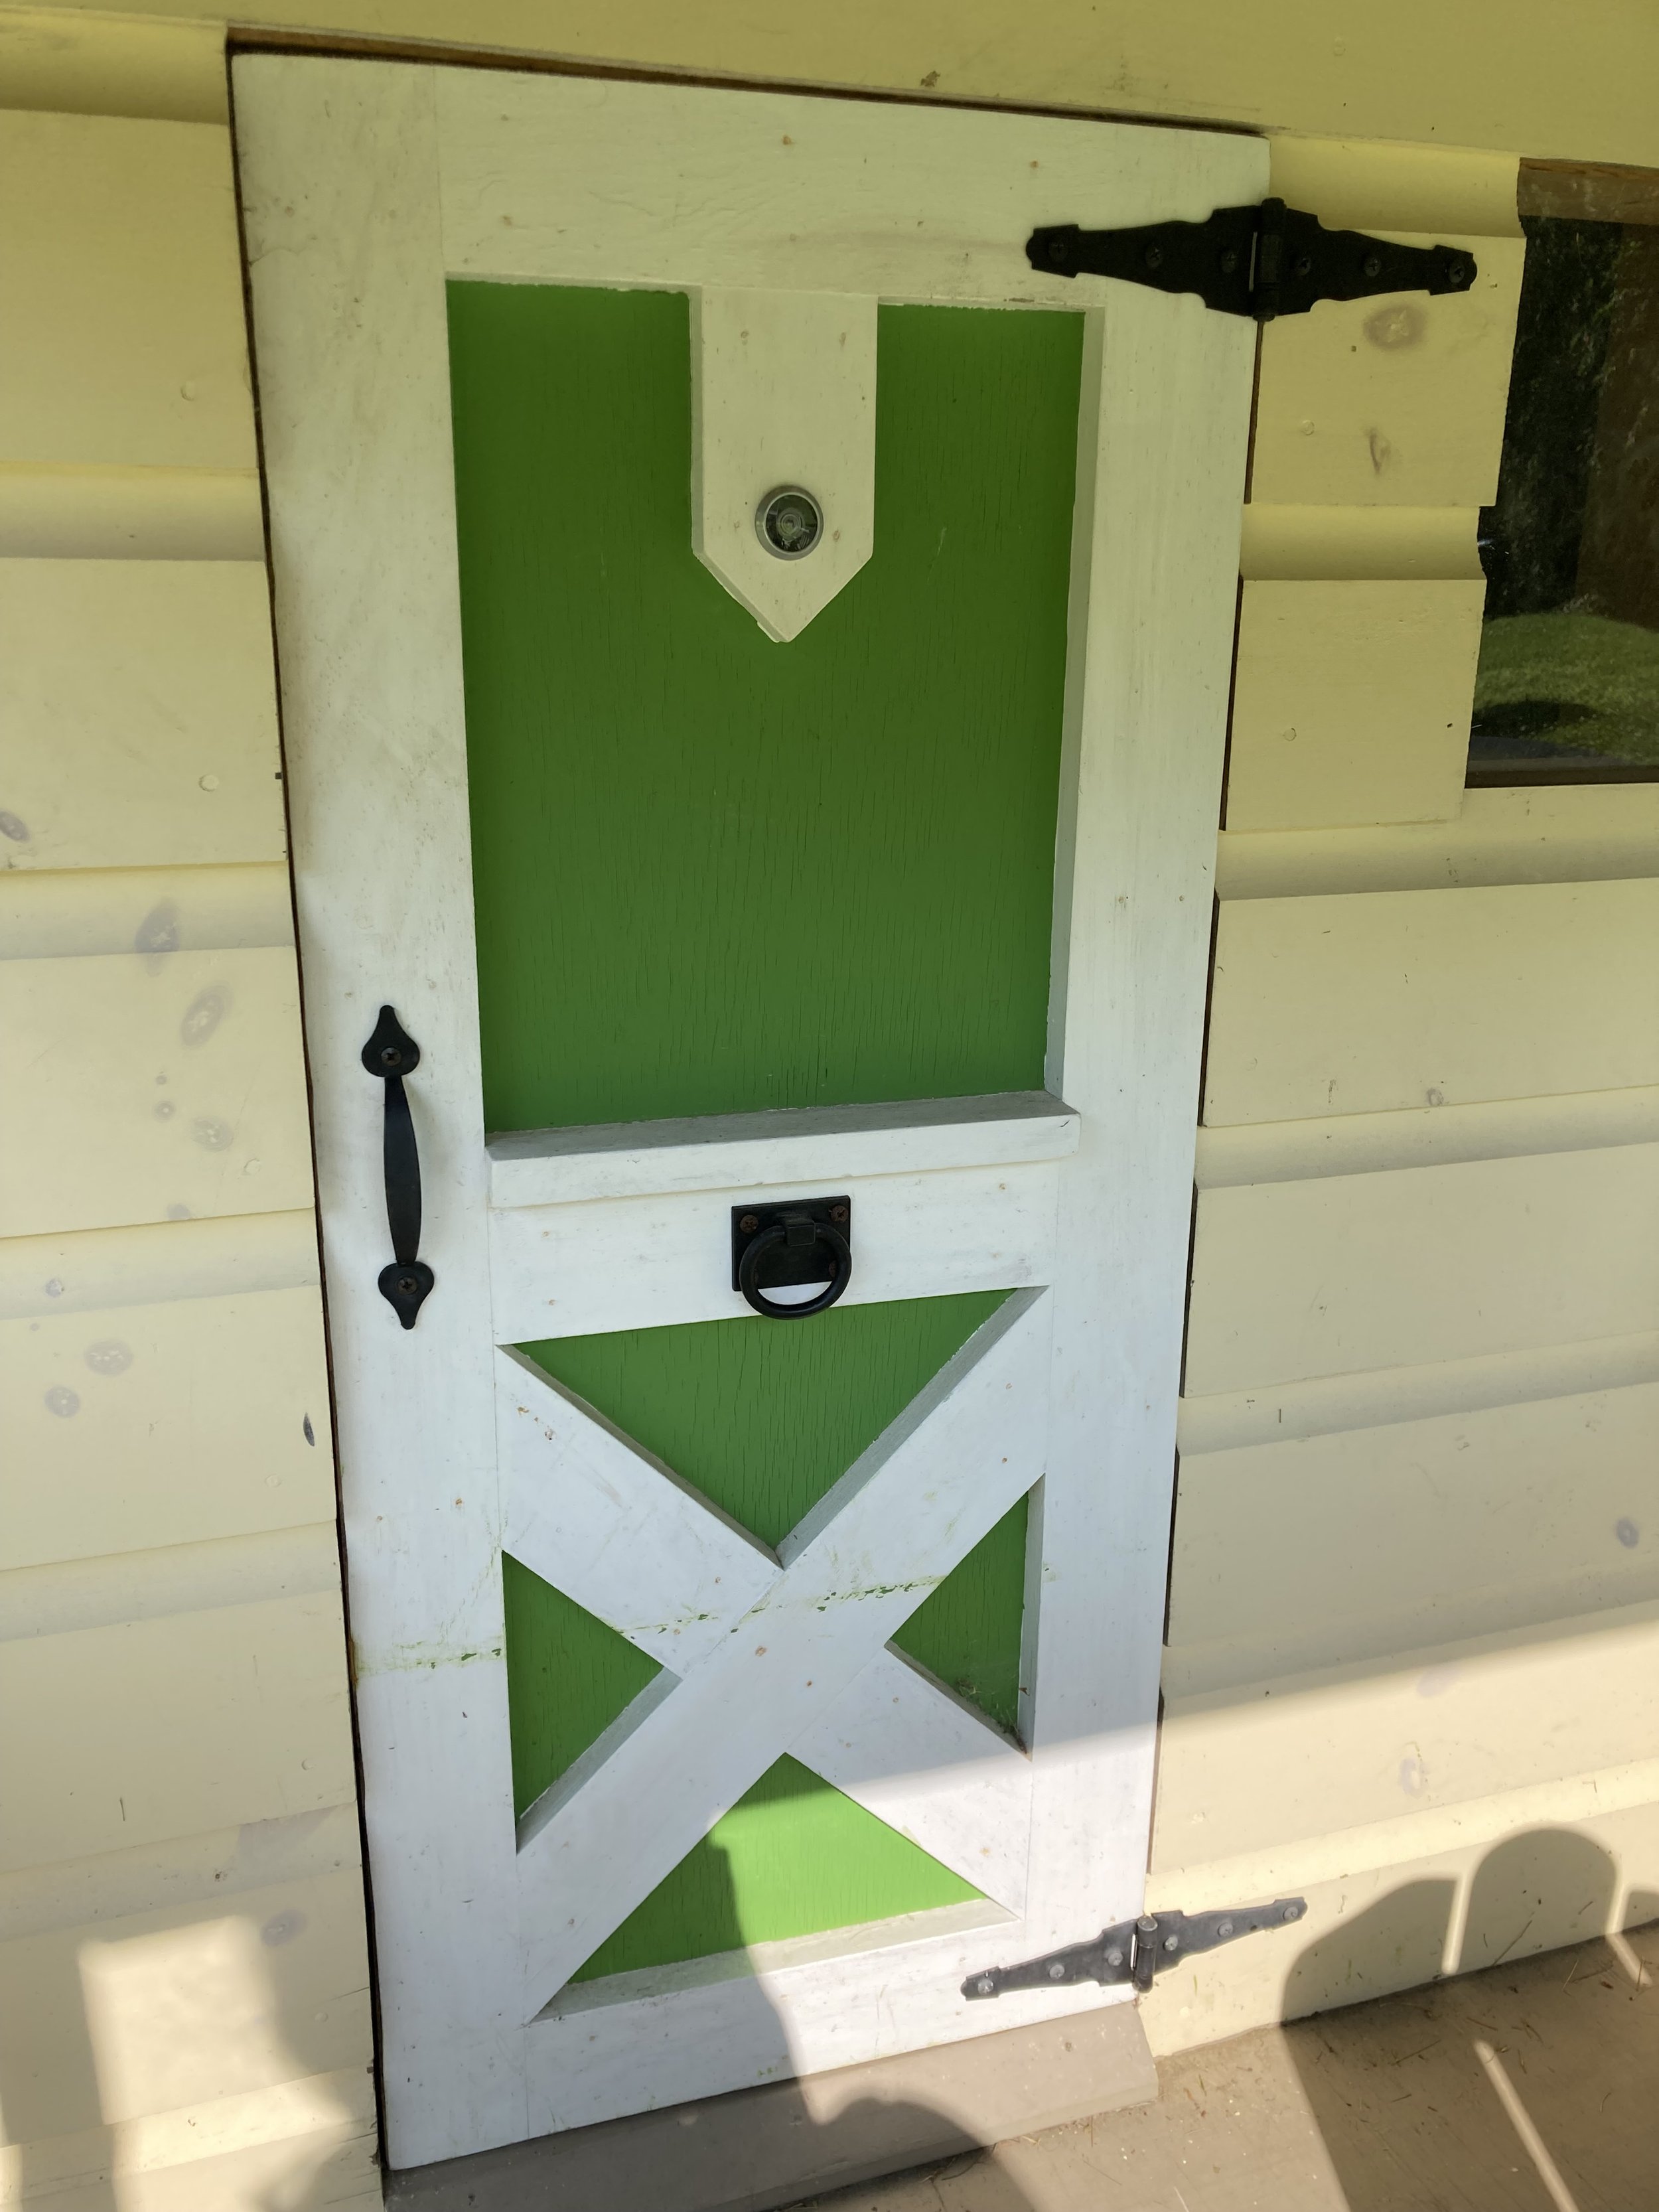
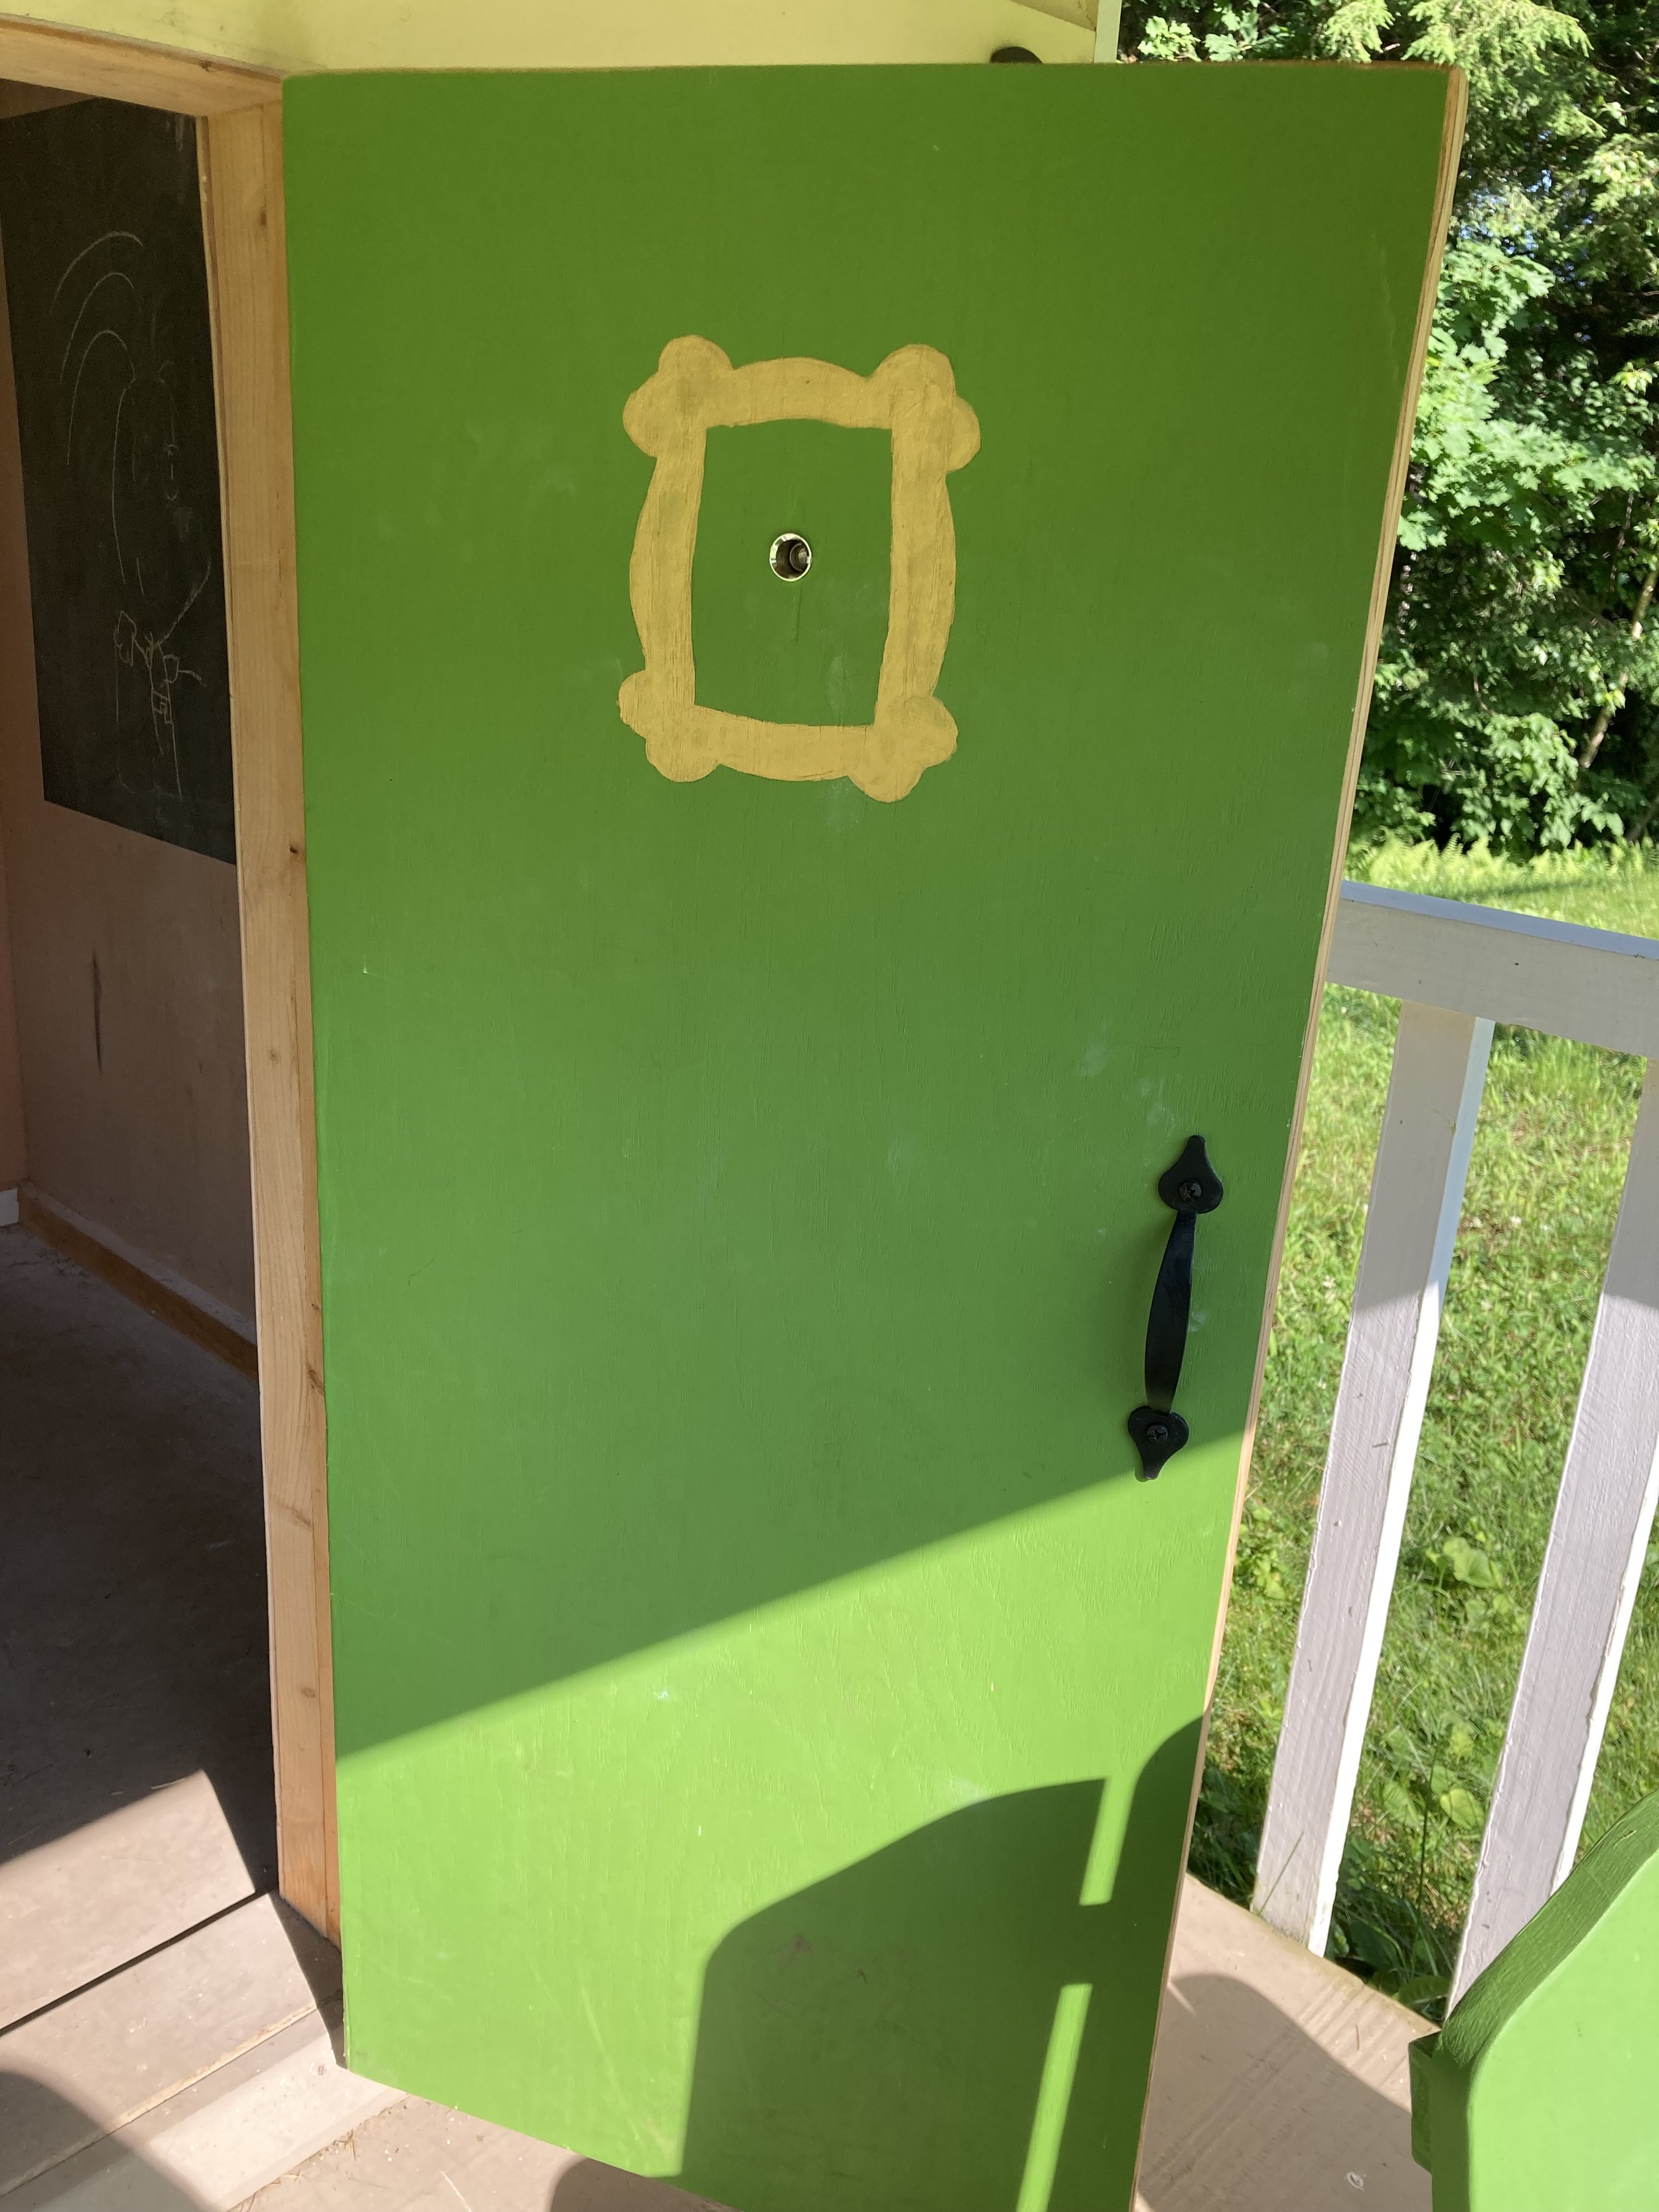
I just love the simple details of our little playhouse - my favorite being the amazing custom farm-style door my husband made for the playhouse.
| Similar Wireless Doorbell - we put the button on the porch post and hung the box inside the playhouse so the kids can ring the doorbell to be let in. | Similar Kid-Sized Adirondack Chair - we got a kid-sized adirondack chair at a yardsale and painted it the same bright green that we painted the door (the original chair was yellow!). |
| Peep Hole - We added a peep hole to the playhouse door too. The kids love looking through it to see who's ringing the doorbell. | "Friends" Reference - I just had to paint a gold frame on the back of the door around the peep hole, just like on the TV show "Friends." |
| Porch Bell - the kids always get a kick out of ringing it to call their friends in from around the yard. |
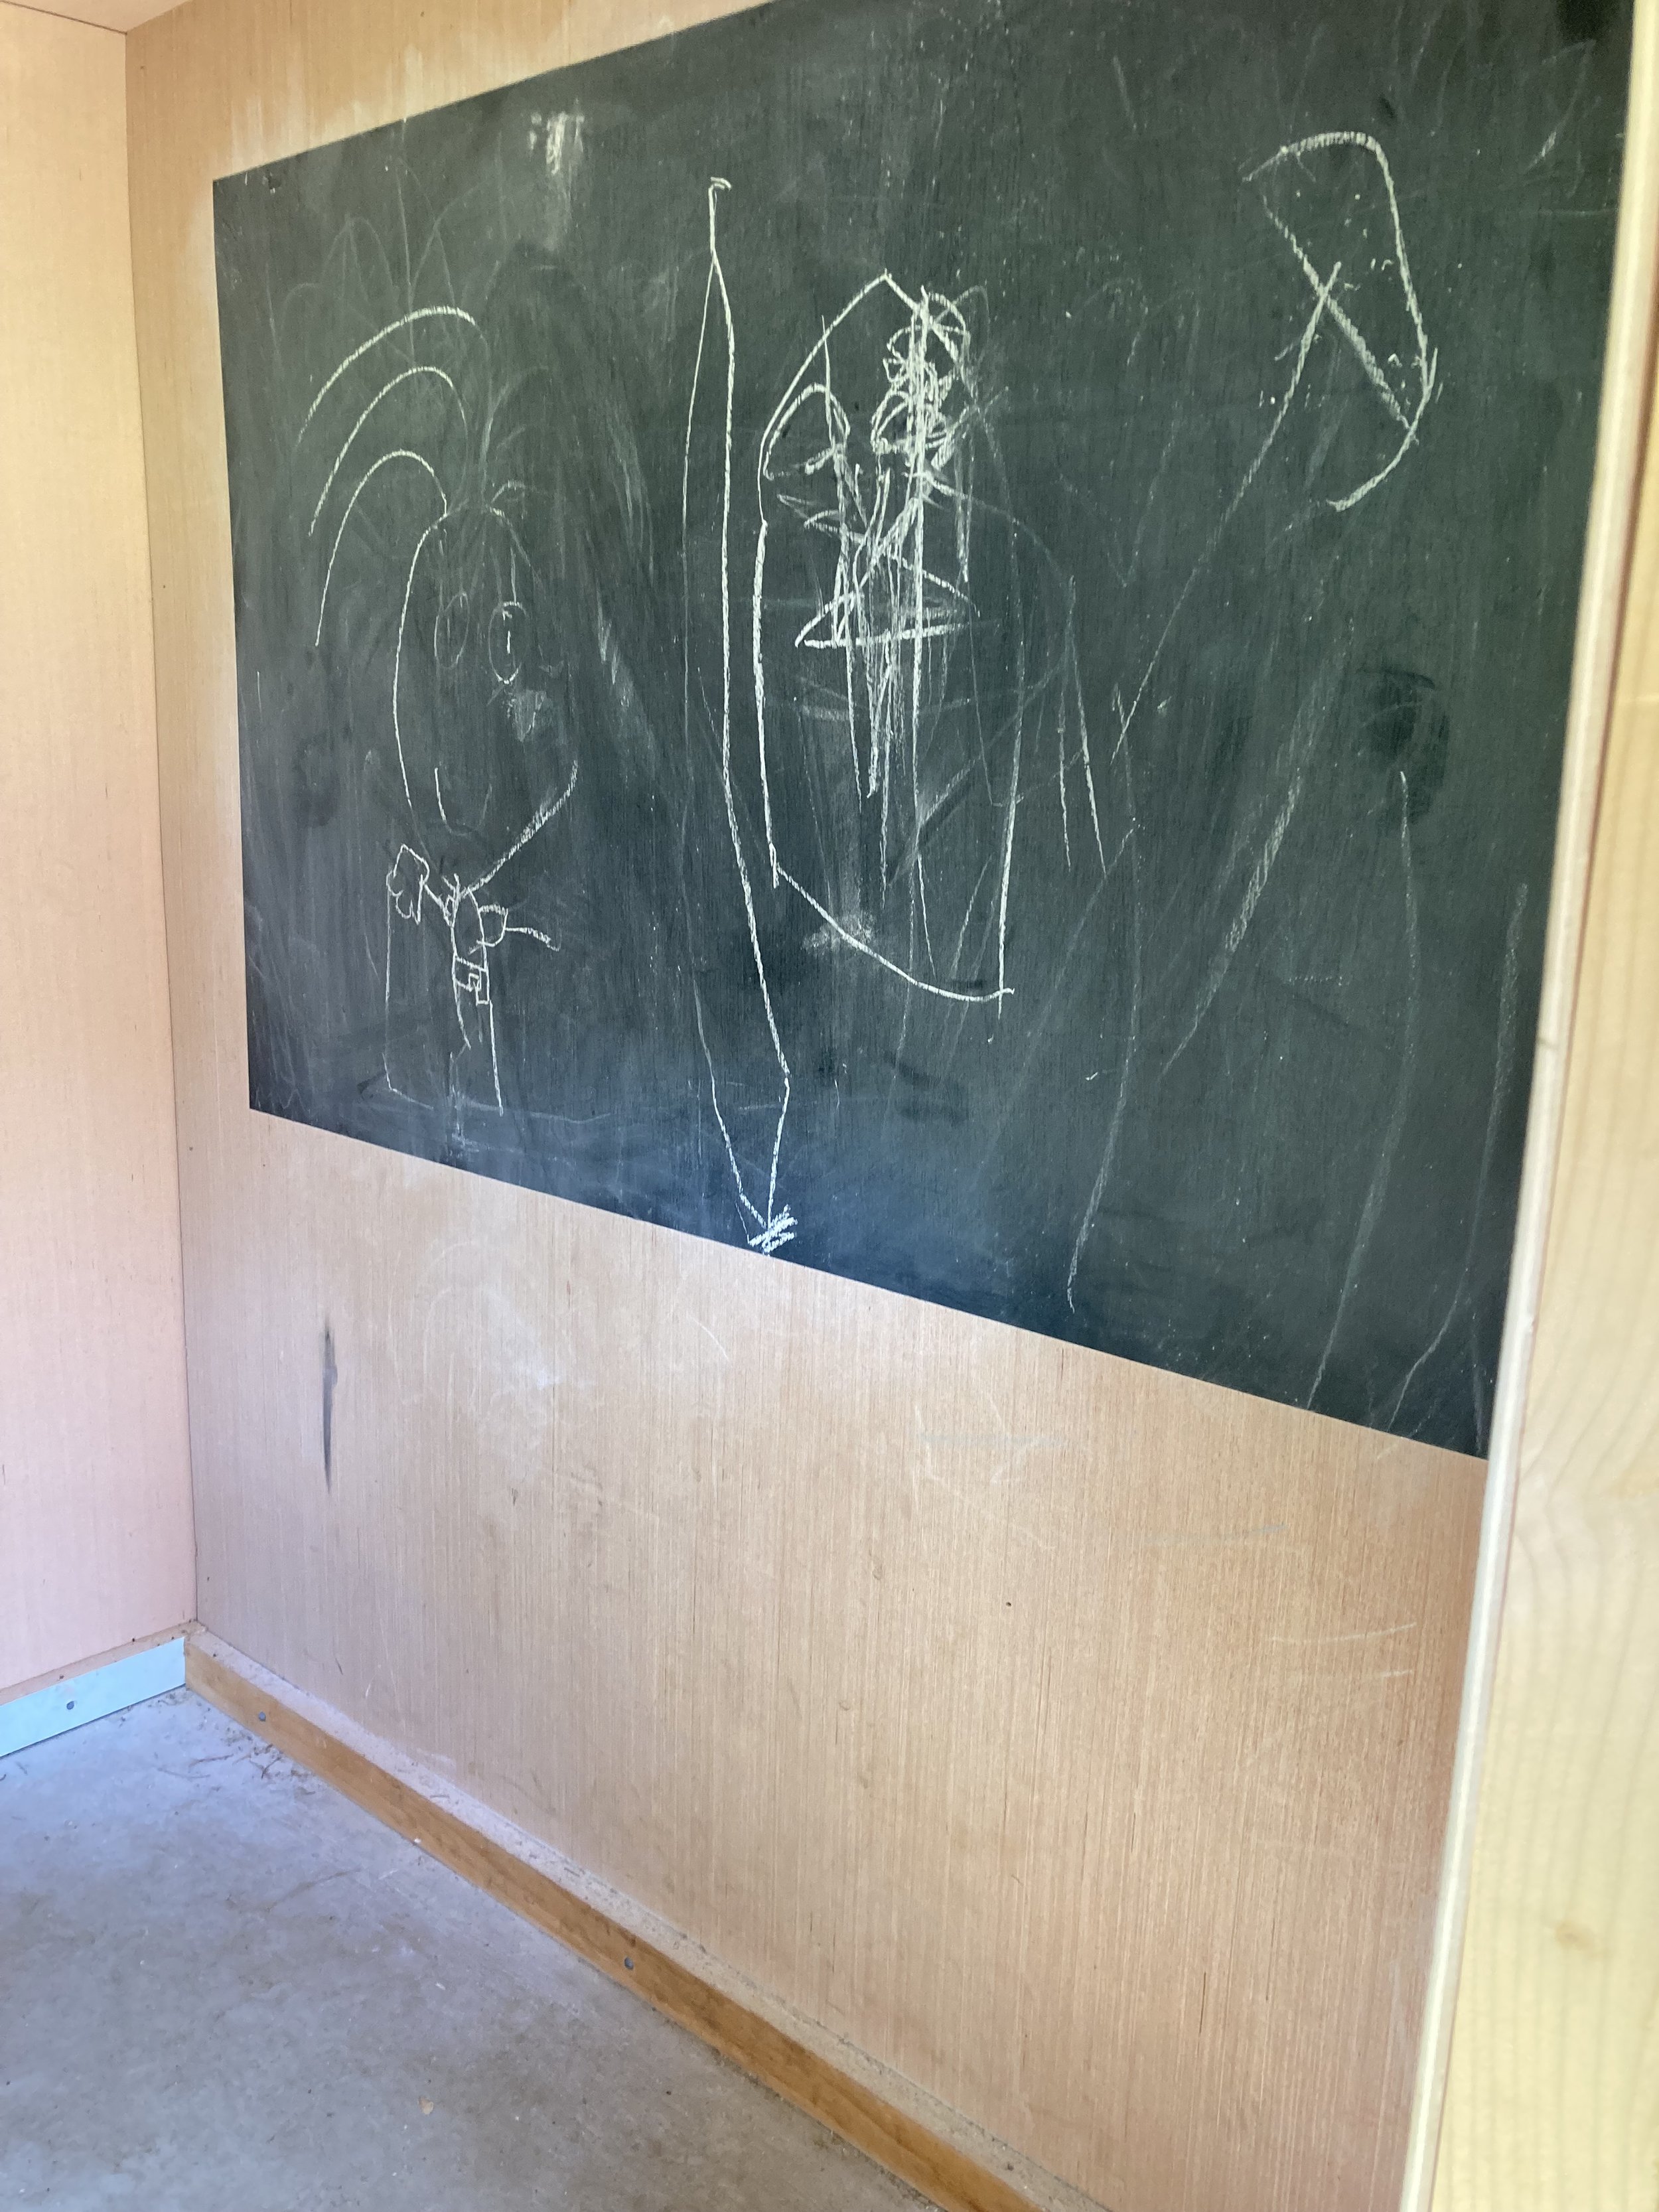
| Chalkboard - Inside the playhouse I painted one wall in chalkboard paint so the kids have a space to draw. We just keep the chalk and eraser on one of the windowsills inside the playhouse. |
PS - At Christmas we even decorate the playhouse with solar Christmas lights and a wreath!
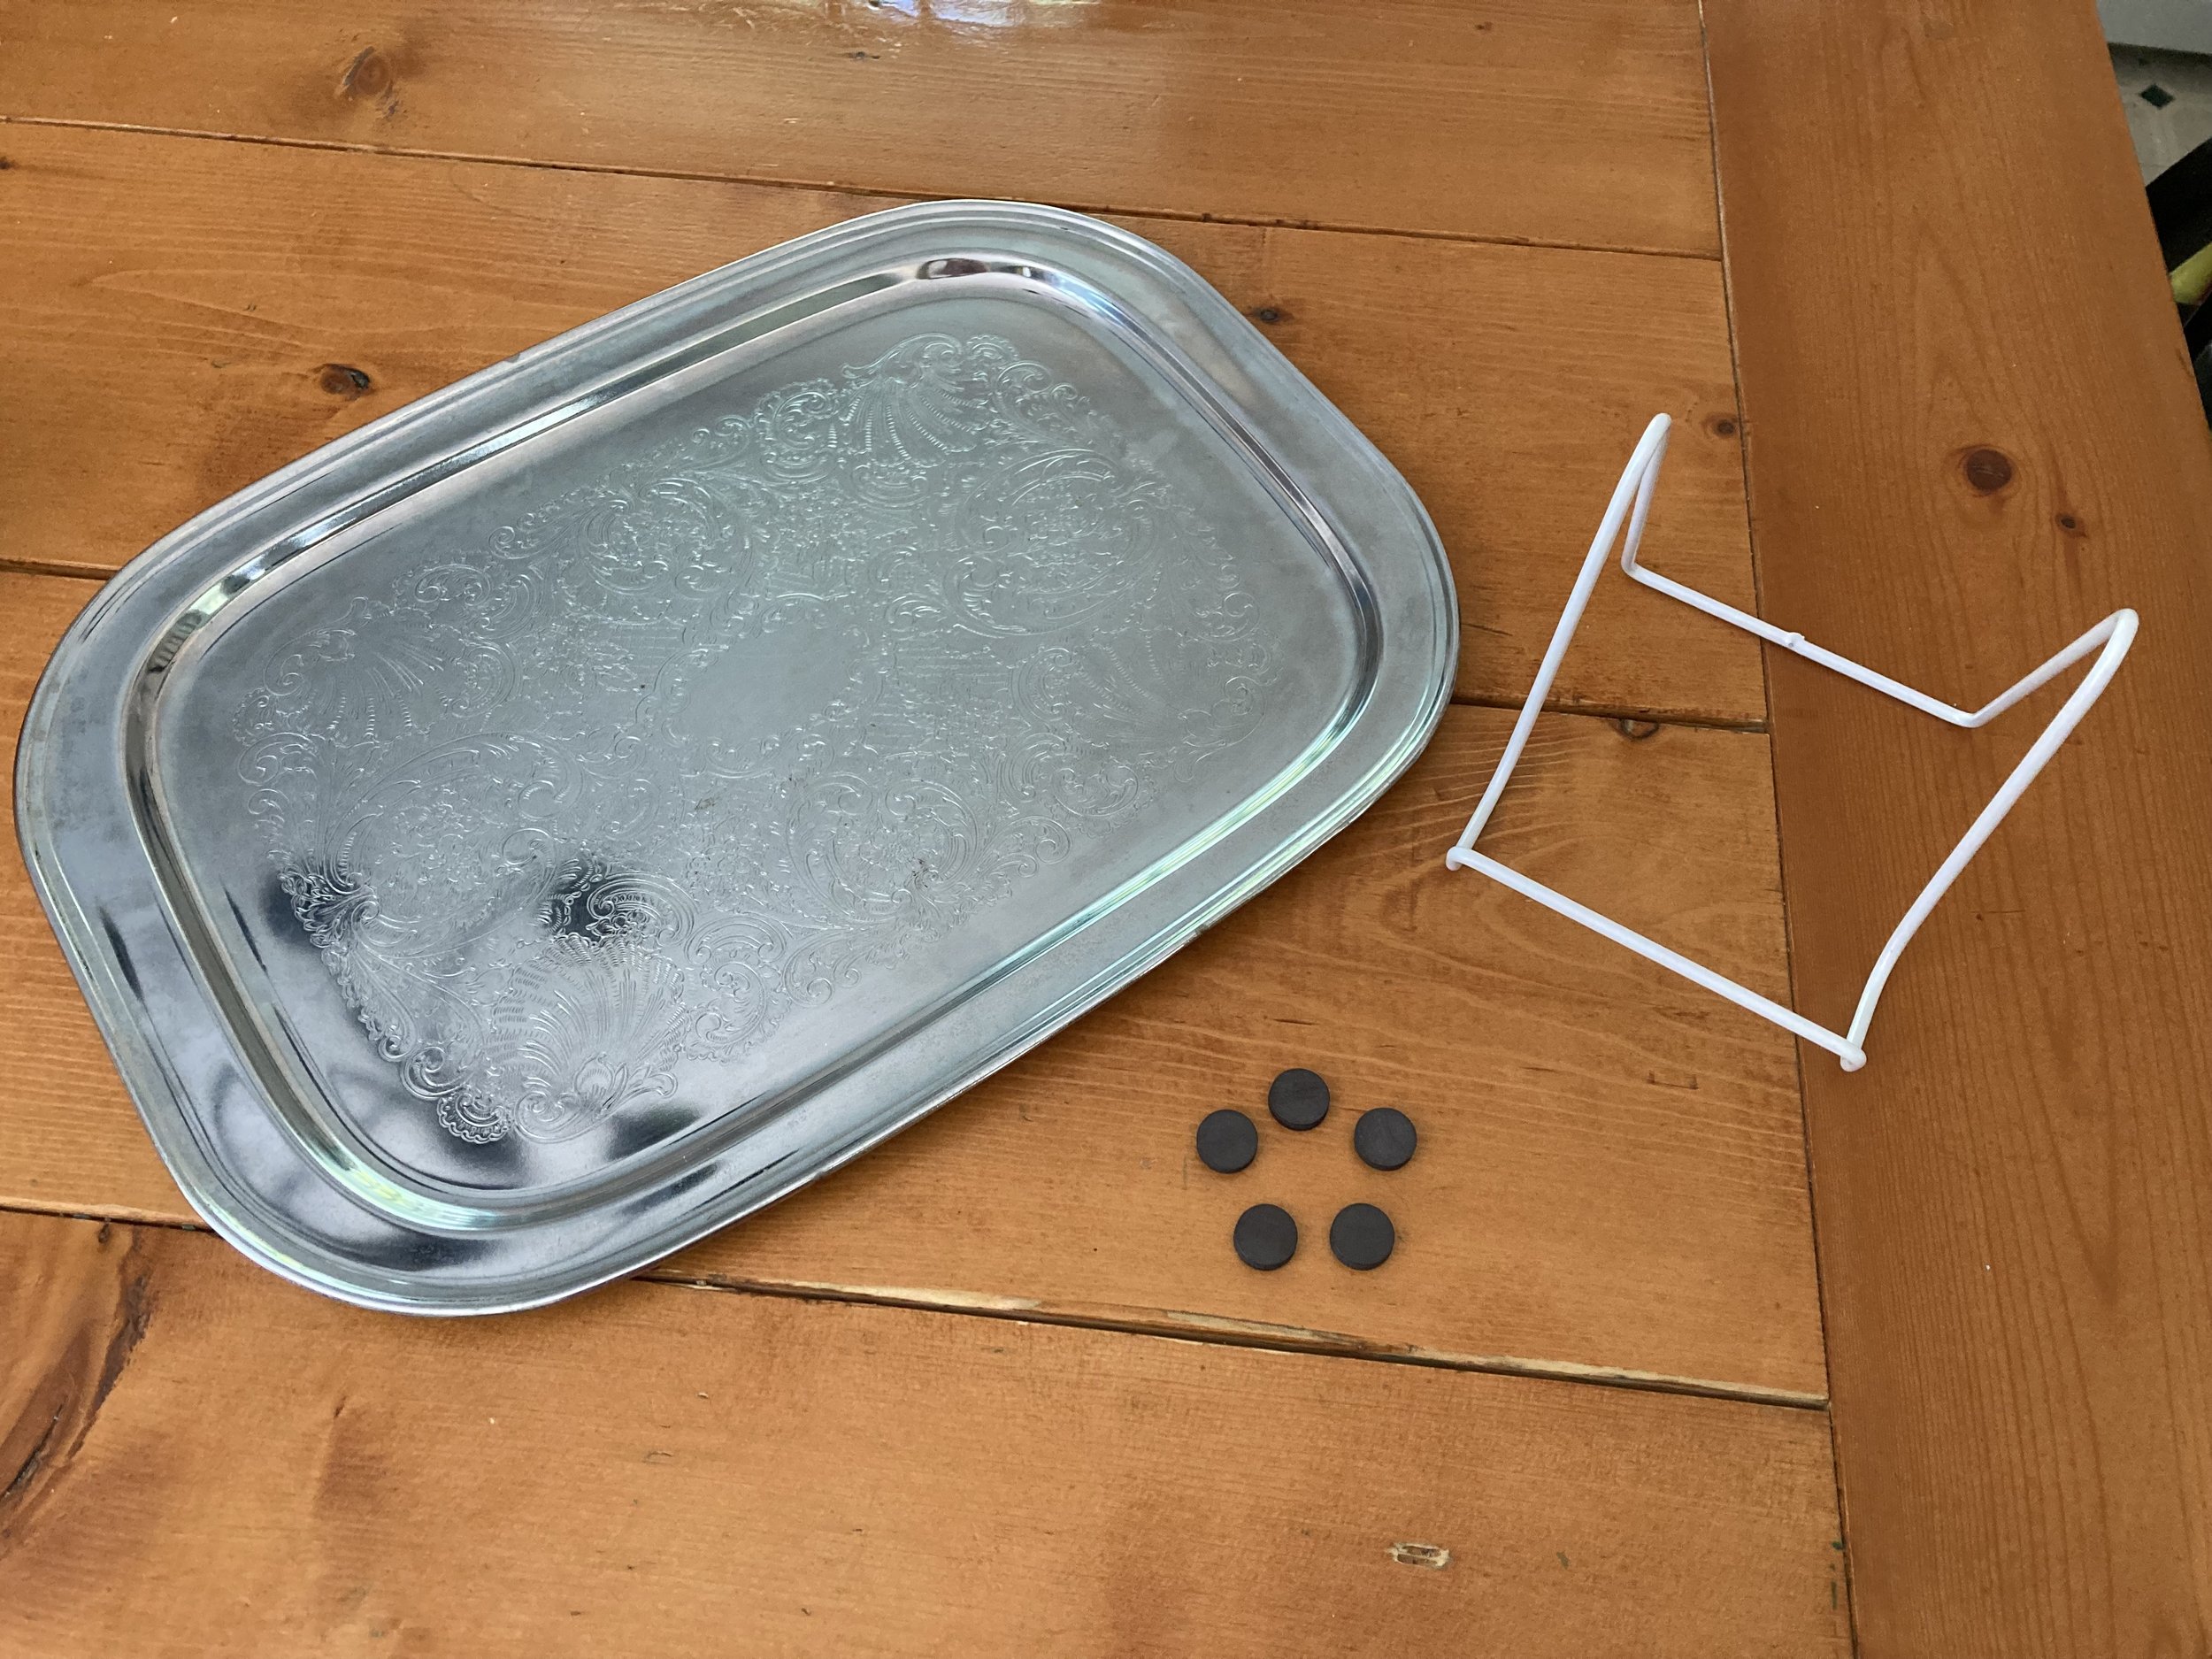
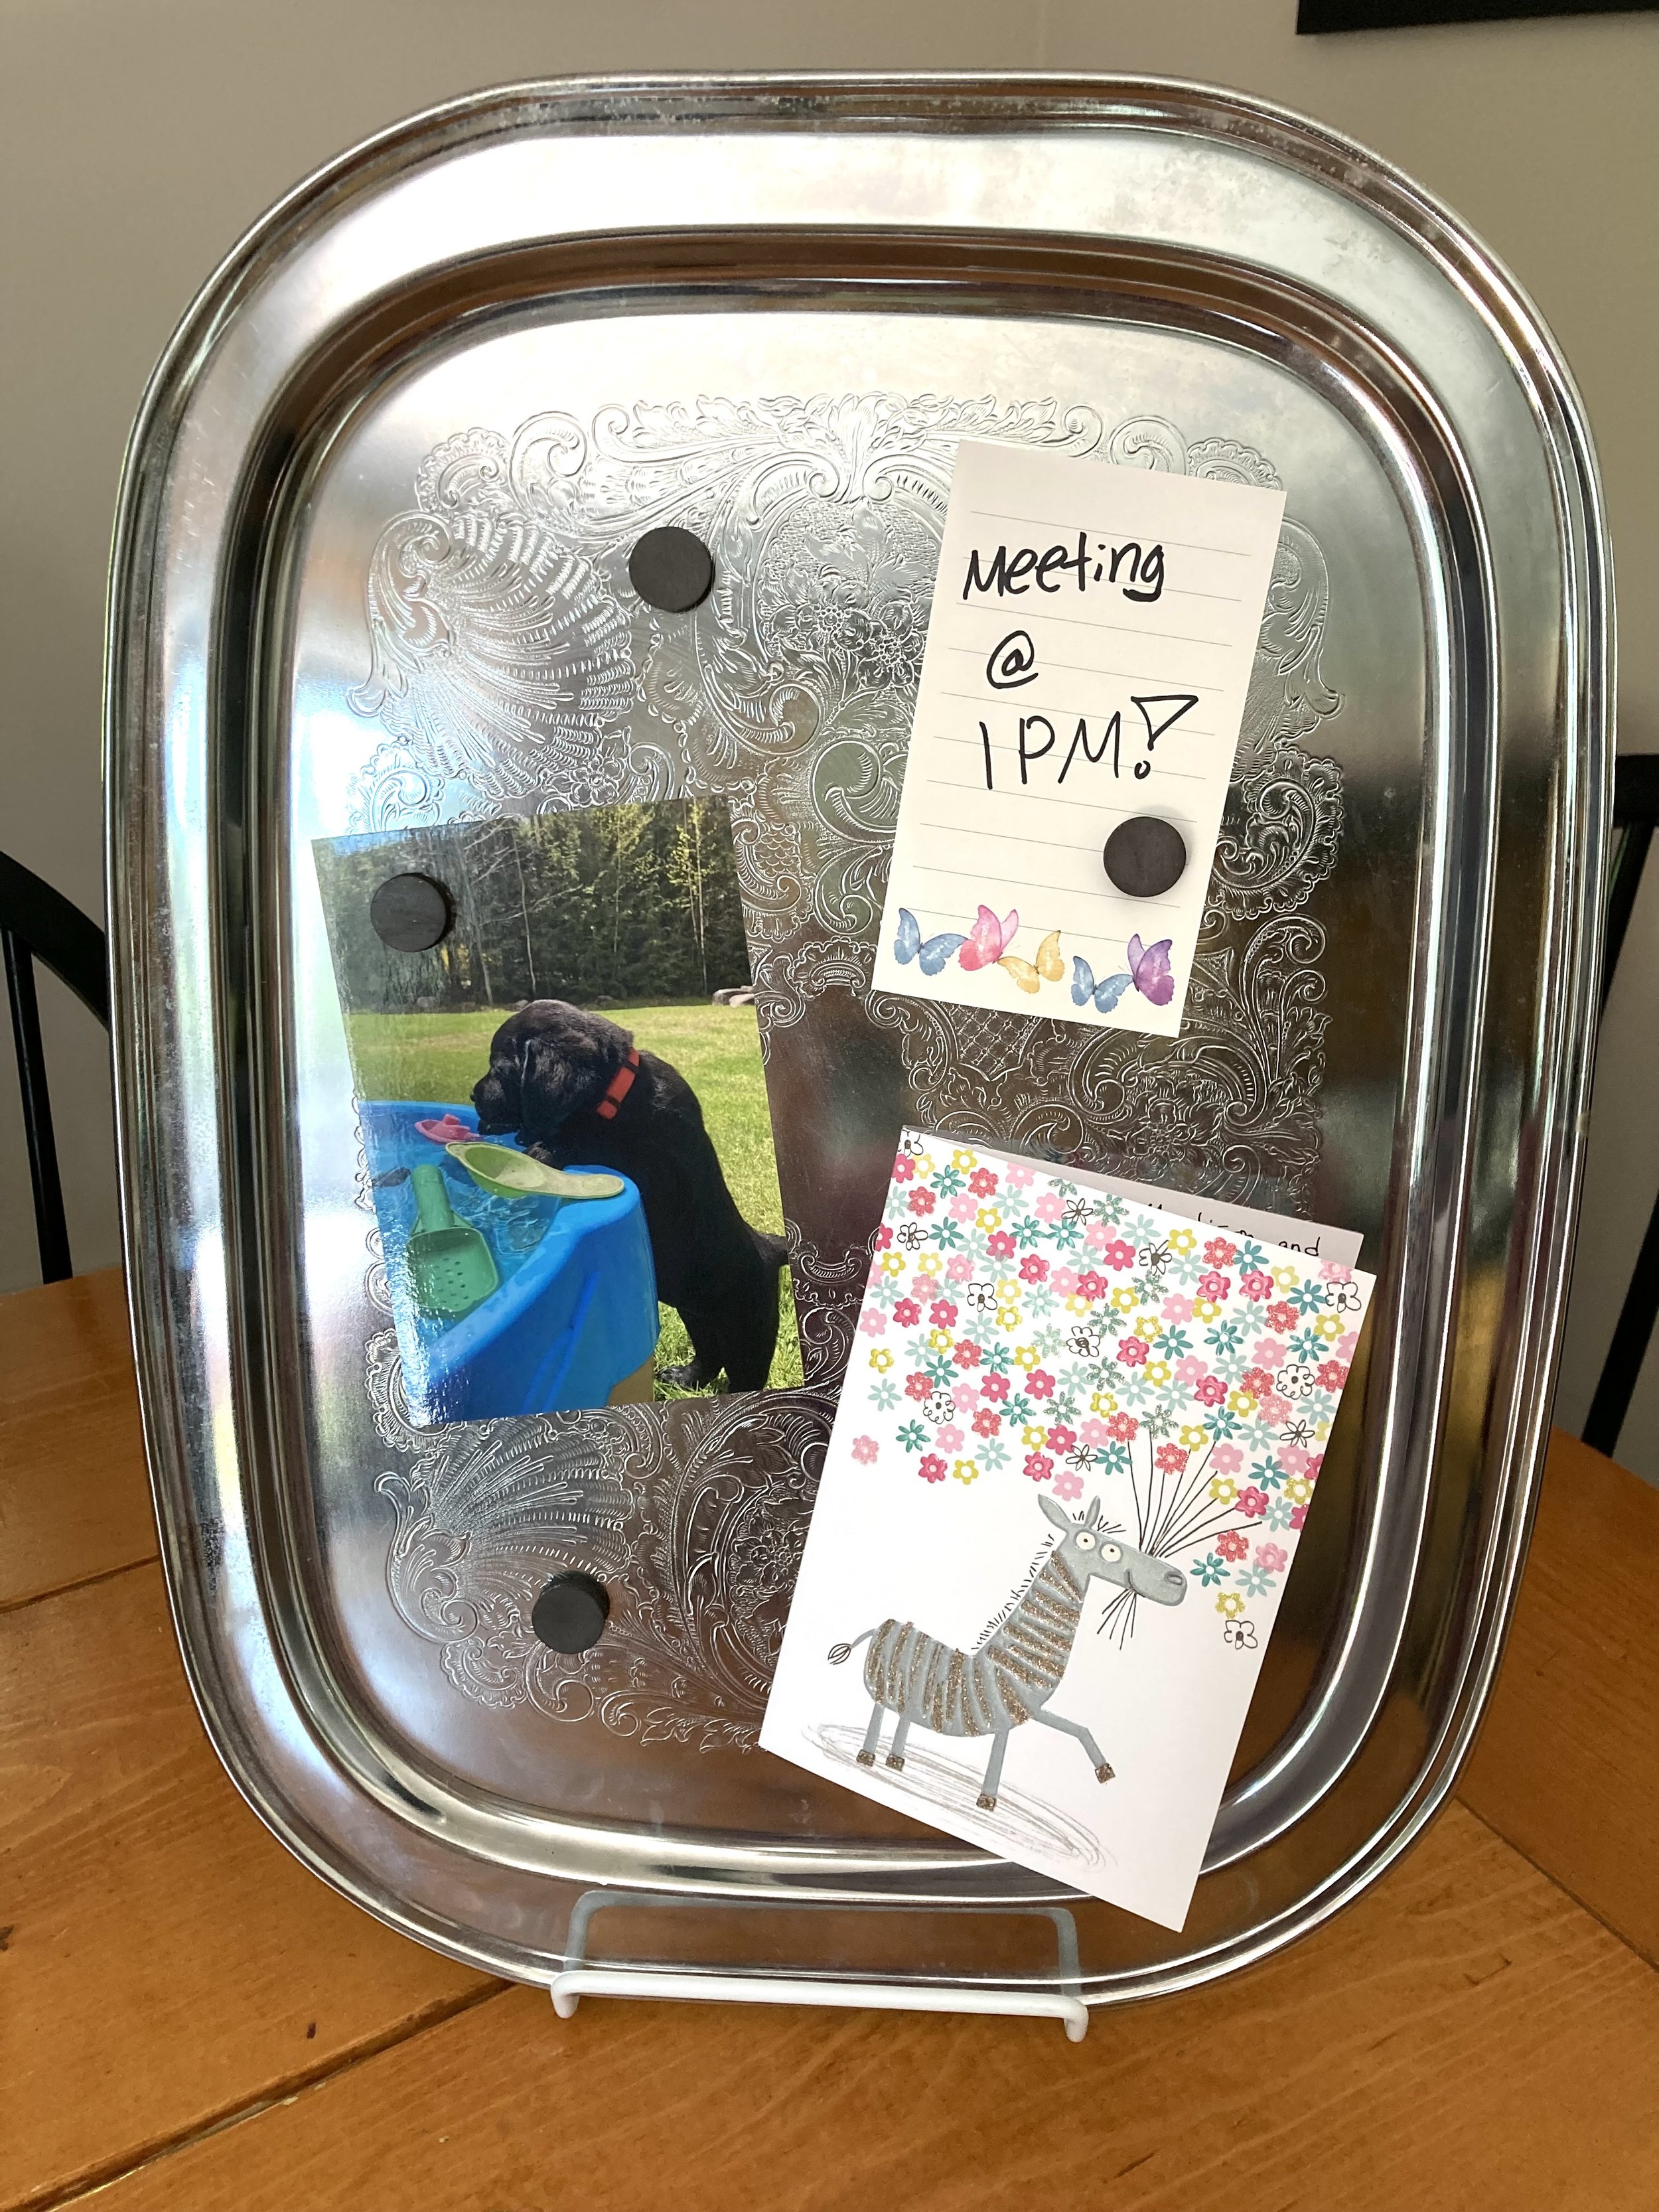
We’ve been slowly helping to clean out a family member’s attic and came across this old heavy “silver” (not actually silver) serving tray. Since not many people still use serving trays I thought it might be fun to repurpose it into something else - and since it seems to be made of some kind of steel (therefore magnetic), I thought it would make a fun magnetic memo board! | This post contains affiliate links |
Materials:
Vintage metal tray (check to make sure it's magnetic)
plate stand big enough to support the tray (similar size stand linked)
magnets
How To:
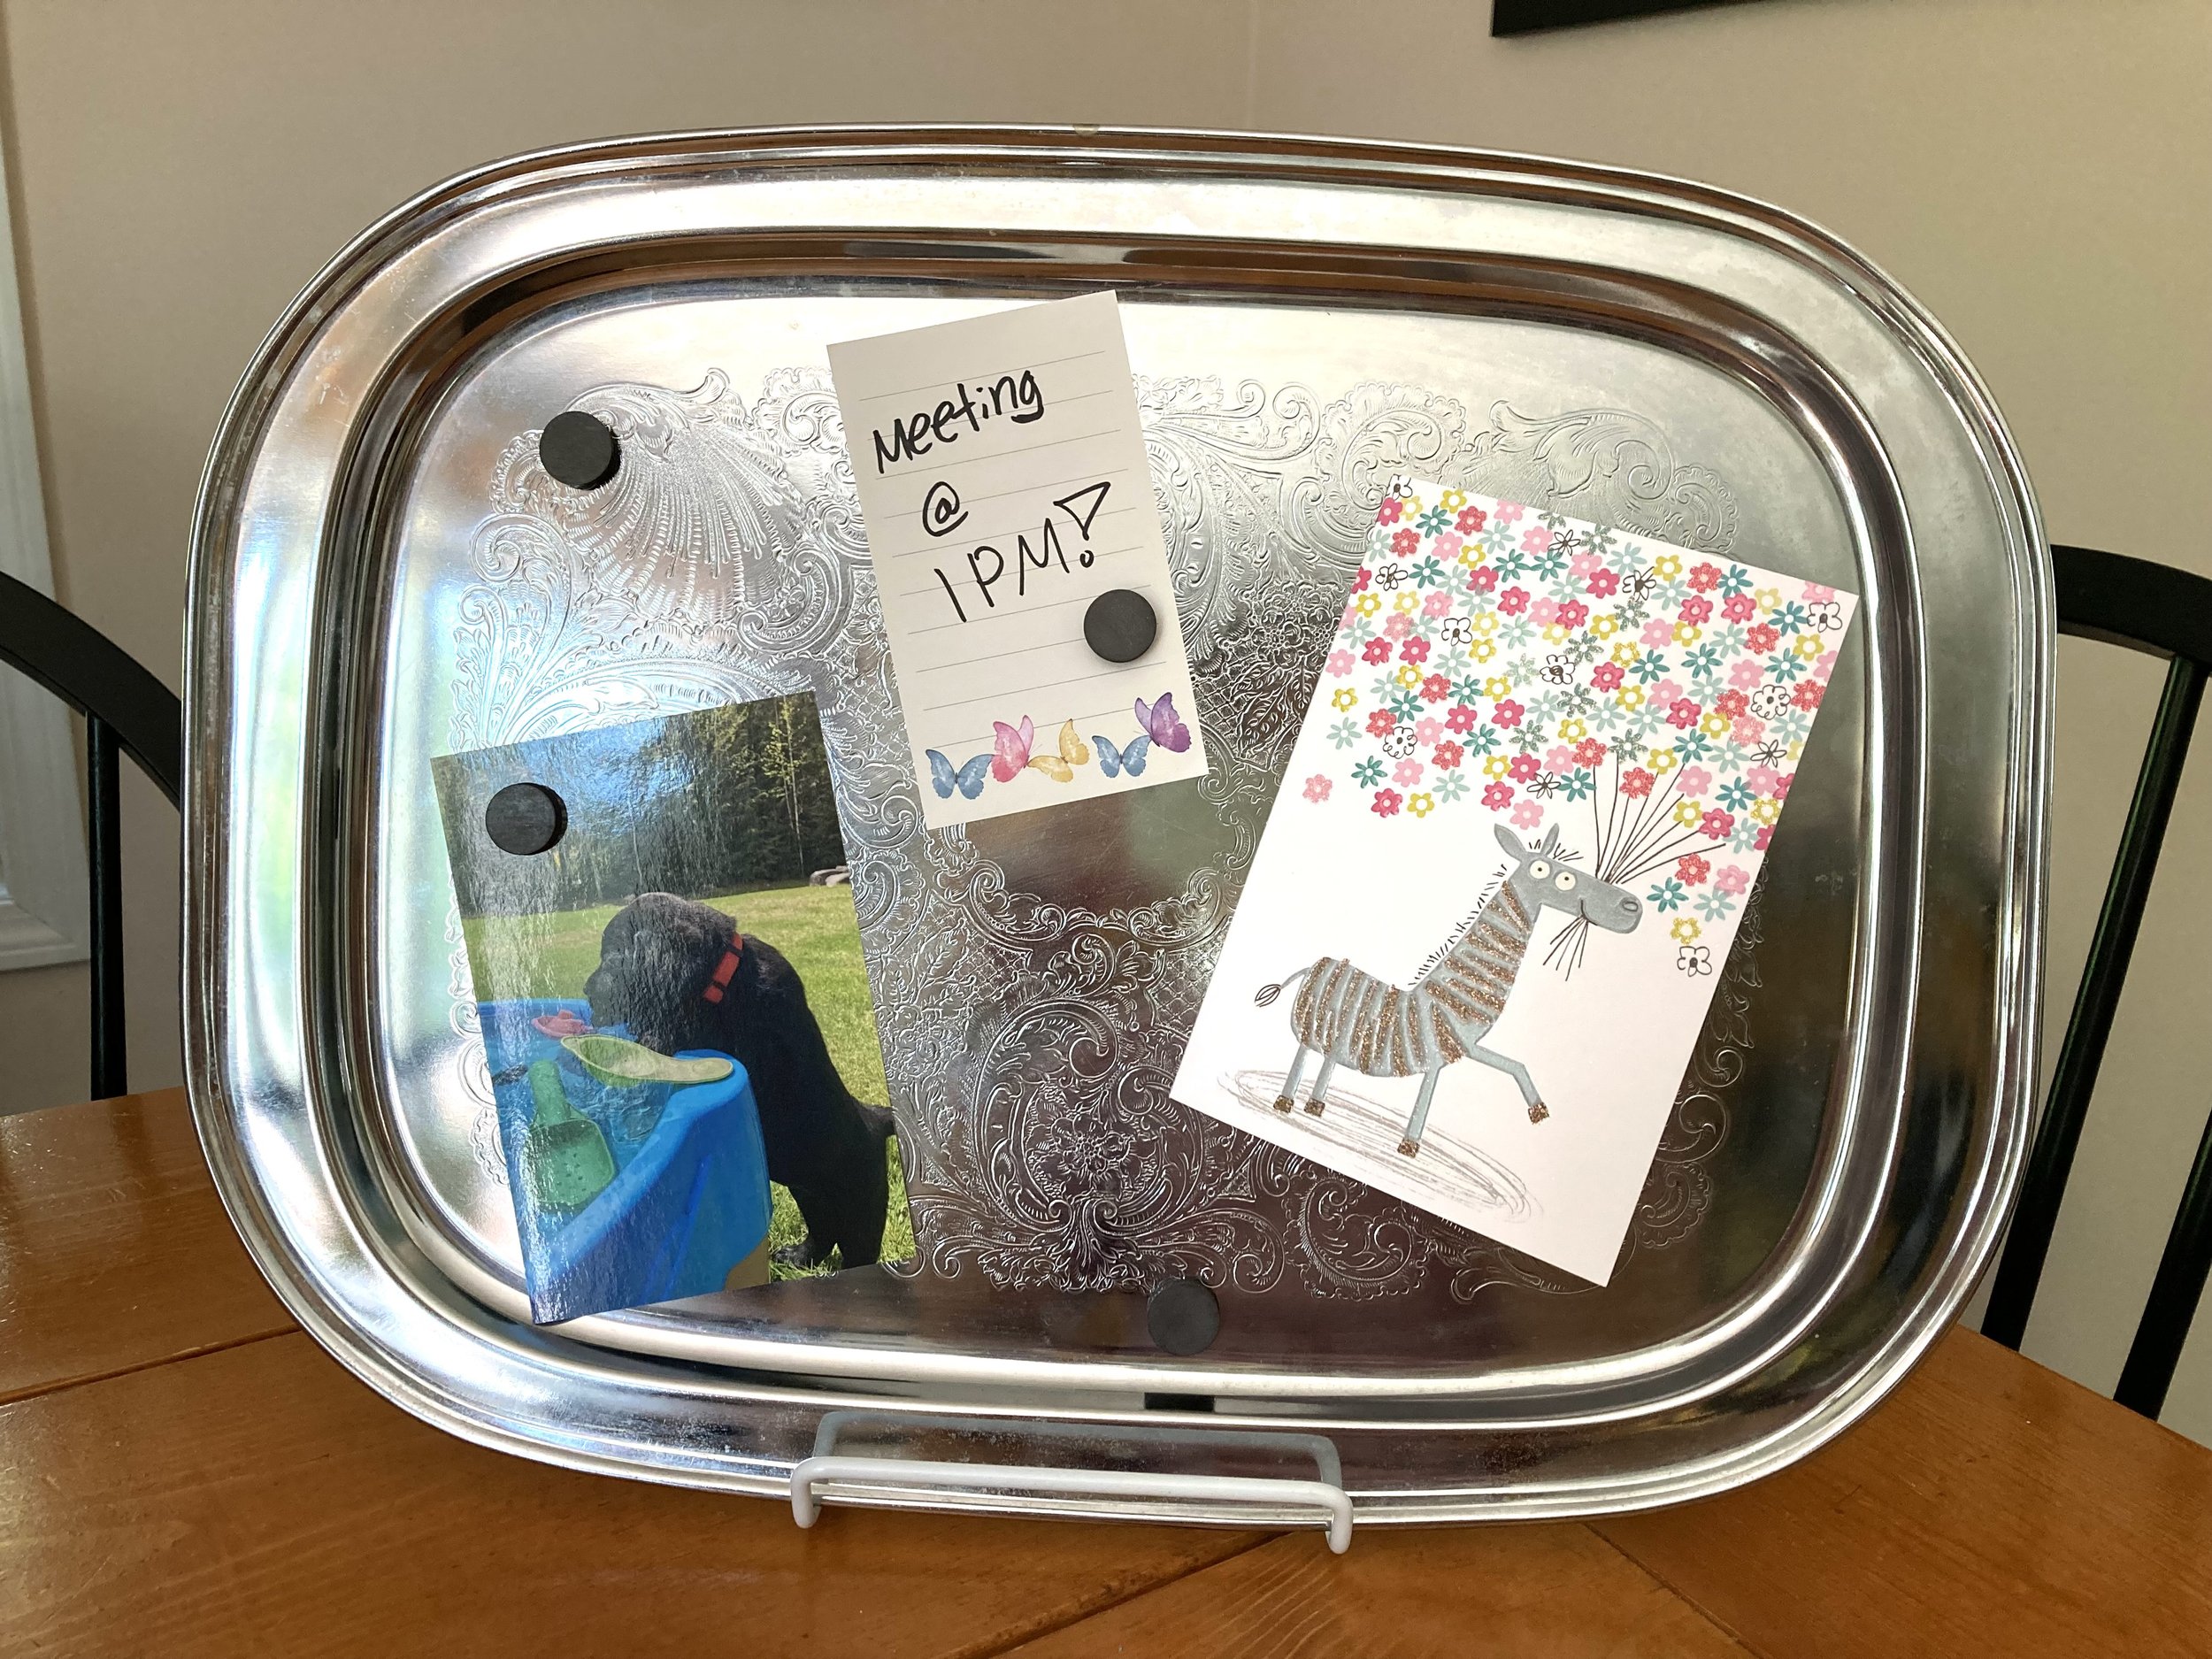
Really the how-to for this project could not be easier! Rest that serving tray on a plate stand that’s big enough/sturdy enough to support it, add some magnets, and BAM, you’re done! I think this project would look so cute on a dresser in a bedroom, a feminine office space, or on a desk nook in the kitchen. It can be used to hold reminders, photos, thank you notes, recipes, mementos, and more.
And if the horizontal orientation isn’t working for your space, just turn the tray and you instantly have a vertical memo board!
If you wanted to hang the tray on a wall instead, you could try using a tray hanger. Just make sure to buy the correct size hanger for your tray and make sure it's rated to support the weight of it.
PS - looking for vintage items like the serving tray in this post? Be sure to check out our Etsy Shop for some fun vintage finds! Our inventory is always changing so check back often :)
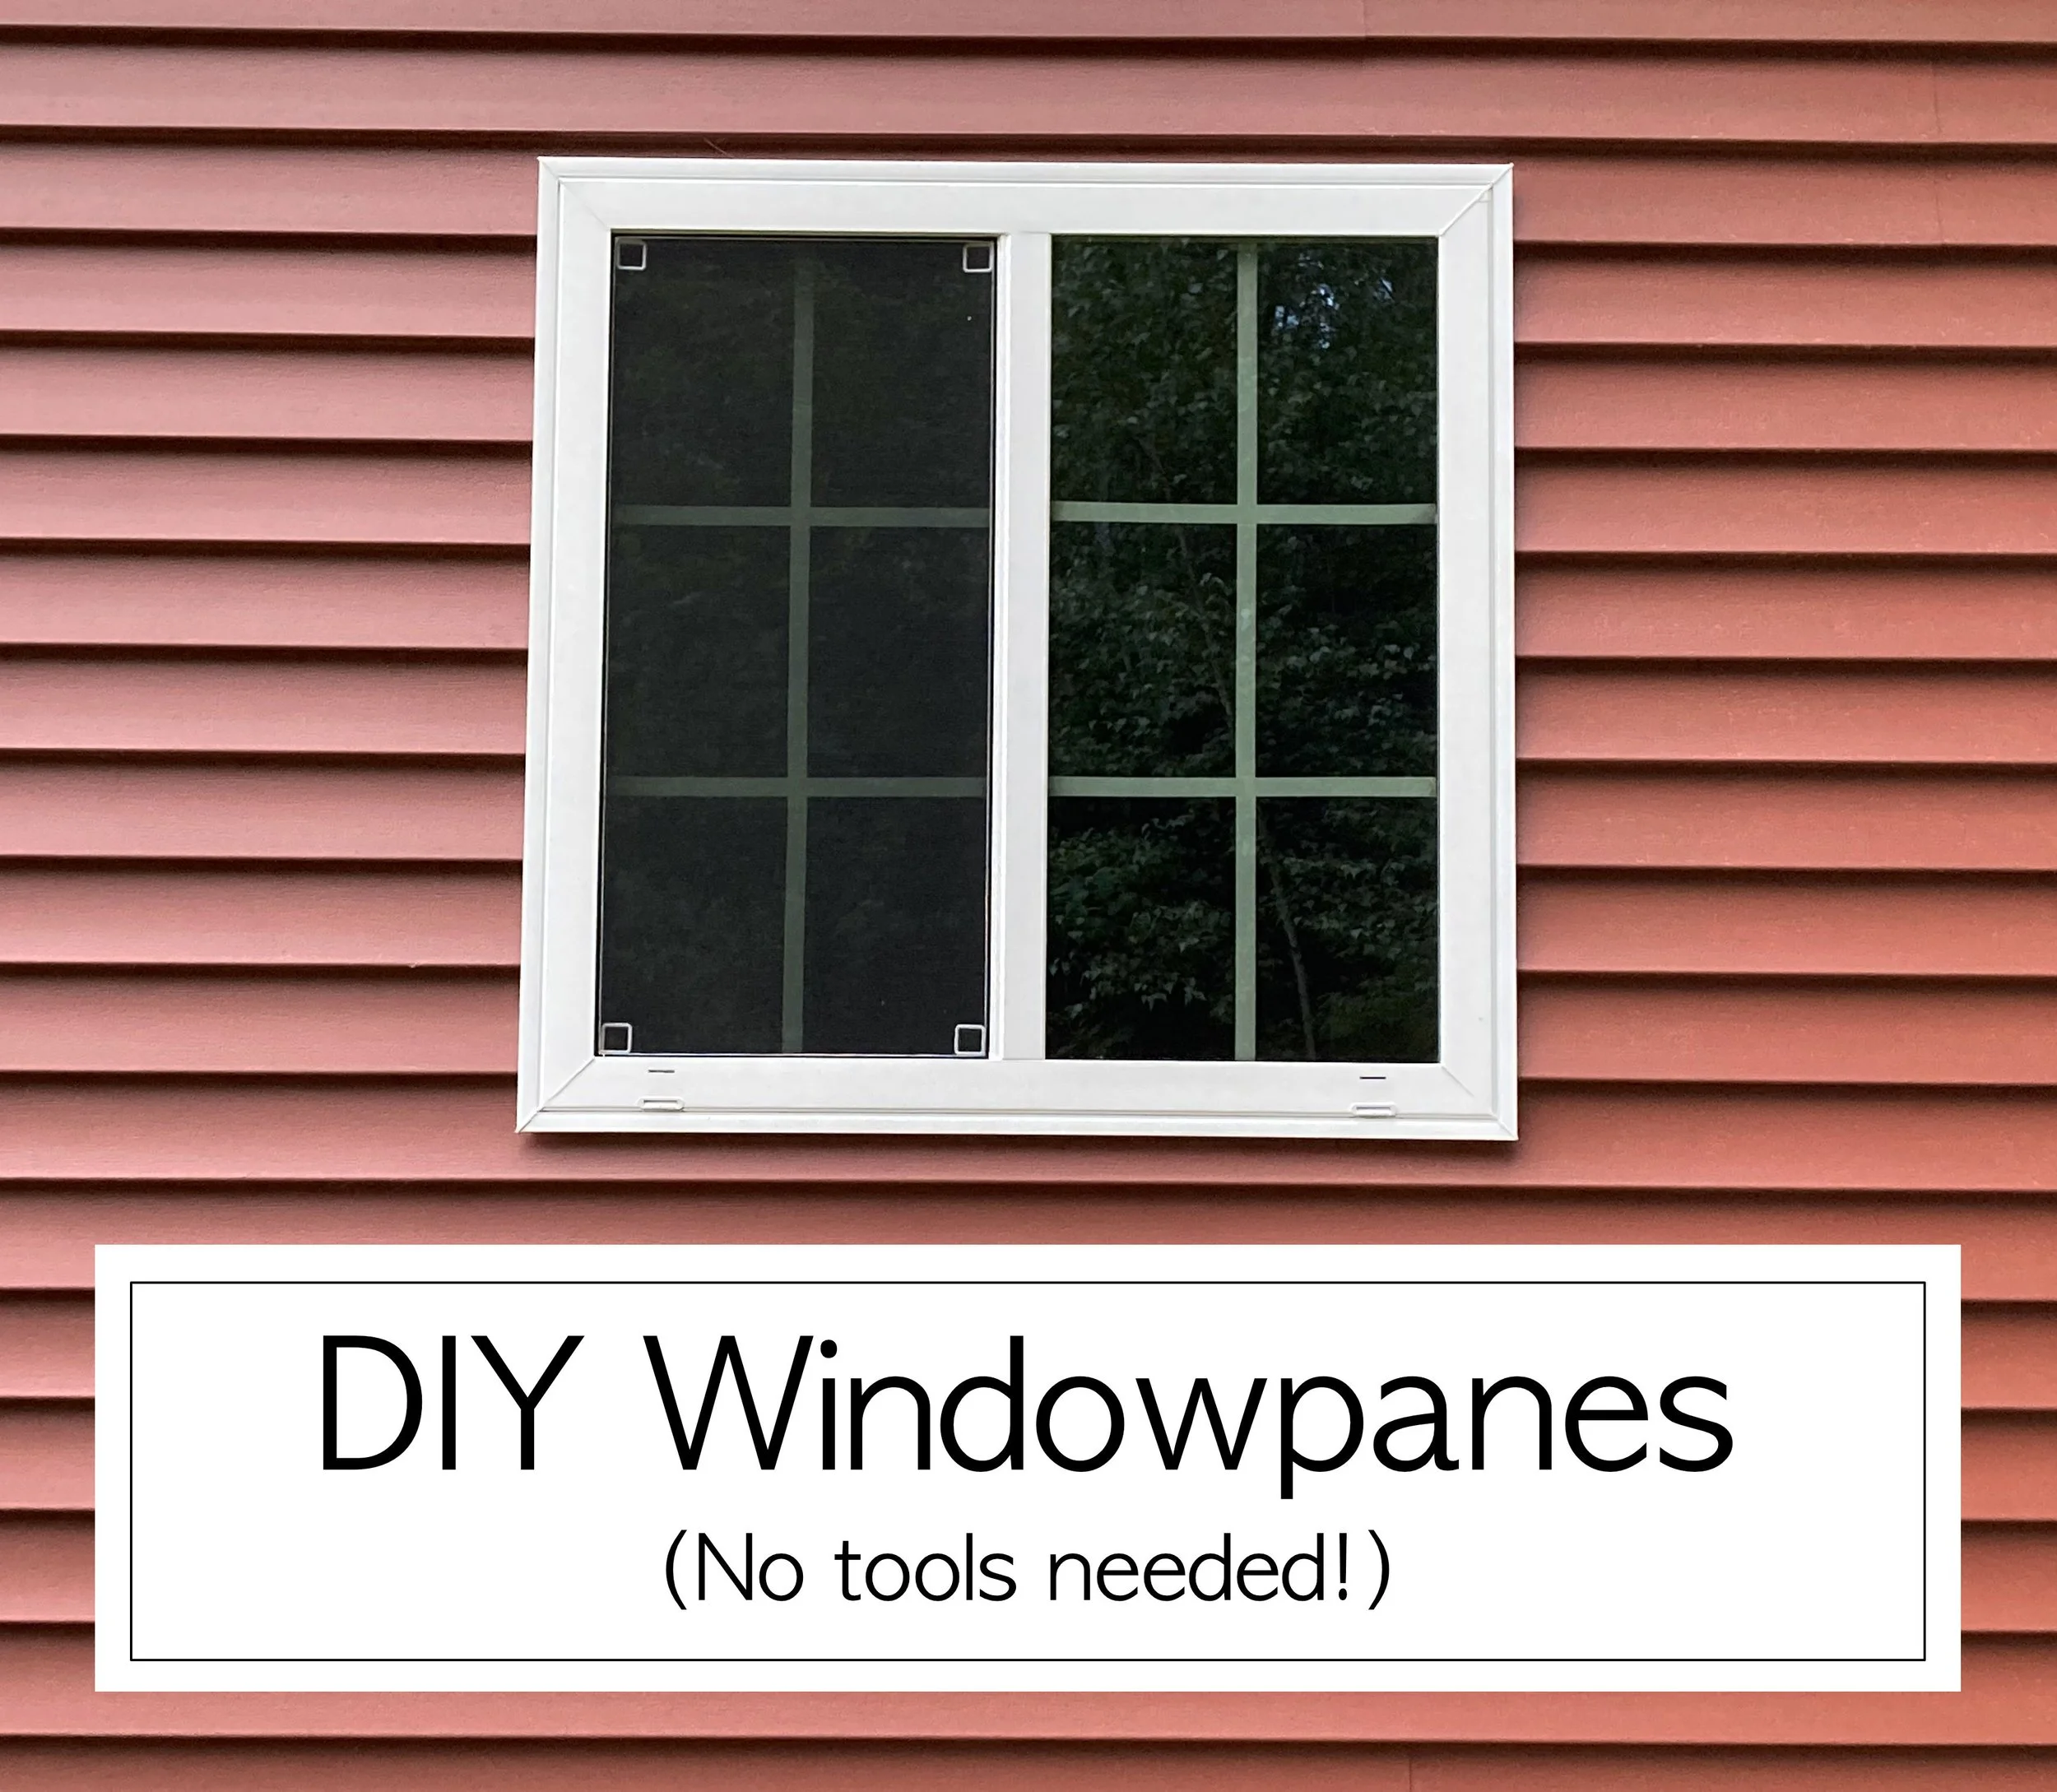
This past fall we had a detached garage built on our property. Being what construction costs are these days we went with basic vinyl windows with no window panes since it was cheaper. We thought “Meh, it’s just a garage - it doesn’t have to match our house perfectly.” But after the garage was done we realized it really was missing something with the basic plain windows, and adding panes was just what it needed. | This post contains affiliate links |
I considered a bunch of different ways to make the panes, including using thin scraps of wood painted and set within the window frame on the inside - but all of that was pretty labor-intensive. In the end I realized using thin strips of vinyl or tape would probably be the easiest - and so that’s what I did!
Using white electrical tape ended up being the perfect solution in our situation - it was to be used in a little-used area, it was the right width, and it was the right color.
Materials:
white electrical tape (though if your window sashes are black or a different color you can buy different colored tape to match)
scissors
tape measure
How-To:
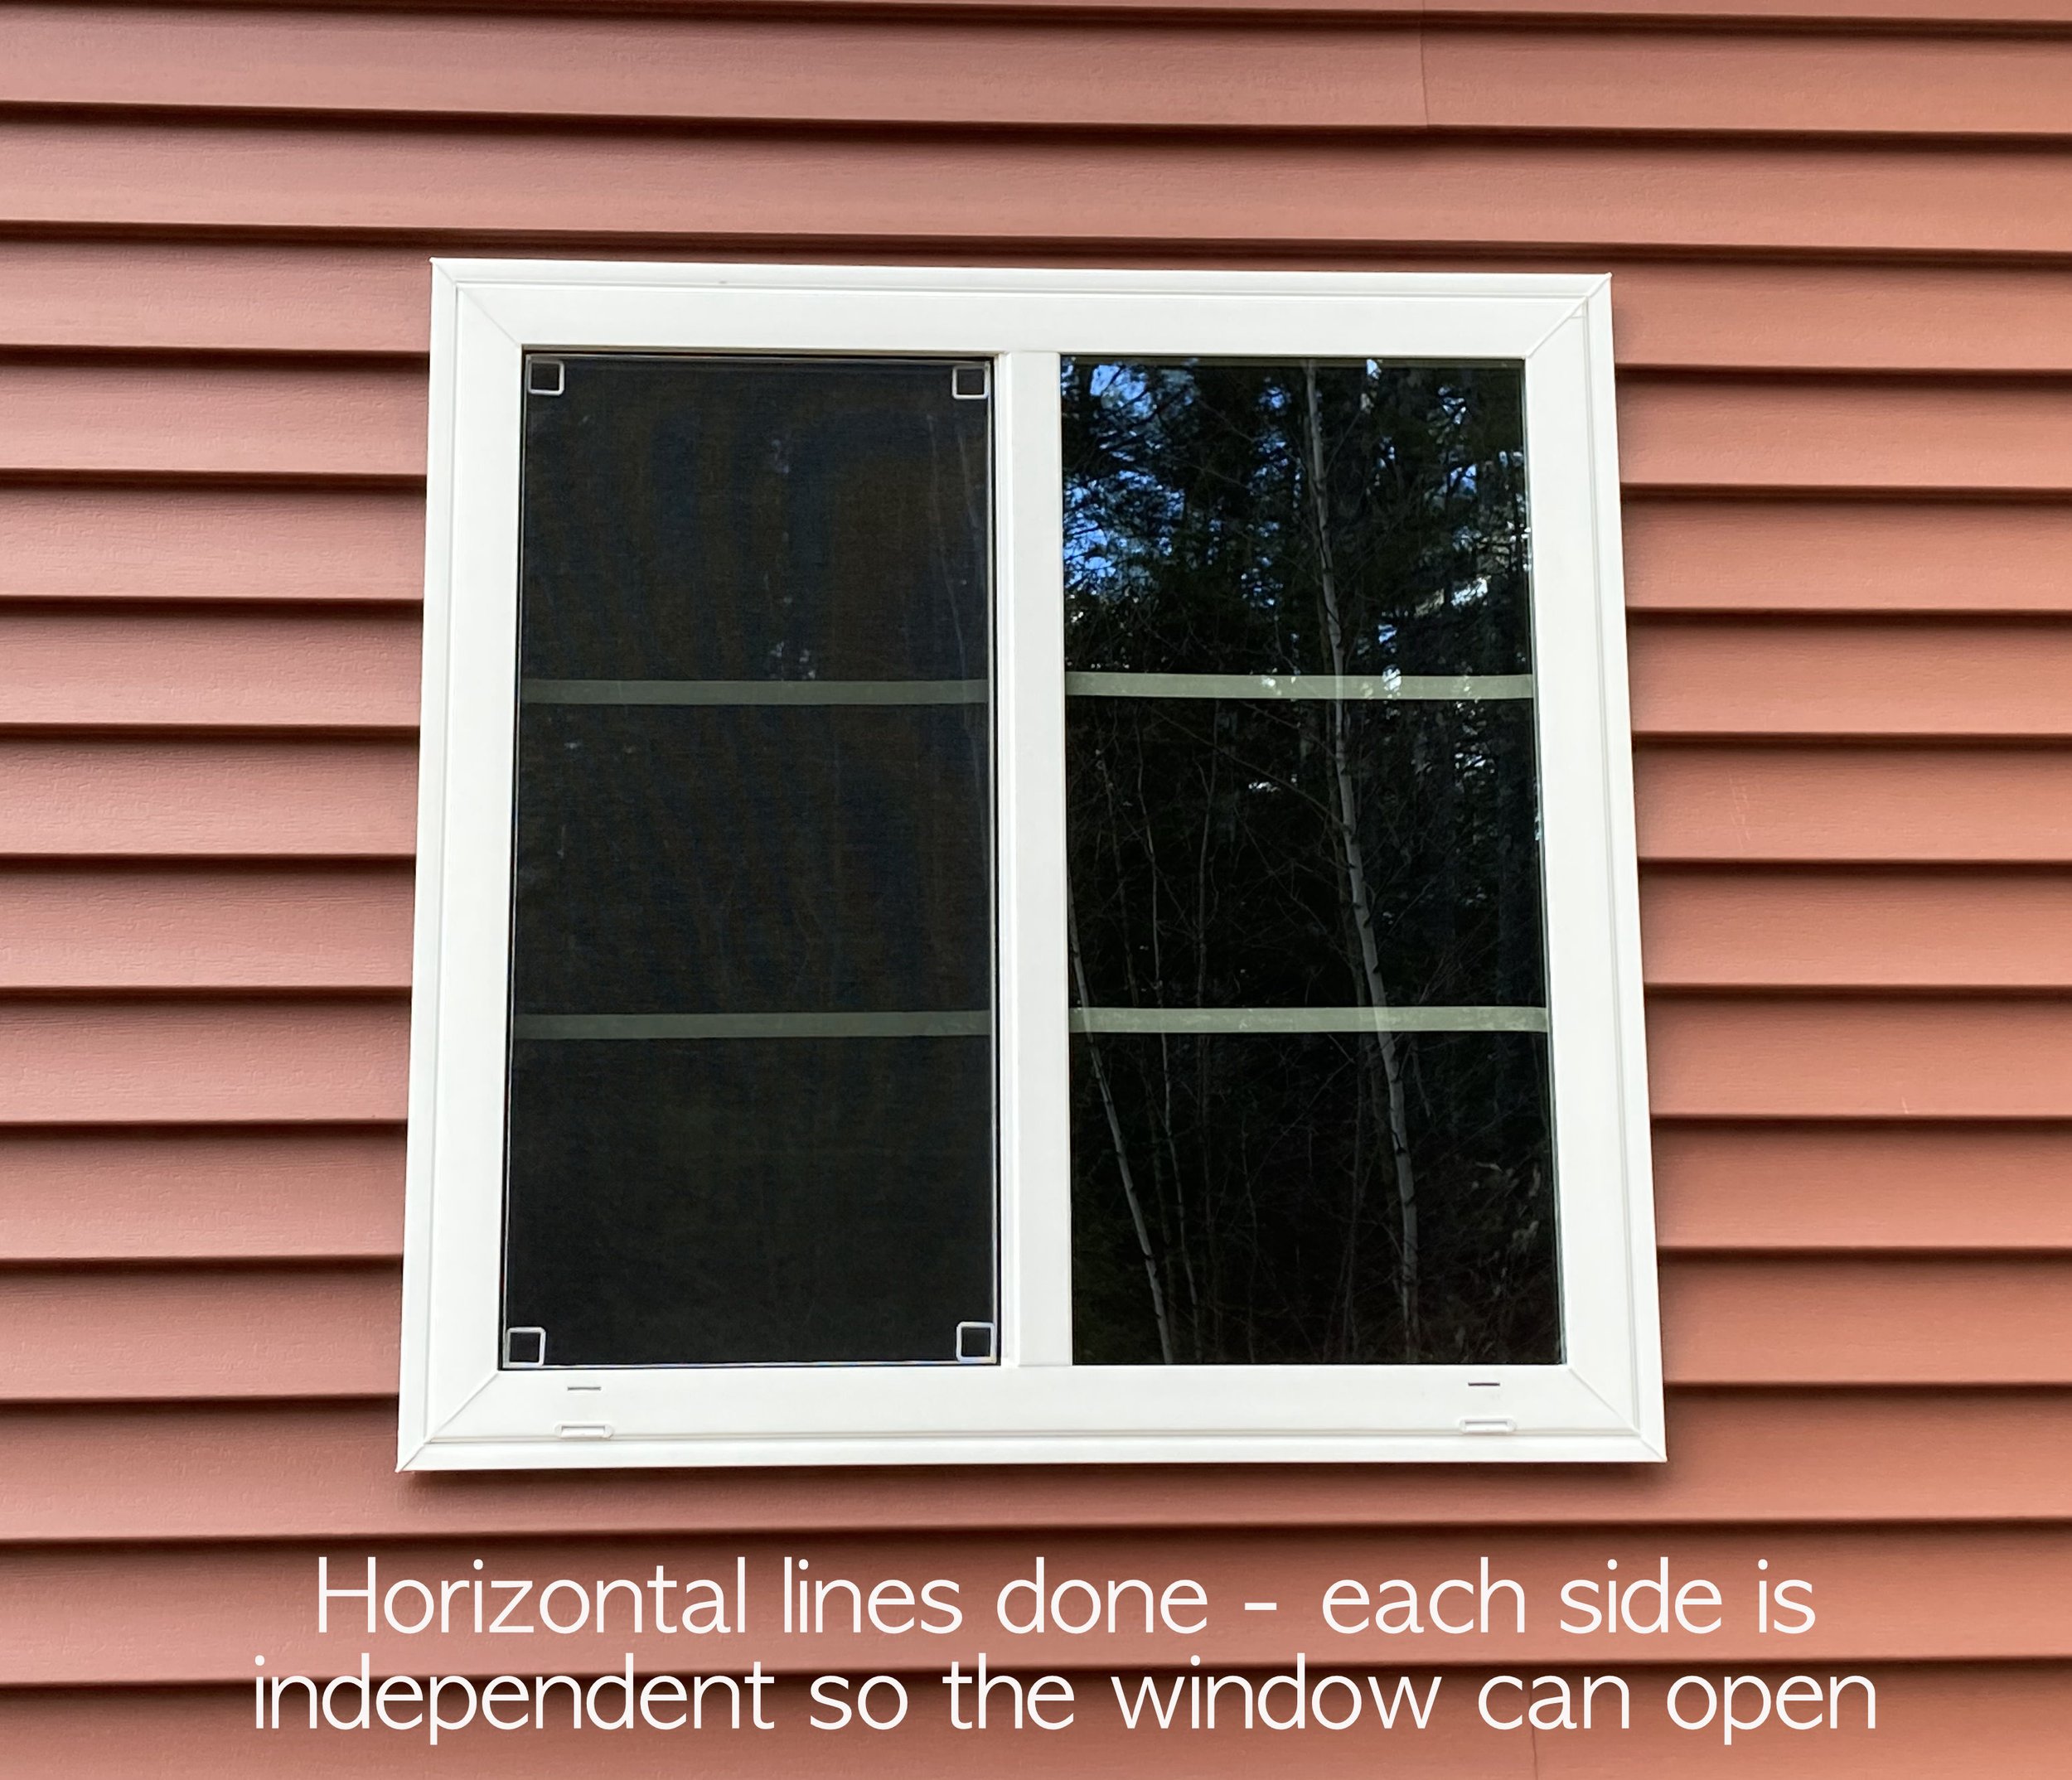
To apply, I first washed and dried the windows well. Then I measured out how to divide the window in an aesthetically pleasing way. For the small windows I did 4 panes across and 3 panes down, and for the big window (not pictured) I ended up doing 4 panes across and 4 panes down.
I measured out my spacing and then made small marks with a pencil on the edge of the window where I was going to place my tape lines, then carefully pulled the tape across the window (I applied the tape on the inside of the window). I did the shorter, horizontal runs of tape first because I found them to be easier and help keep the longer, vertical runs straighter since it was easier to line them up straight with those horizontal reference points.
When pulling your tape lines make sure to go slow and pull the tape out straight. Electrical tape is rather stretchy and it’s easy to distort the lines and make them wonky. Taking your time is key and don’t be discouraged if you have to redo some of the lines! I had to redo a bunch of mine, especially at the beginning while I was getting the hang of it.
TA-DA! In just a short amount of time you now have easy and cheap windowpanes, and the best part was no tools were needed. The style windowpane I tried to mimic was “colonial” in order to match our house, but if you wanted to get fancy you could try laying out your lines in a different style (diamond, prairie, etc).
DISCLAIMER: Please note that the electrical tape I used for this project does have a Prop 65 warning on the package. You may want to do your own research regarding this. We used it since it was a non-living area in a detached garage. I also made sure to wash my hands well after handling it. Use at own risk.
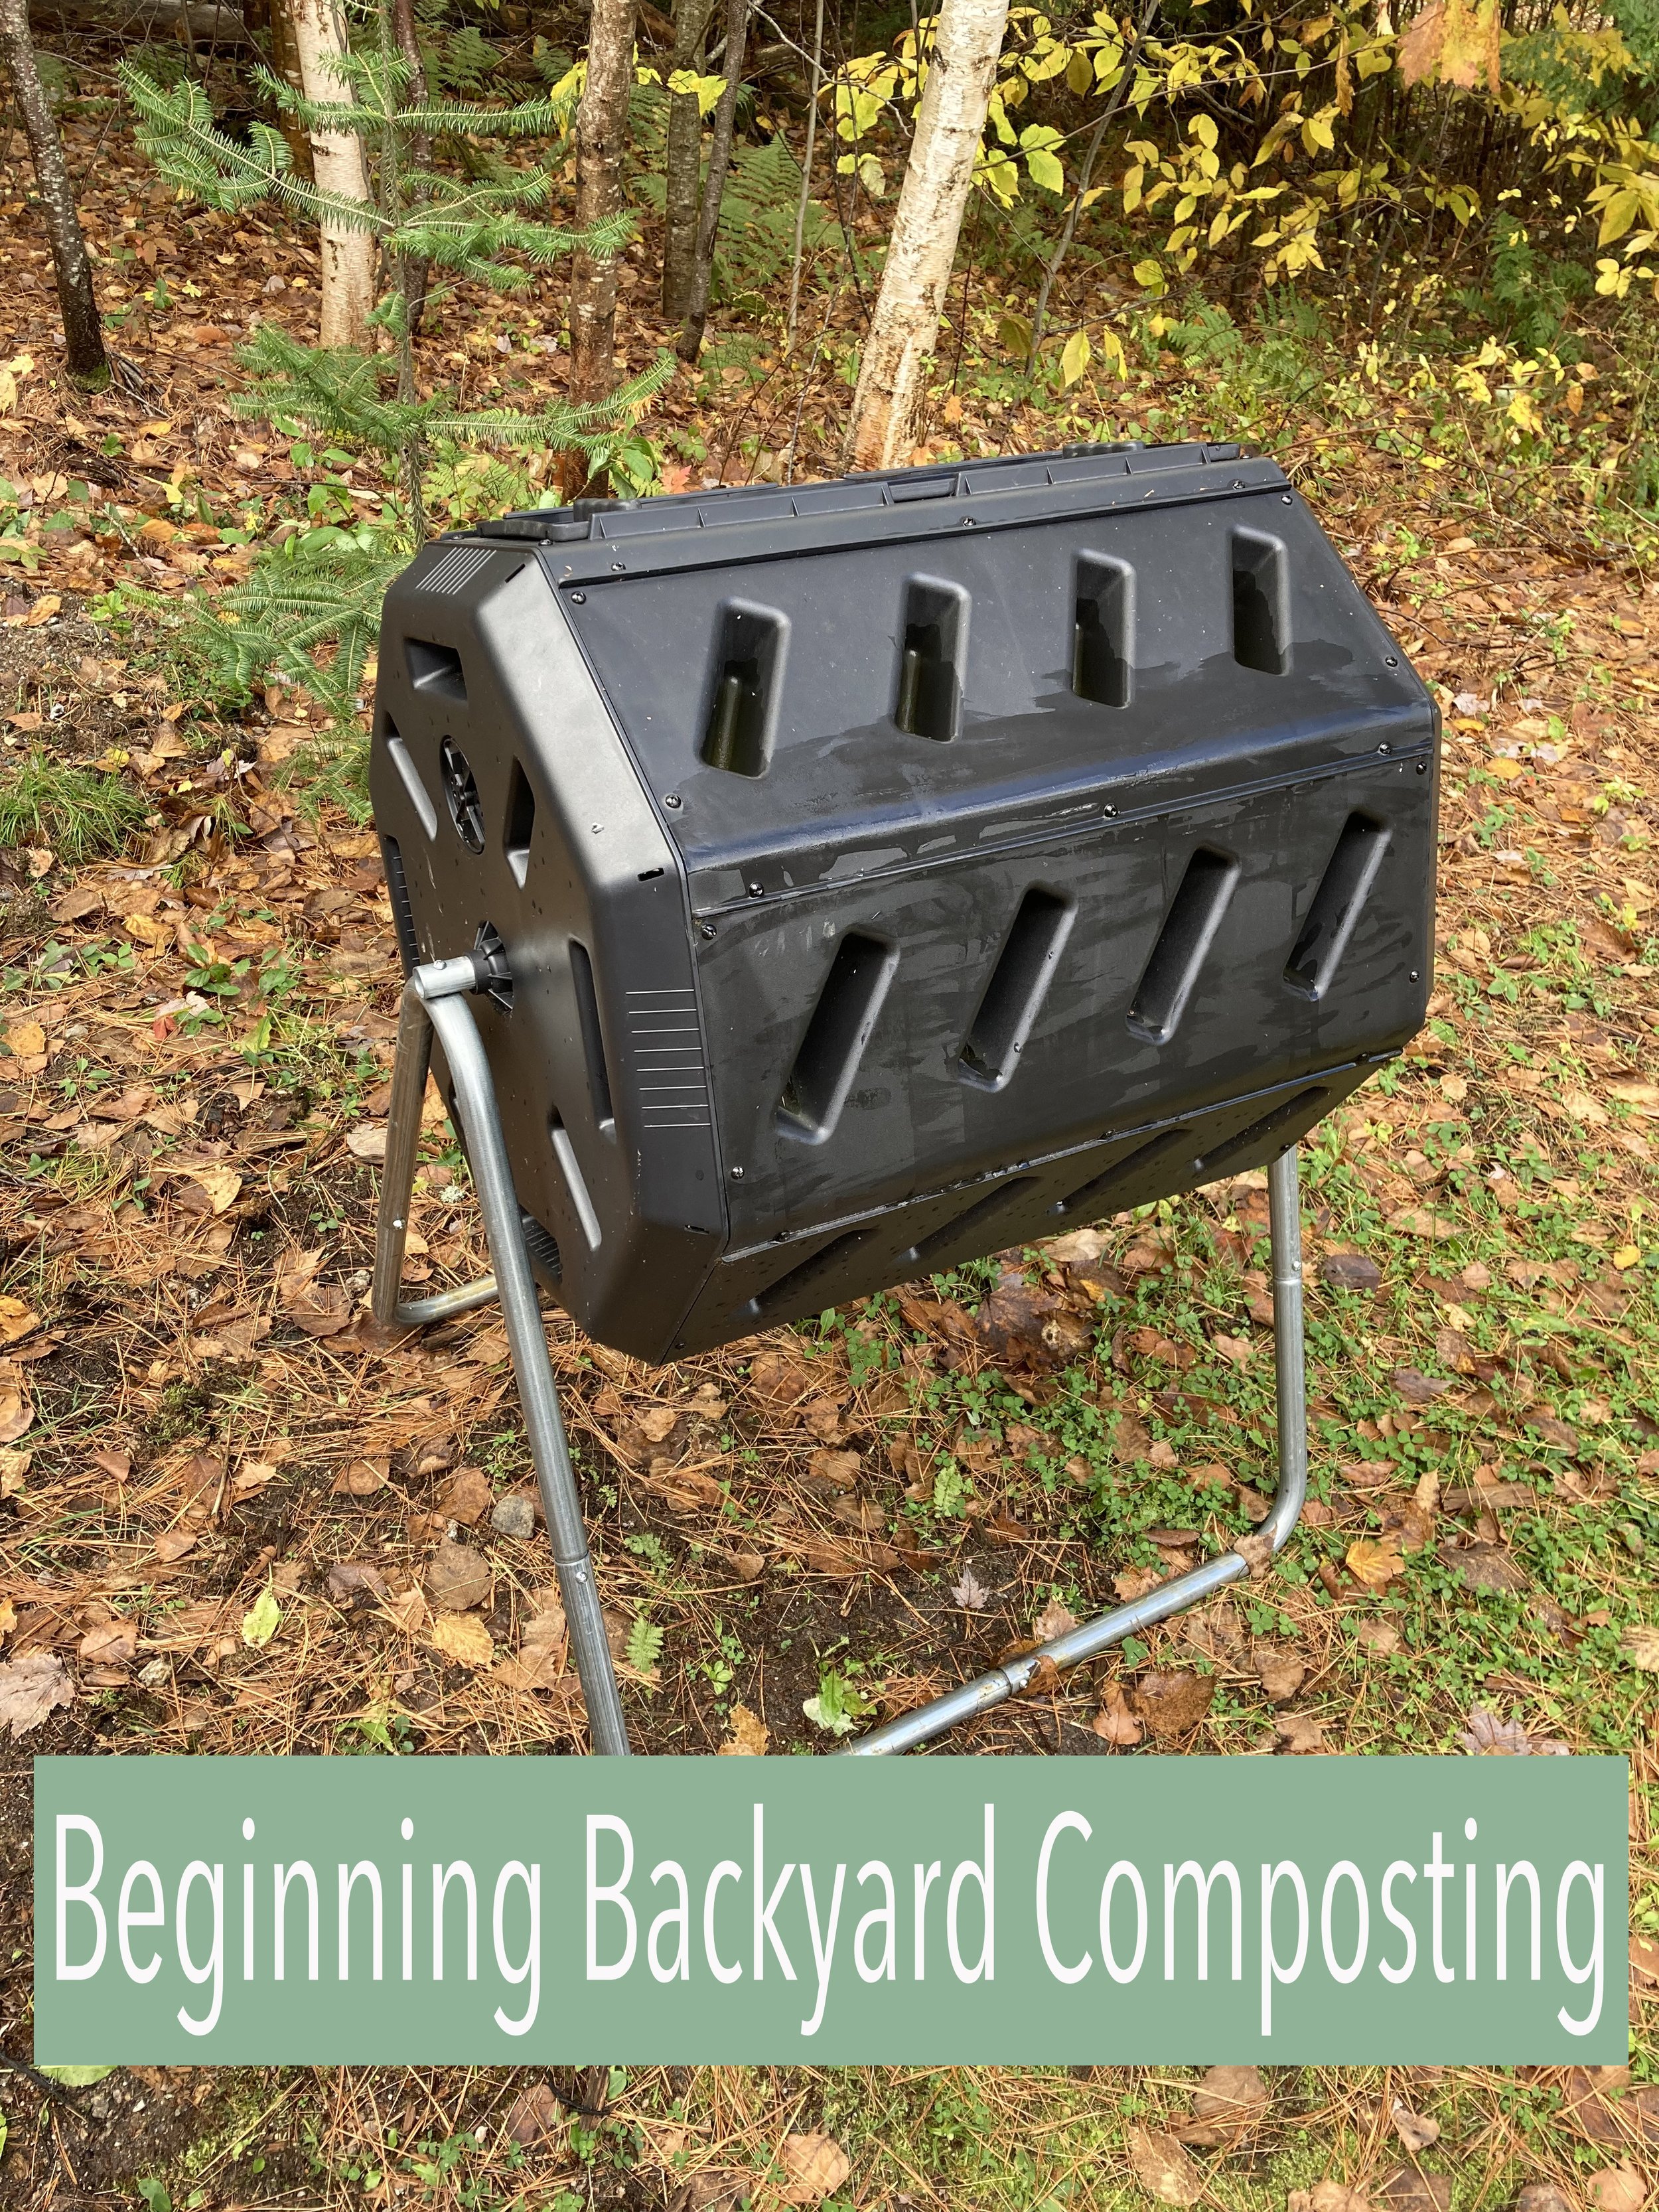
This year we finally jumped on the backyard composting bandwagon. We’ve been wanting to make more eco-friendly choices around our home and decided a big step we could make would be trying to eliminate as much food waste going into our household trash as possible. | This post contains affiliate links |
Composting has a lot of benefits. Some of which include reducing the amount of decomposing matter filling our landfills as well as producing nutrient-rich garden soil to benefit your own yard and garden.
Getting Set Up
When it comes to composting, you could just make a pile in the corner of your yard or make your own bin with some scrap wood or fence. However, we decided to opt for a tumbler-style bin since we were looking for something compact, self-contained, and efficient.
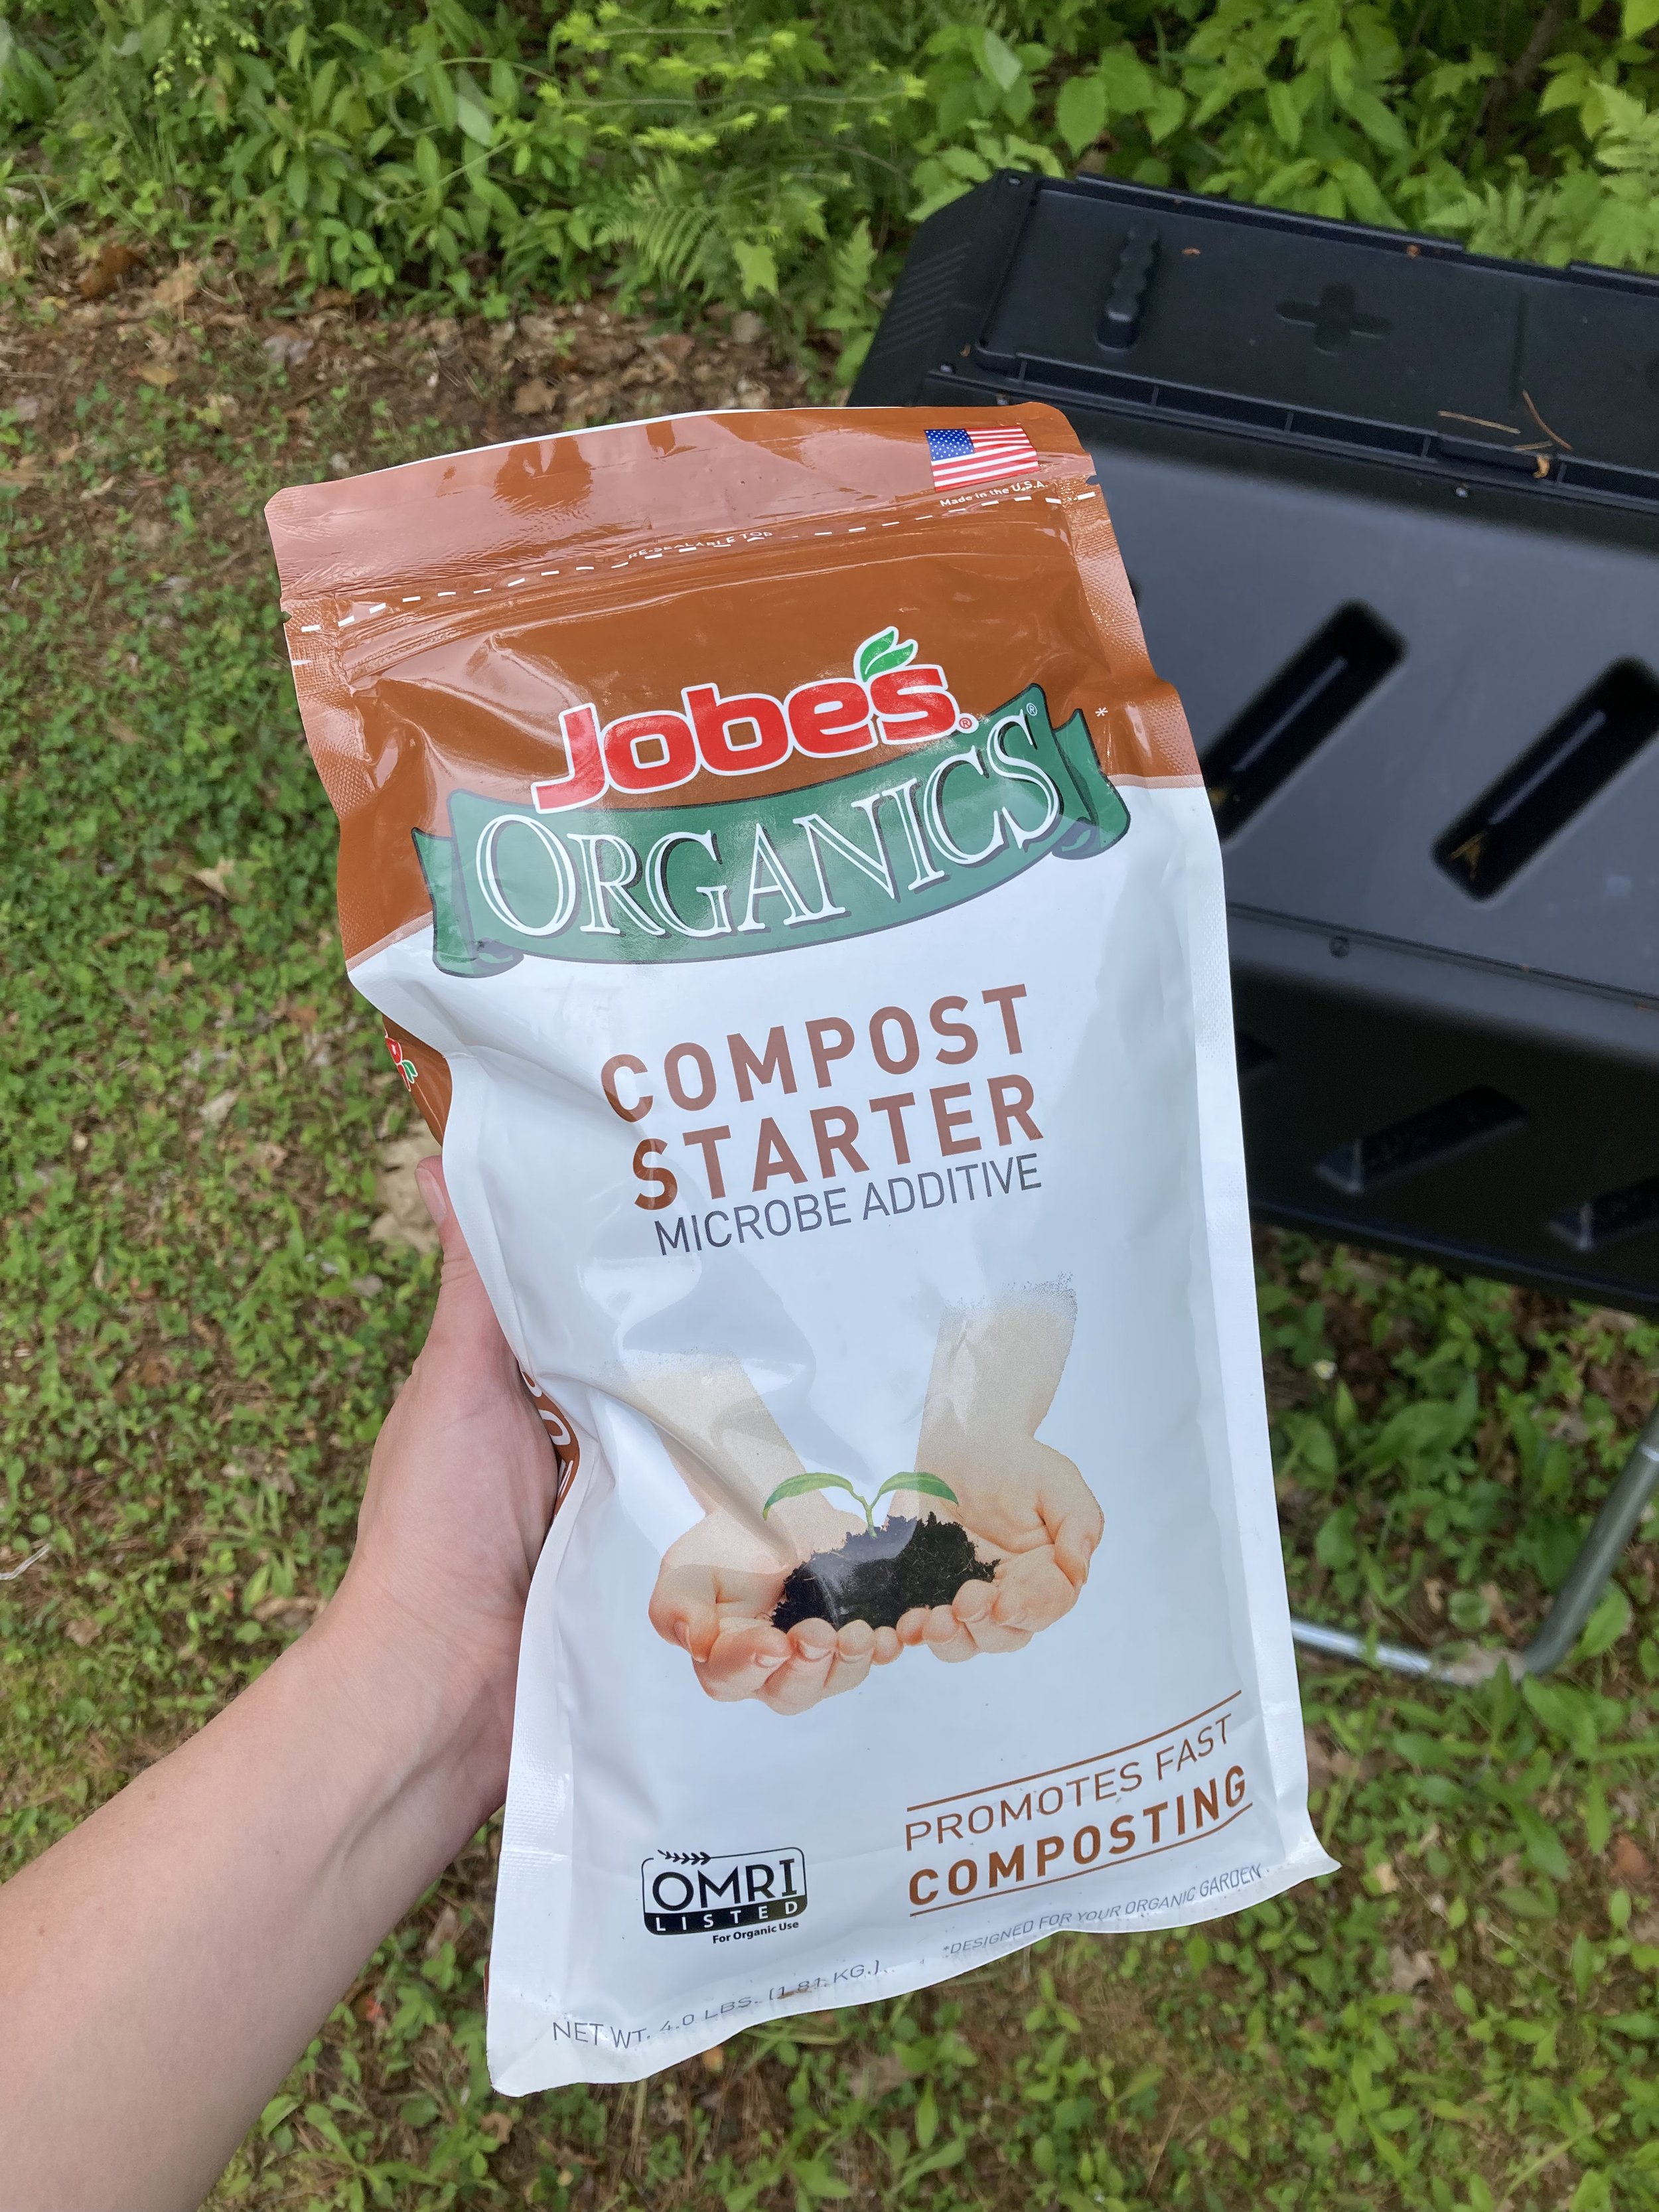
Once you decide on your compost set-up it's important to add some good microbes to "get the party started" and create a good environment for breaking down your food and yard waste. To do this you can add a shovel-full of garden dirt from your own garden to introduce some microbes, or you can buy some specialty compost starter to add to your composter (just follow the package directions).
Composting
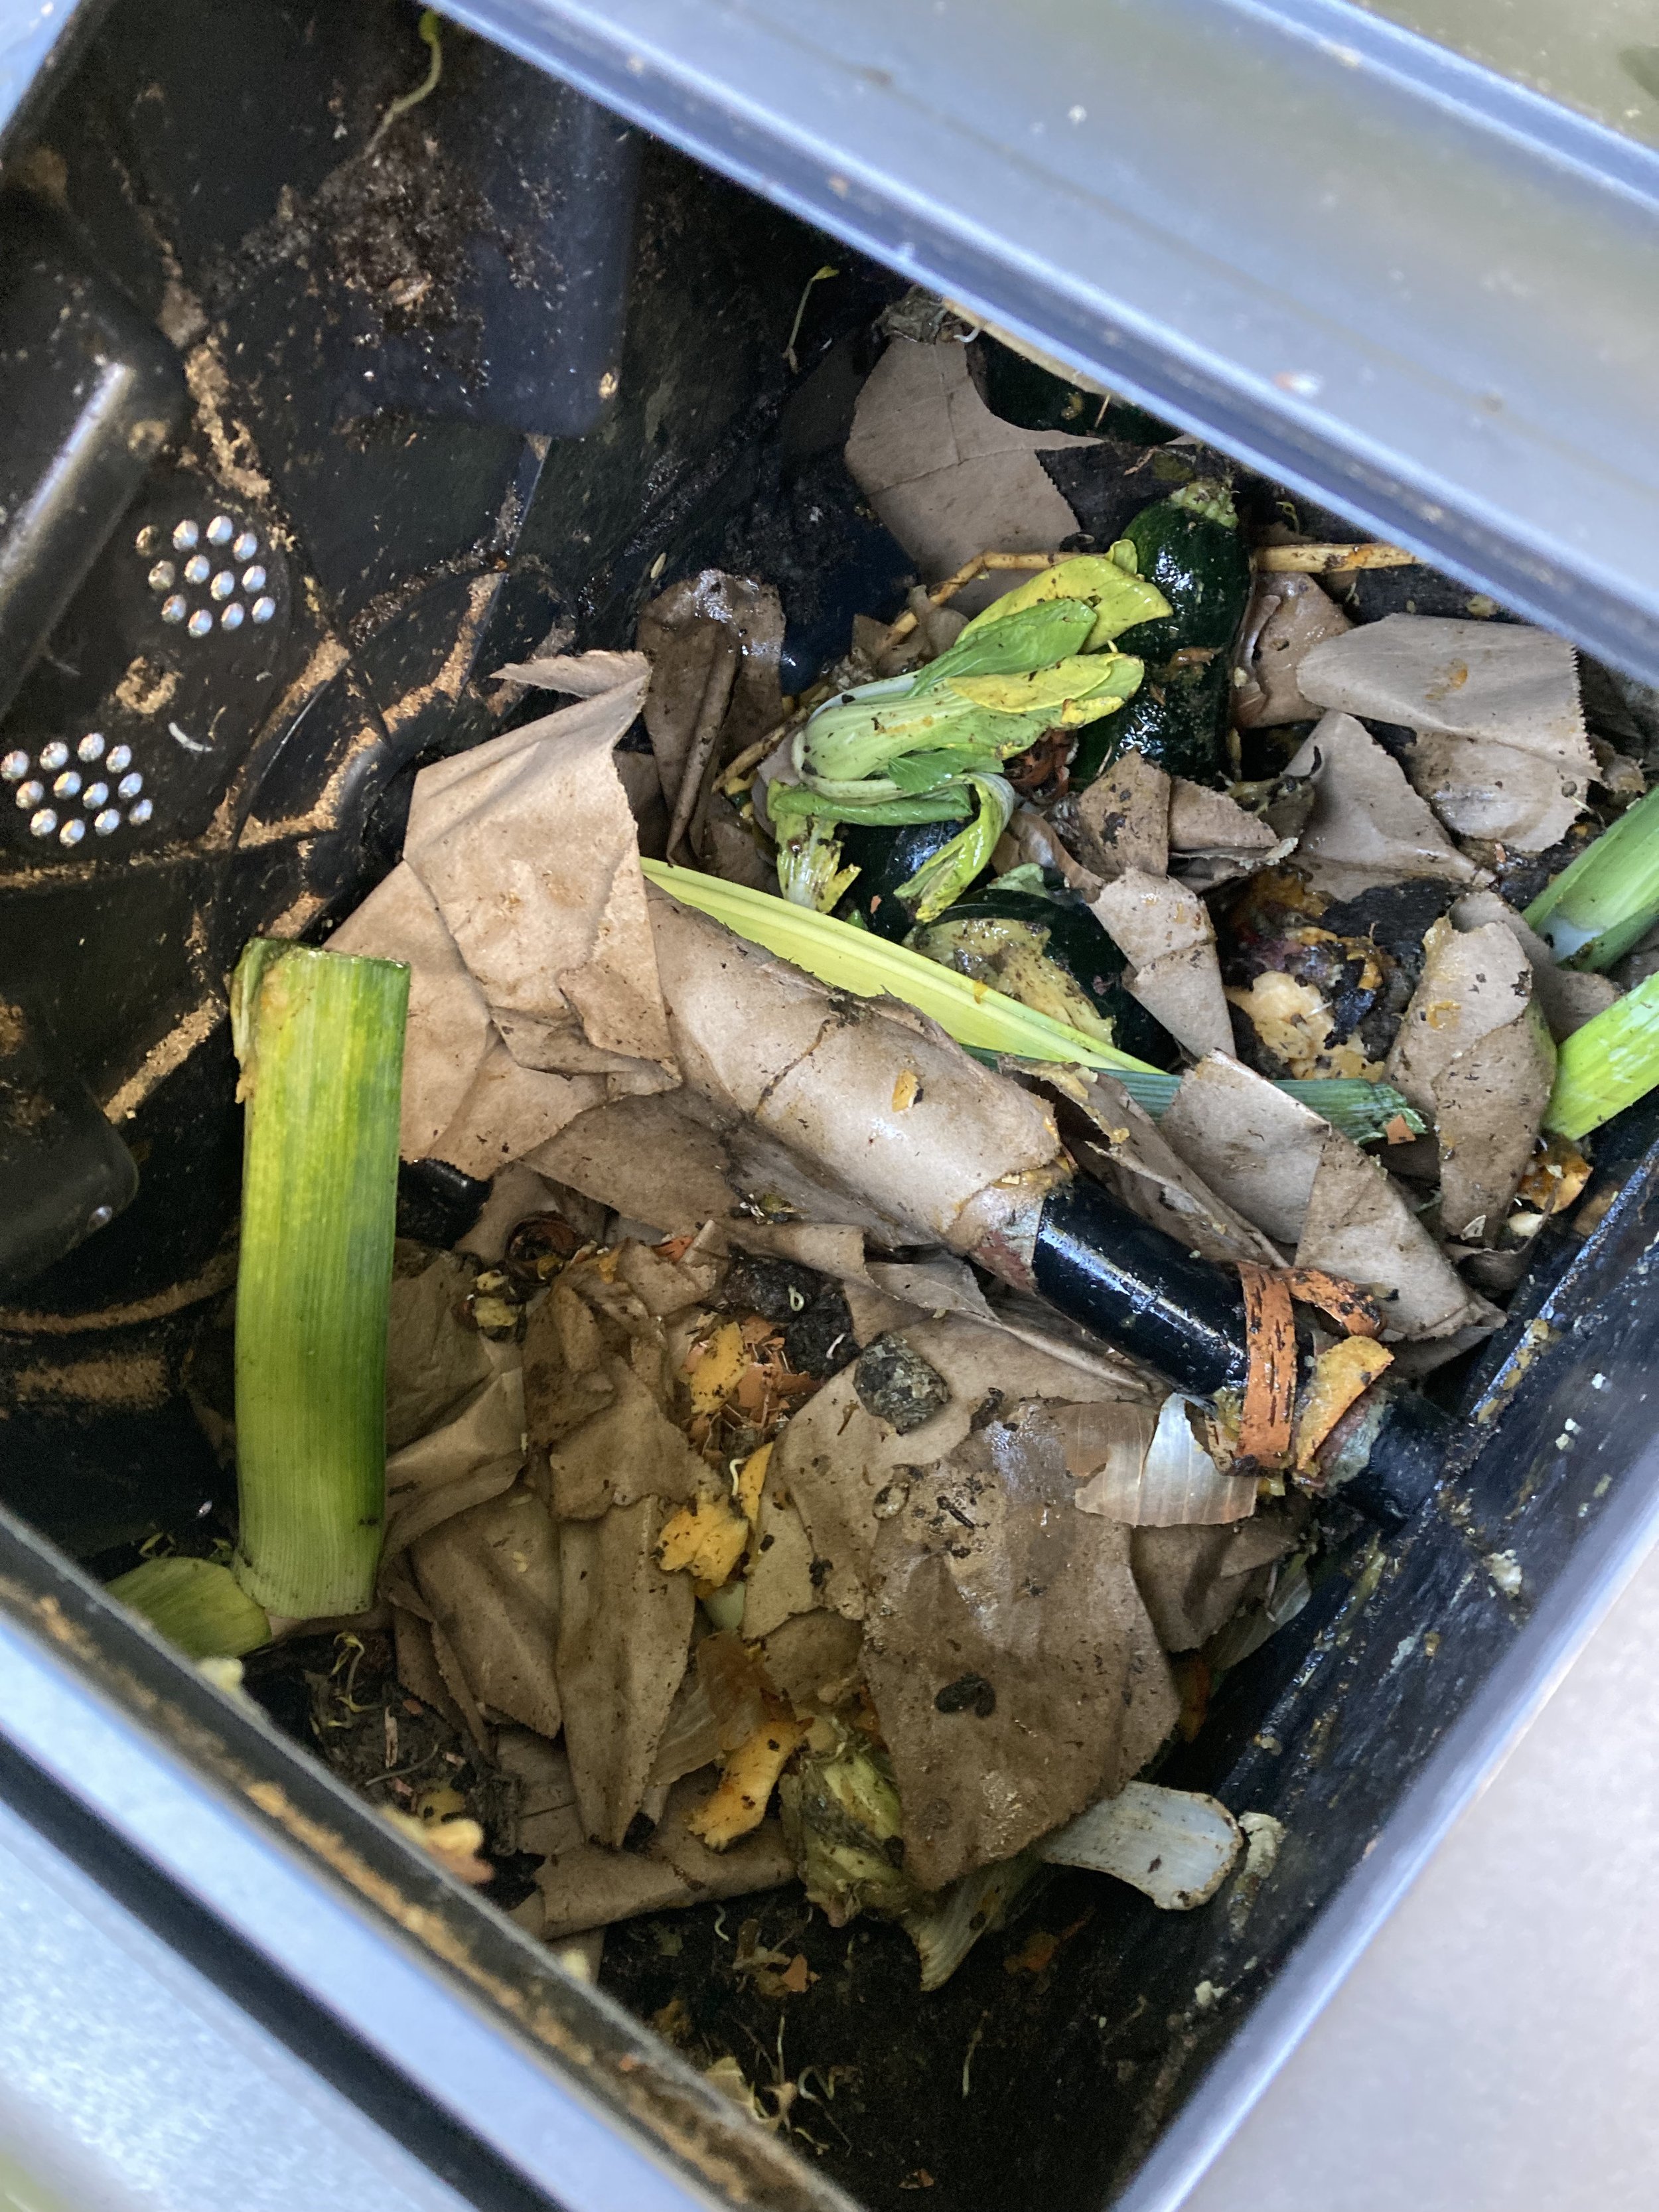
Once you have it set up, just keep on adding food/yard waste and periodically turn your compost over (by hand if yours is a pile or by spinning the drum if it’s a tumbler-style). The trickiest part for me is keeping the ratios right - ideally your compost pile should be about 1 part “greens” (these would be fruit/veggie scraps, coffee grounds, etc… I like to think of them as wet items) and 2 parts “browns” (leaves, newspaper, brown paper bags, etc… I like to think of them as dry items). We personally tend to teeter from too dry to too wet in our compost bin but it seems to average out eventually.
I typically toss our kitchen scraps in a bowl on the counter as I'm cooking and promptly empty it into the compost bin outside. This has worked well for us so far since the weather has been mild. Once it turns winter here I will probably invest in a kitchen countertop compost container so I don't need to walk outside across the icy/snowy yard several times a day, and instead can just empty the kitchen container into the outside compost bin periodically as it fills up.
What to Compost
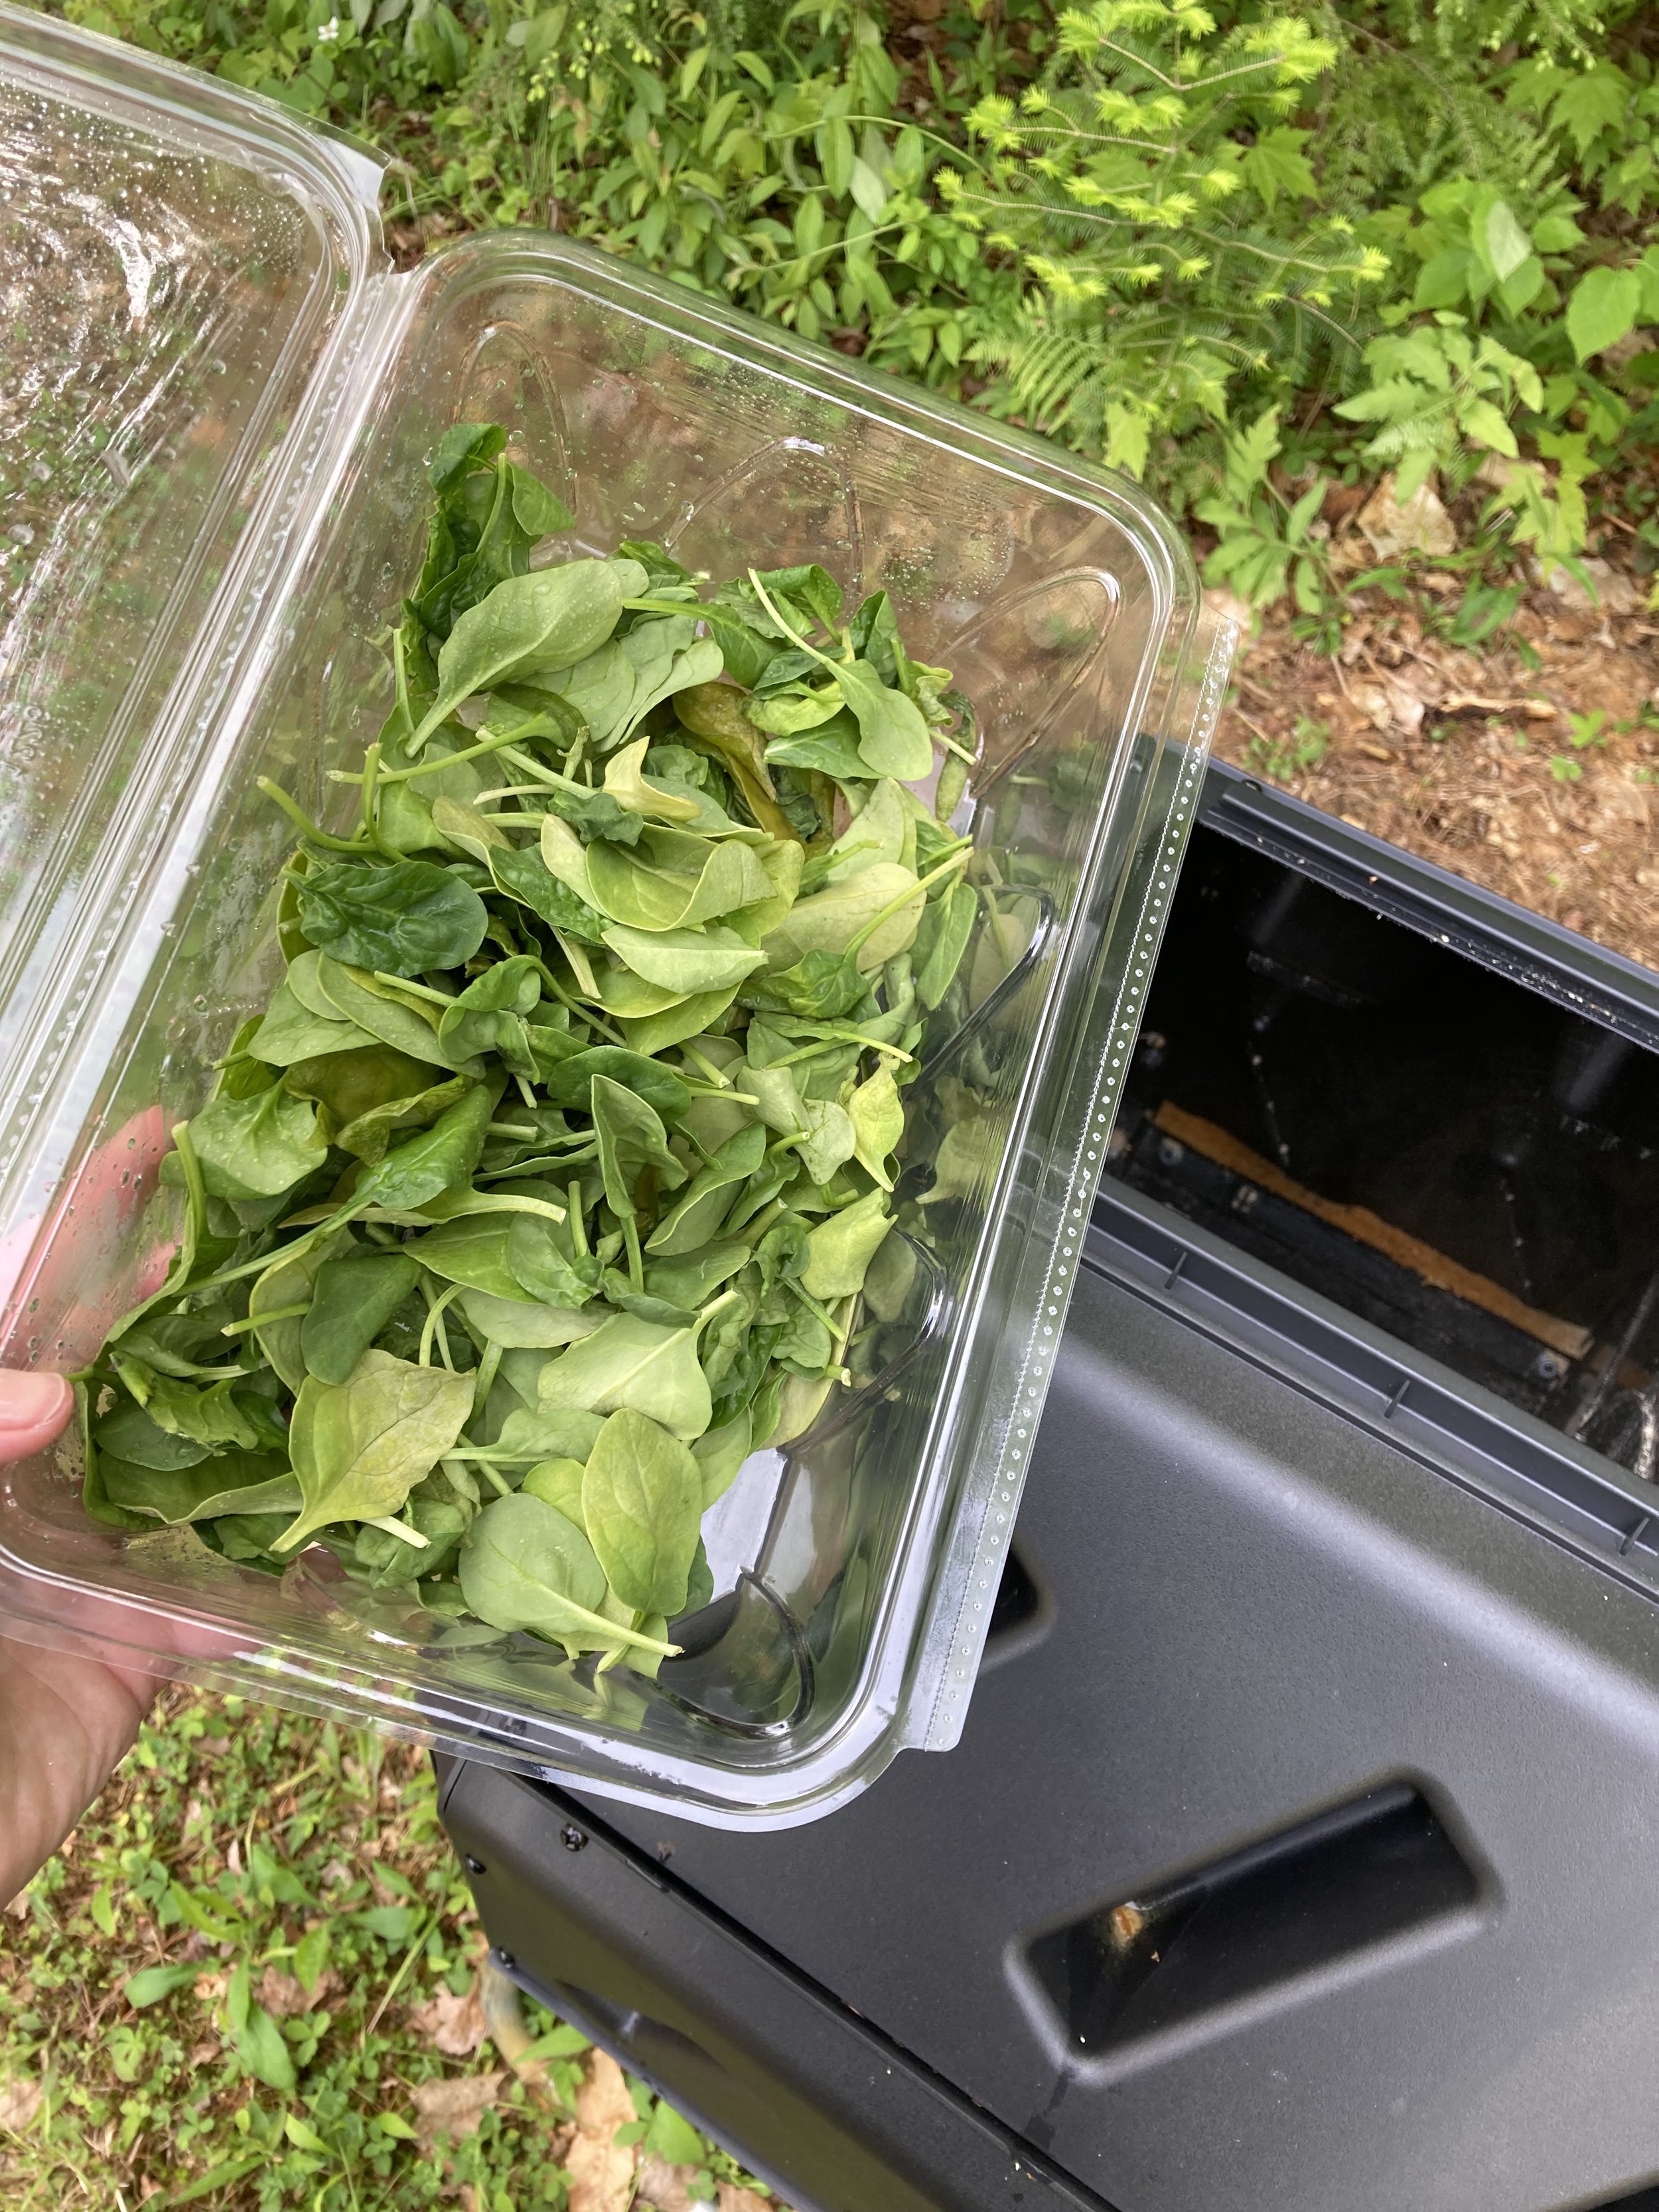
Slimy spinach in your fridge? Toss it in the composter and then recycle the container!
Here’s a short list of things you can potentially compost:
fruit
vegetables
inedible portions of fruit/veggies (i.e. - rinds/cores)
coffee grounds
egg shells
disease-free, non-invasive plants
shredded newspaper
shredded brown paper bags
shredded paper (non-glossy)
untreated sawdust (I make a lot of ornaments for my Etsy shop and compost the sawdust)
toilet paper rolls
leaves, grass clippings
small sticks
The smaller you make the items in your compost bin (cut them up or shred them), the quicker they should decompose and compost.
What NOT to Compost
Do NOT Compost:
x plastic or household trash x meat x dairy x cooked food x glass or metal x animal waste or used animal bedding/shavings x invasive or diseased plant materials - compost very strong smelling fruit/veggies with caution (i.e. citrus/bananas) if you live in an area with bears or raccoons that are an issue
Good luck in your composting adventure! I hope you enjoy the process and be proud in your efforts to be a little more eco-friendly in your home.
Disclaimer: I am sharing my experiences with what we’ve learned in the composting process so far. If you’d like expert or more detailed and specific information, I’d recommend contacting your local garden center or university cooperative for more information. Your local town or city may have composting programs to join or guidelines to follow too.
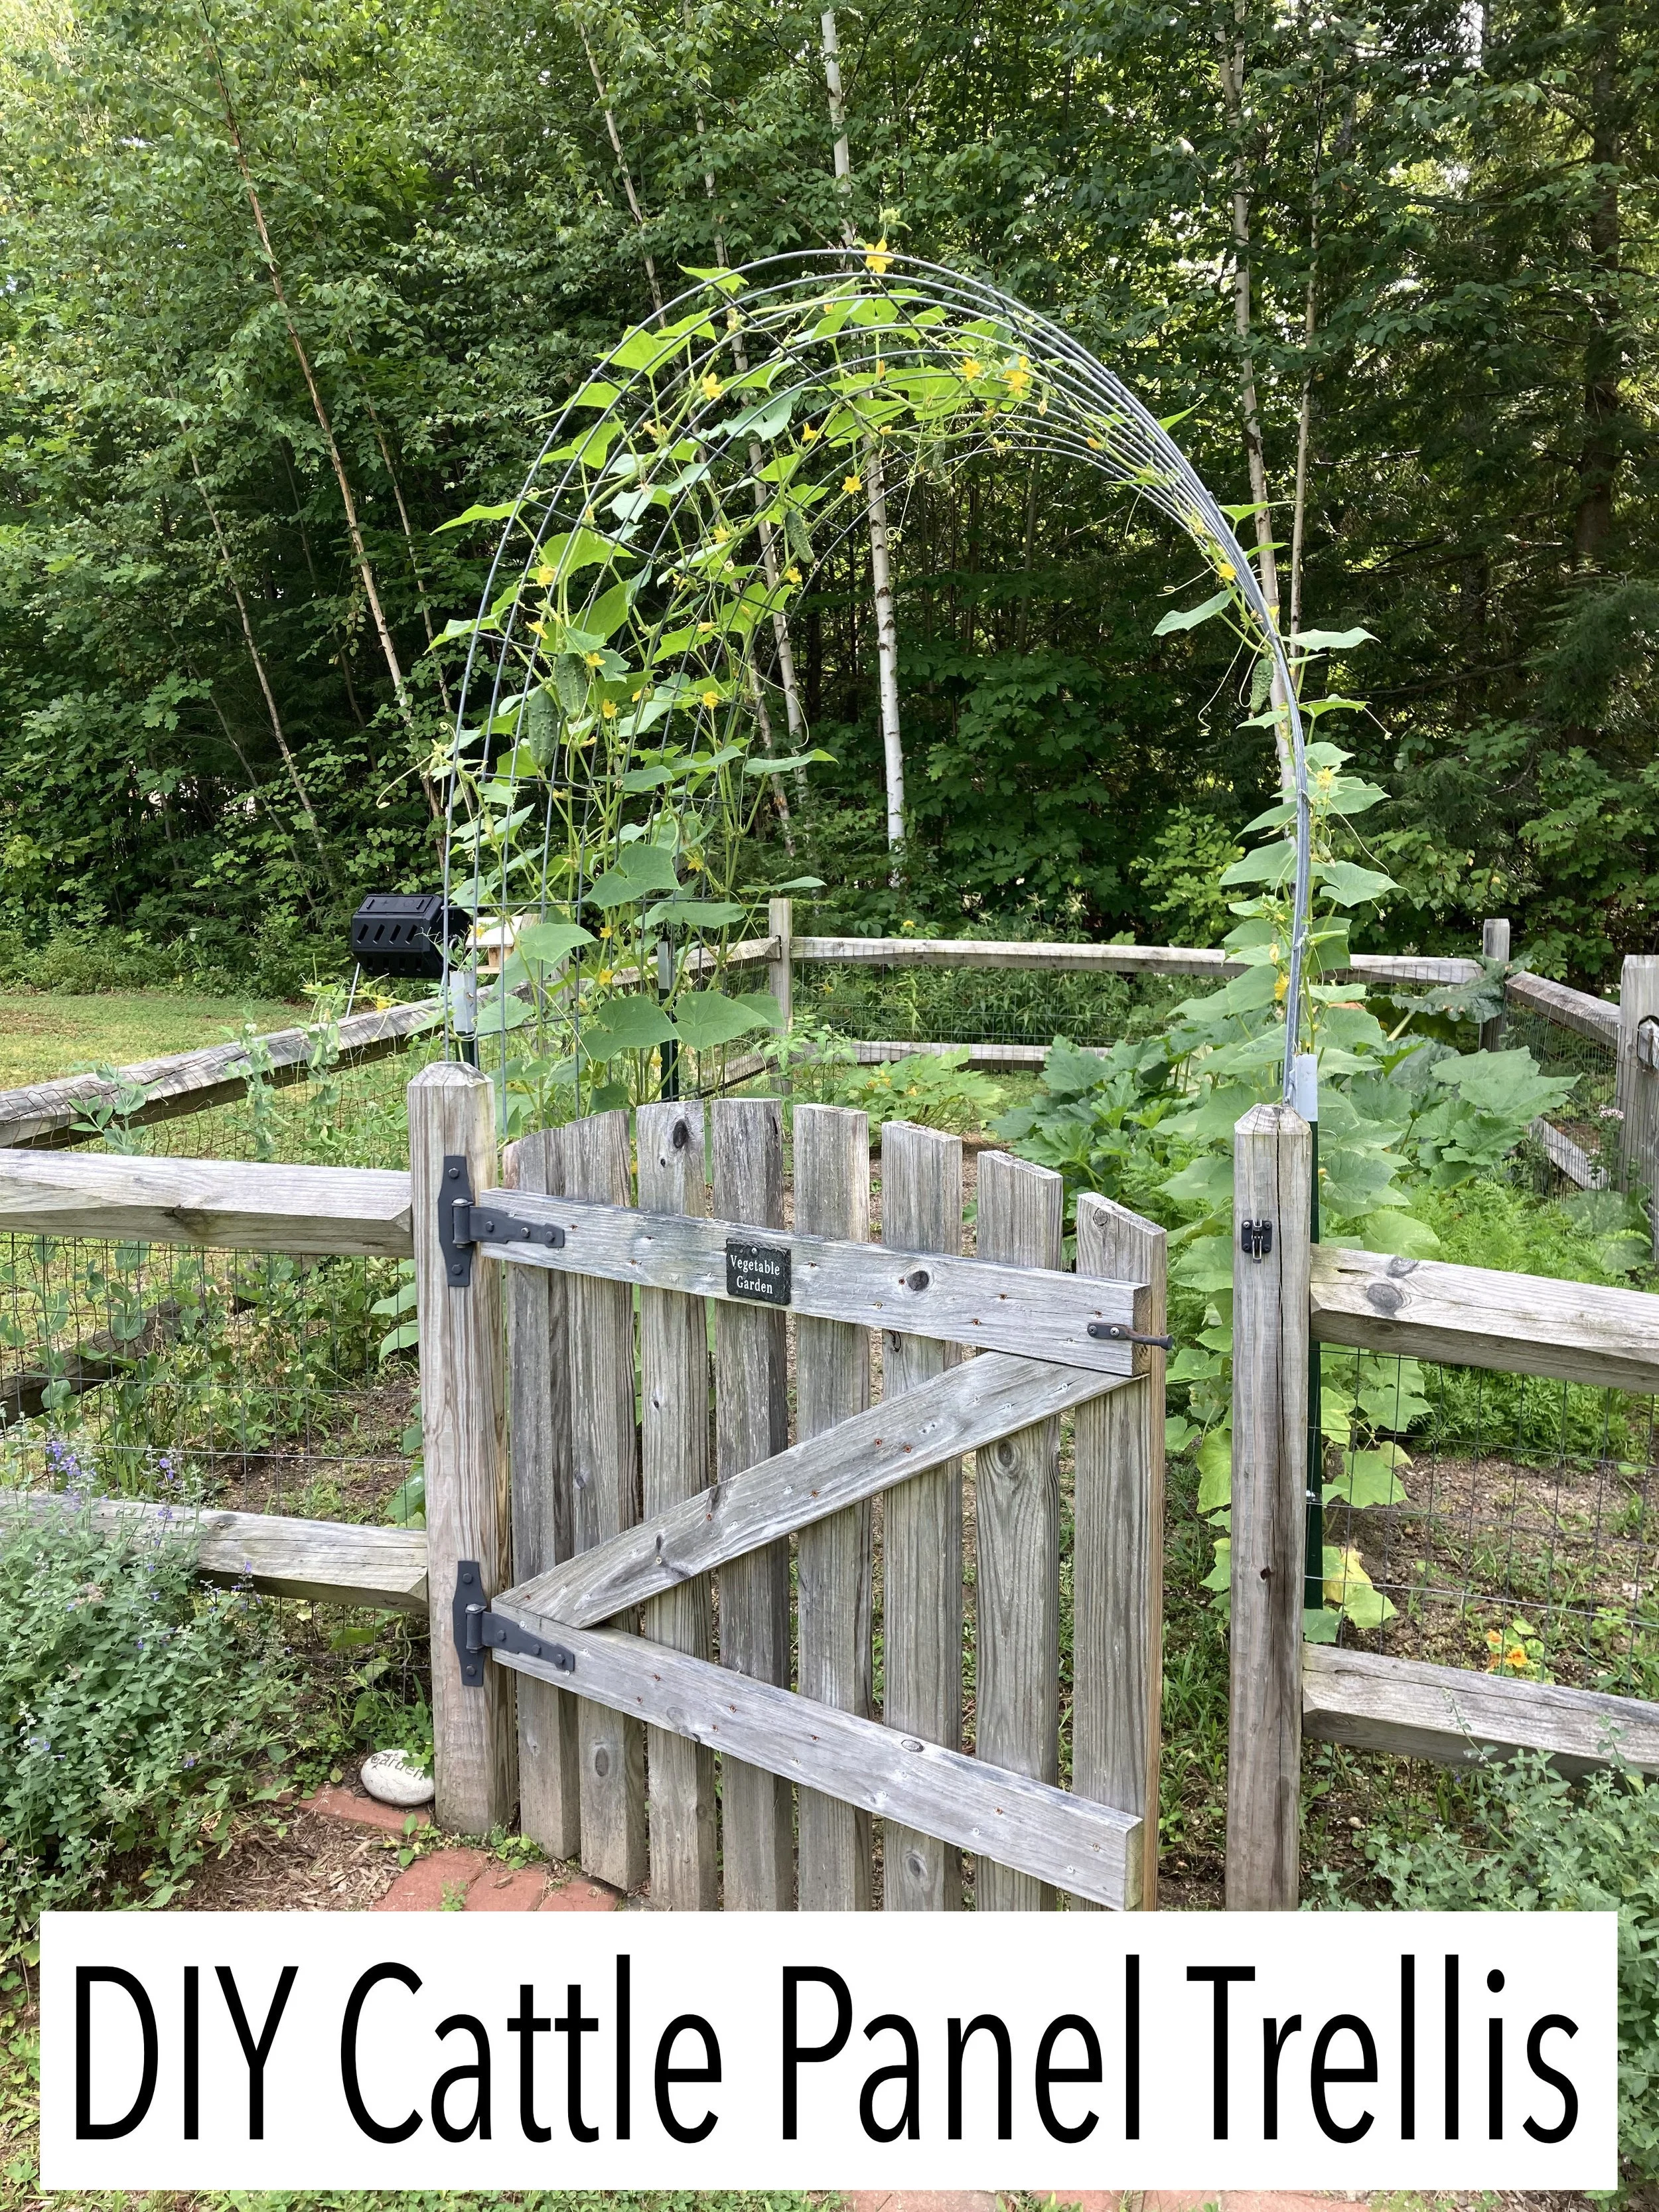
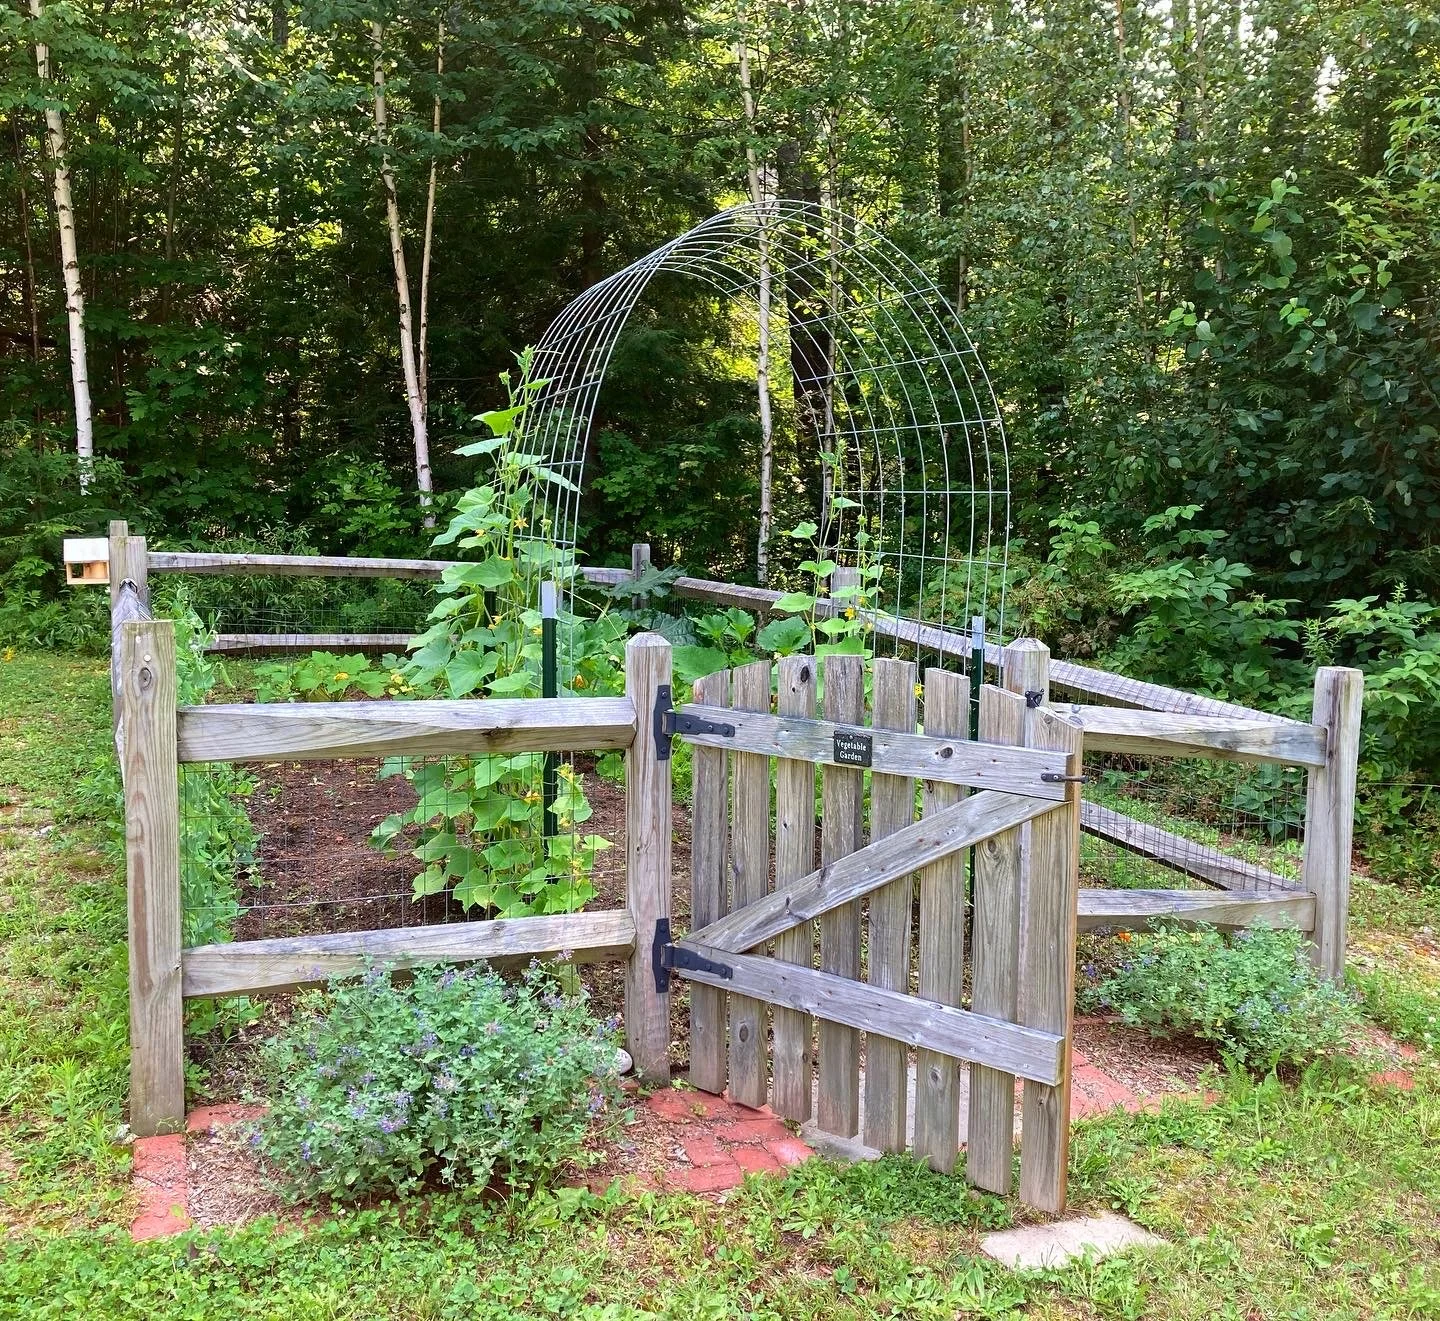
Last summer Pinterest blew up with DIY Cattle Panel Trellises and I decided I was going to jump on this bandwagon next season… And so here we are - it’s spring and I’m excited to get this set up and document my garden’s progress this year. | This post contains affiliate links |
- This post will show how we built our Cattle Panel Arch and I will also add progress photos to this post as our garden grows -
To make a Cattle Panel Trellis, you really only need a few things. We picked up most of our materials at a local Tractor Supply store but you could find these materials at other farm/garden centers too or order online. The trickiest part was getting everything home since the cattle panel is fairly large. Thankfully my father-in-law has a pickup truck and was able to pick up the items for us.
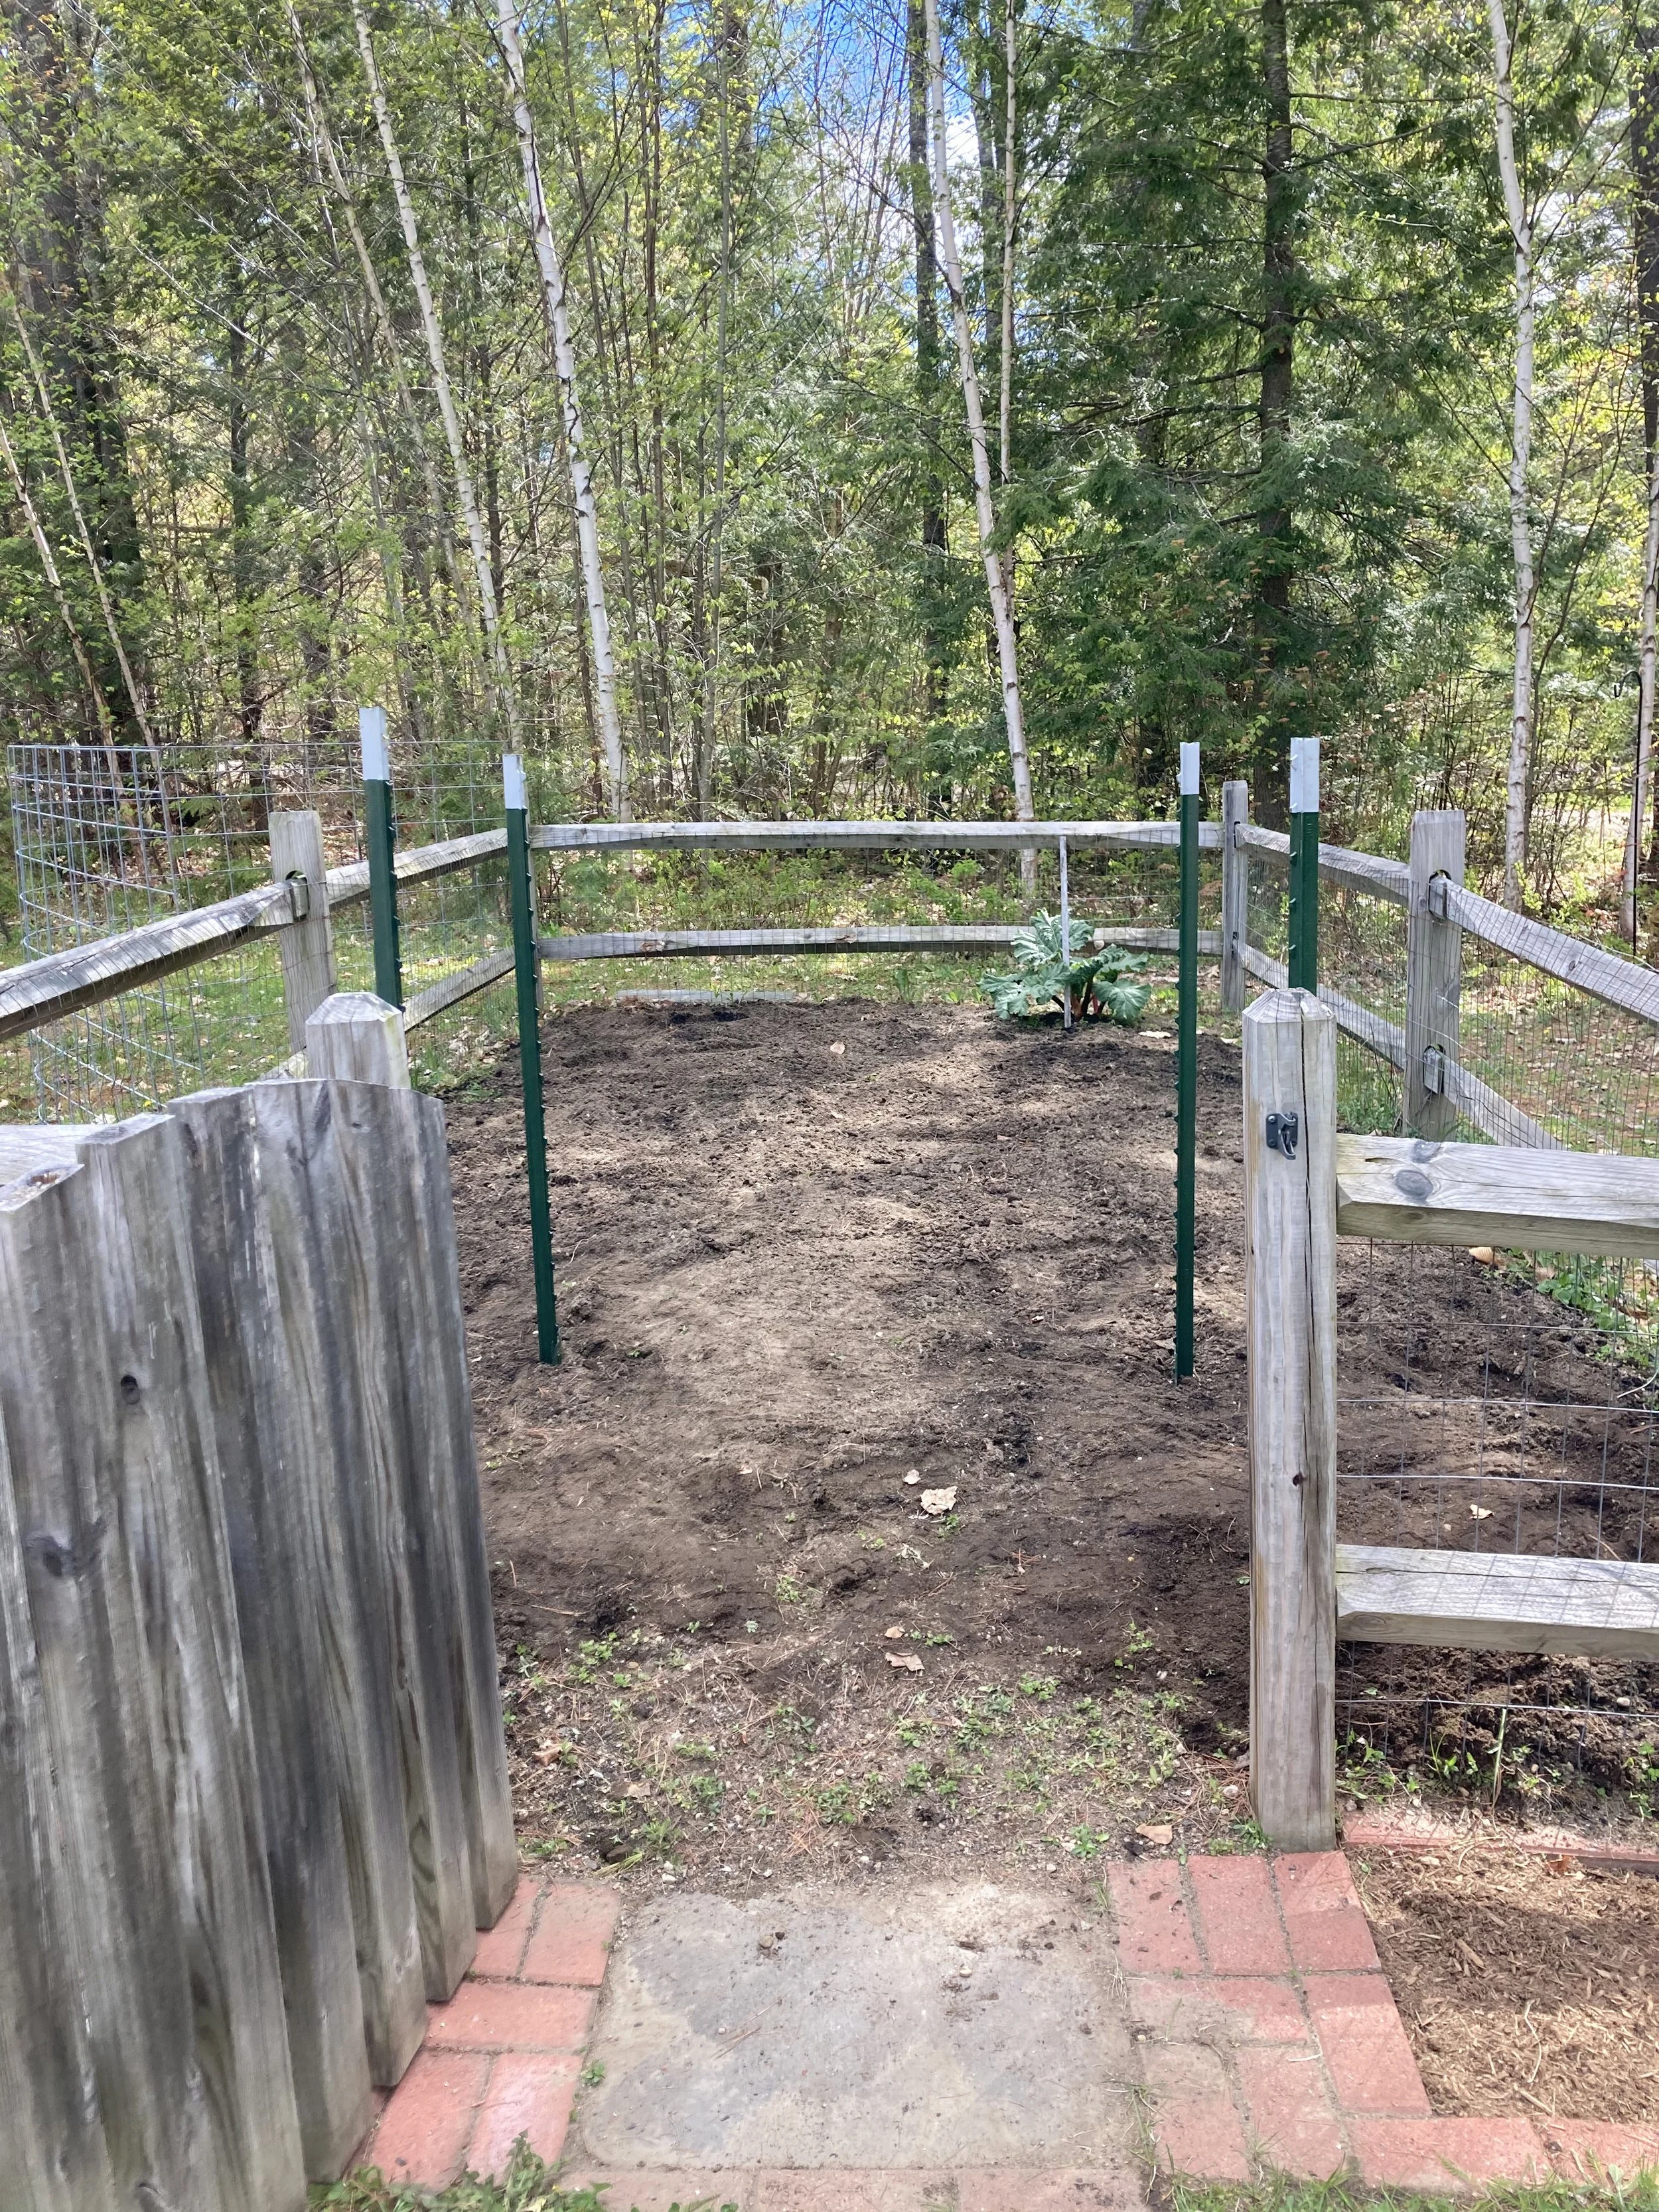
First, figure out where you want your arch to go. For us we put it just inside our garden gate to frame the entrance. It’s also on the north side of our garden so it won’t shade the other veggies too much.
Once you have it laid out and square, drive the t-posts in with a hammer or post driver until they’re deep and sturdy. This was easier-said-than-done with our rocky soil here in NH, so one post couldn’t go in quite as deep as the others but it was sturdy enough still.
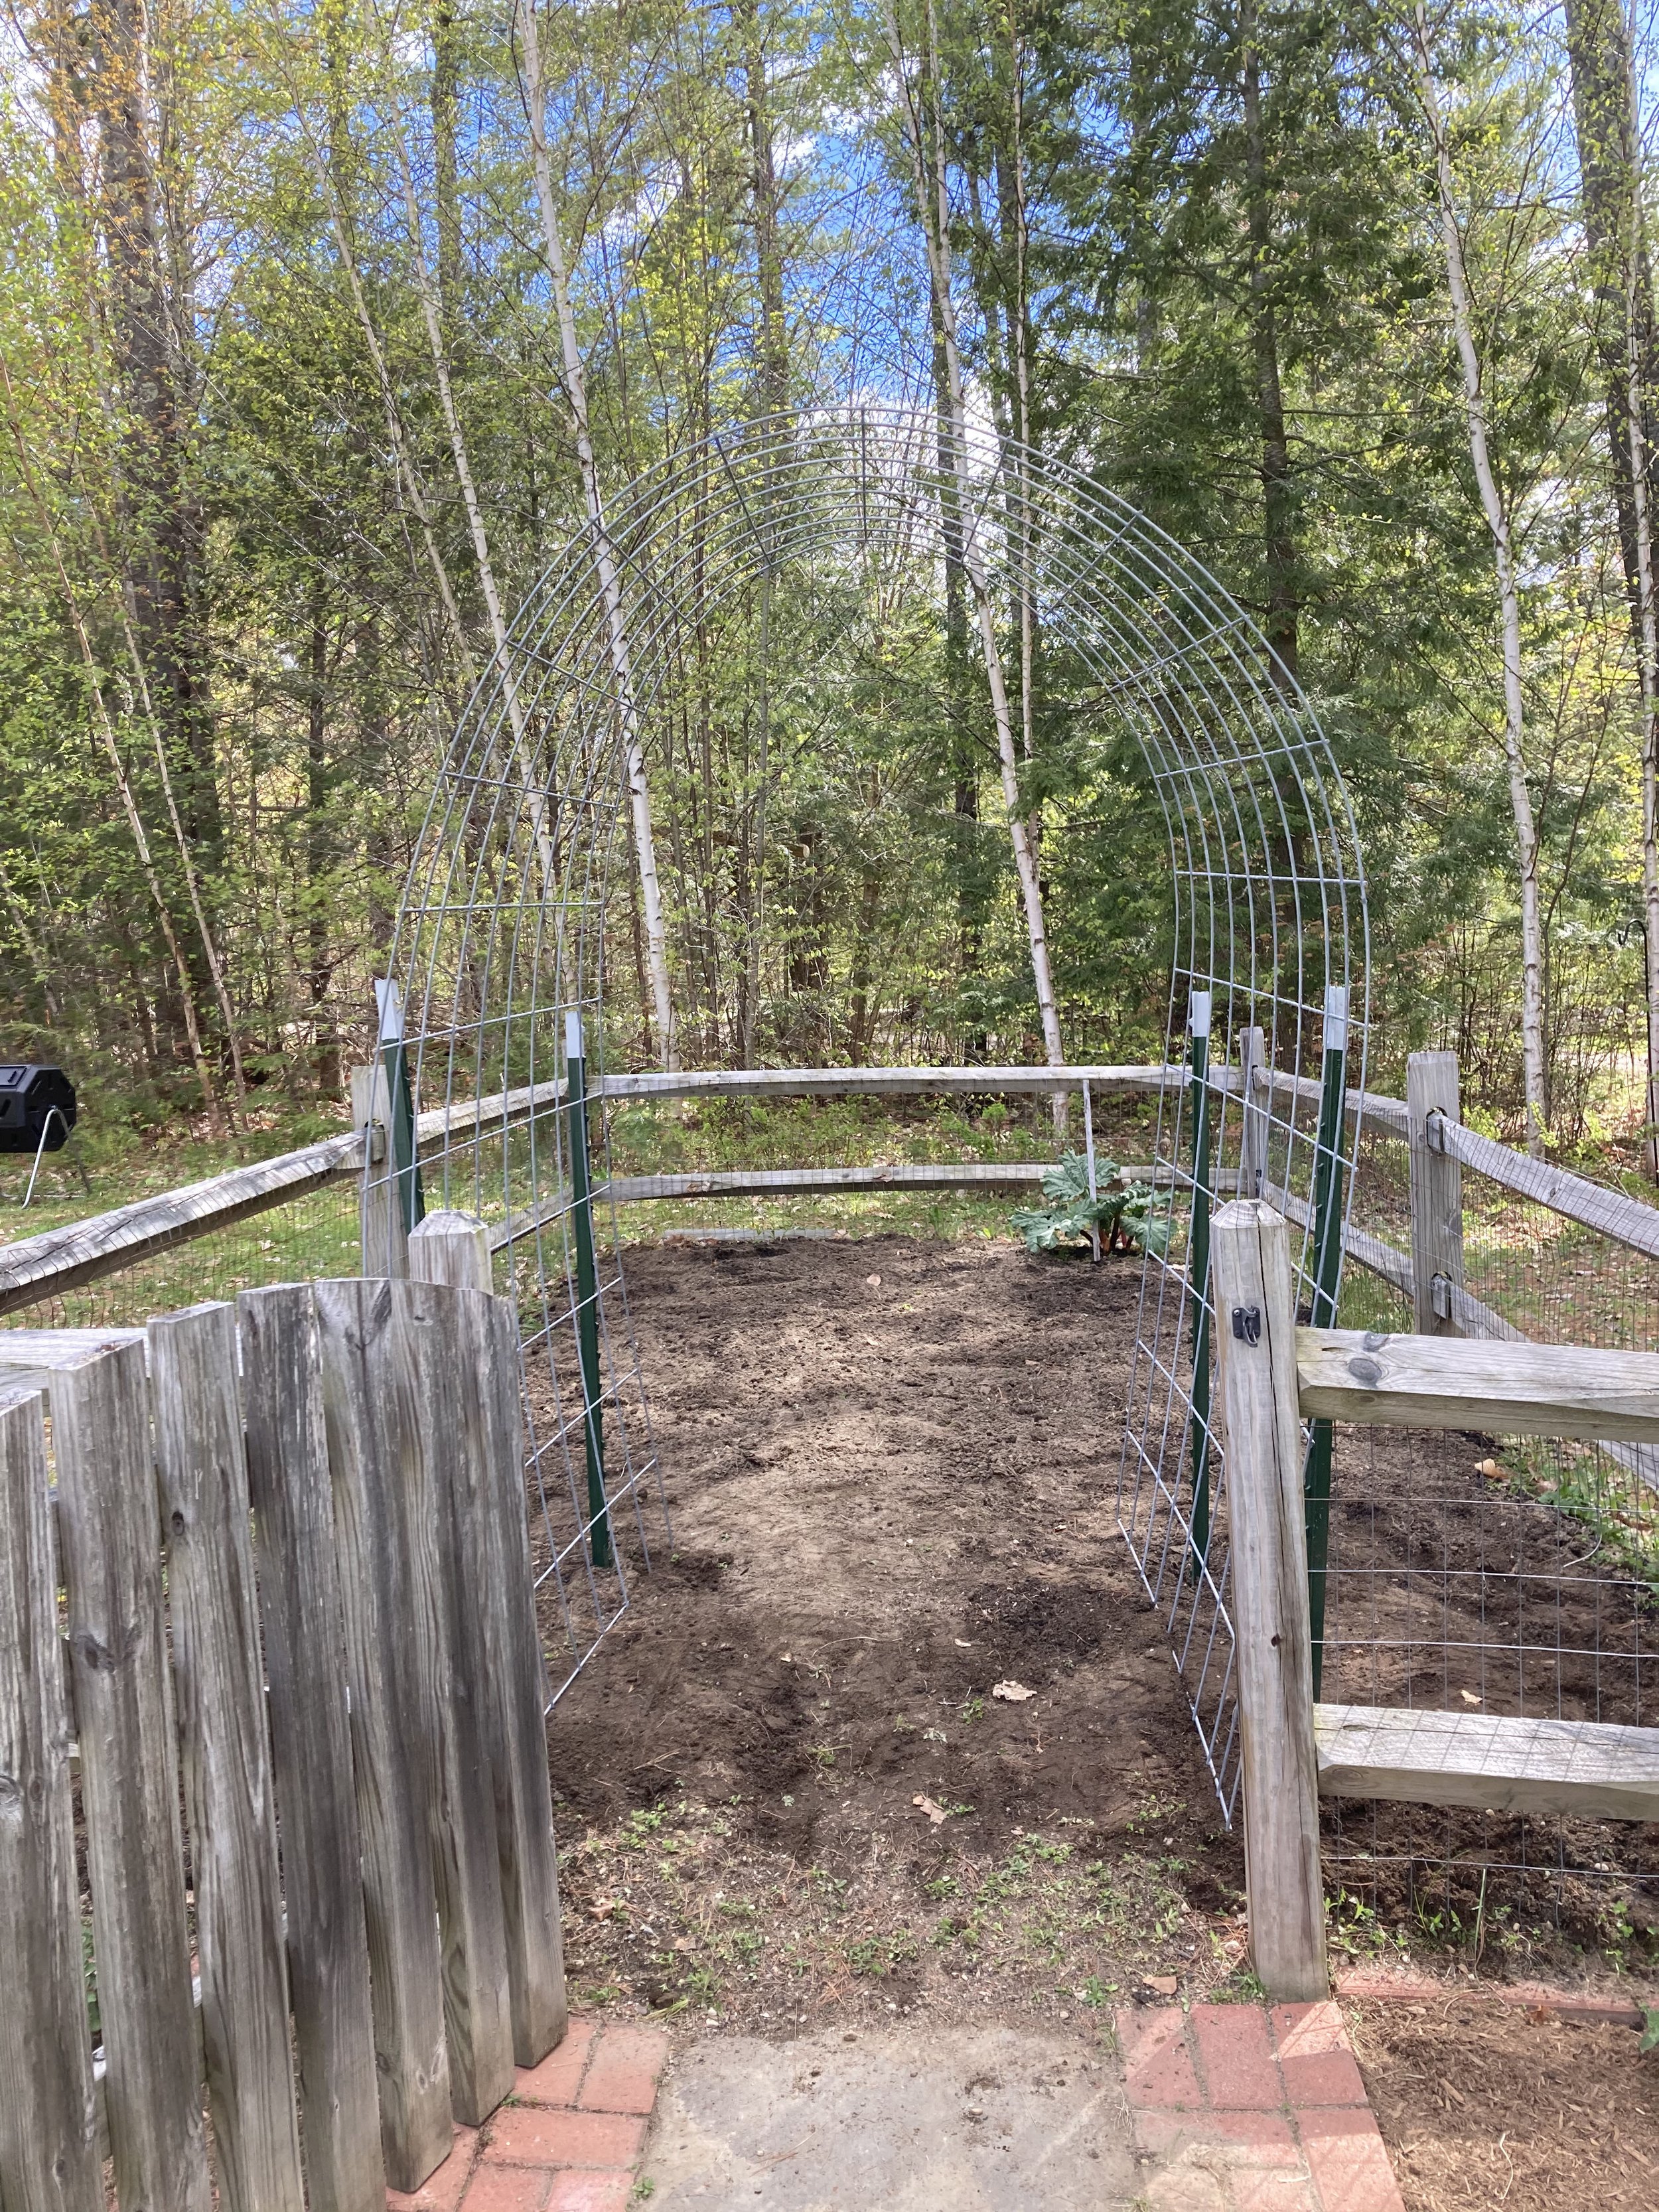
Next gently bend the cattle panel into a “rainbow” and set it inside the square you made. (Next year we might move our t-posts out a little wider to get a more gentle and less-tall arch, but this worked fine for us too as-is.)
Once you get it in place, secure it with hose clamps, heavy duty wire, or some rope so it stays in place.
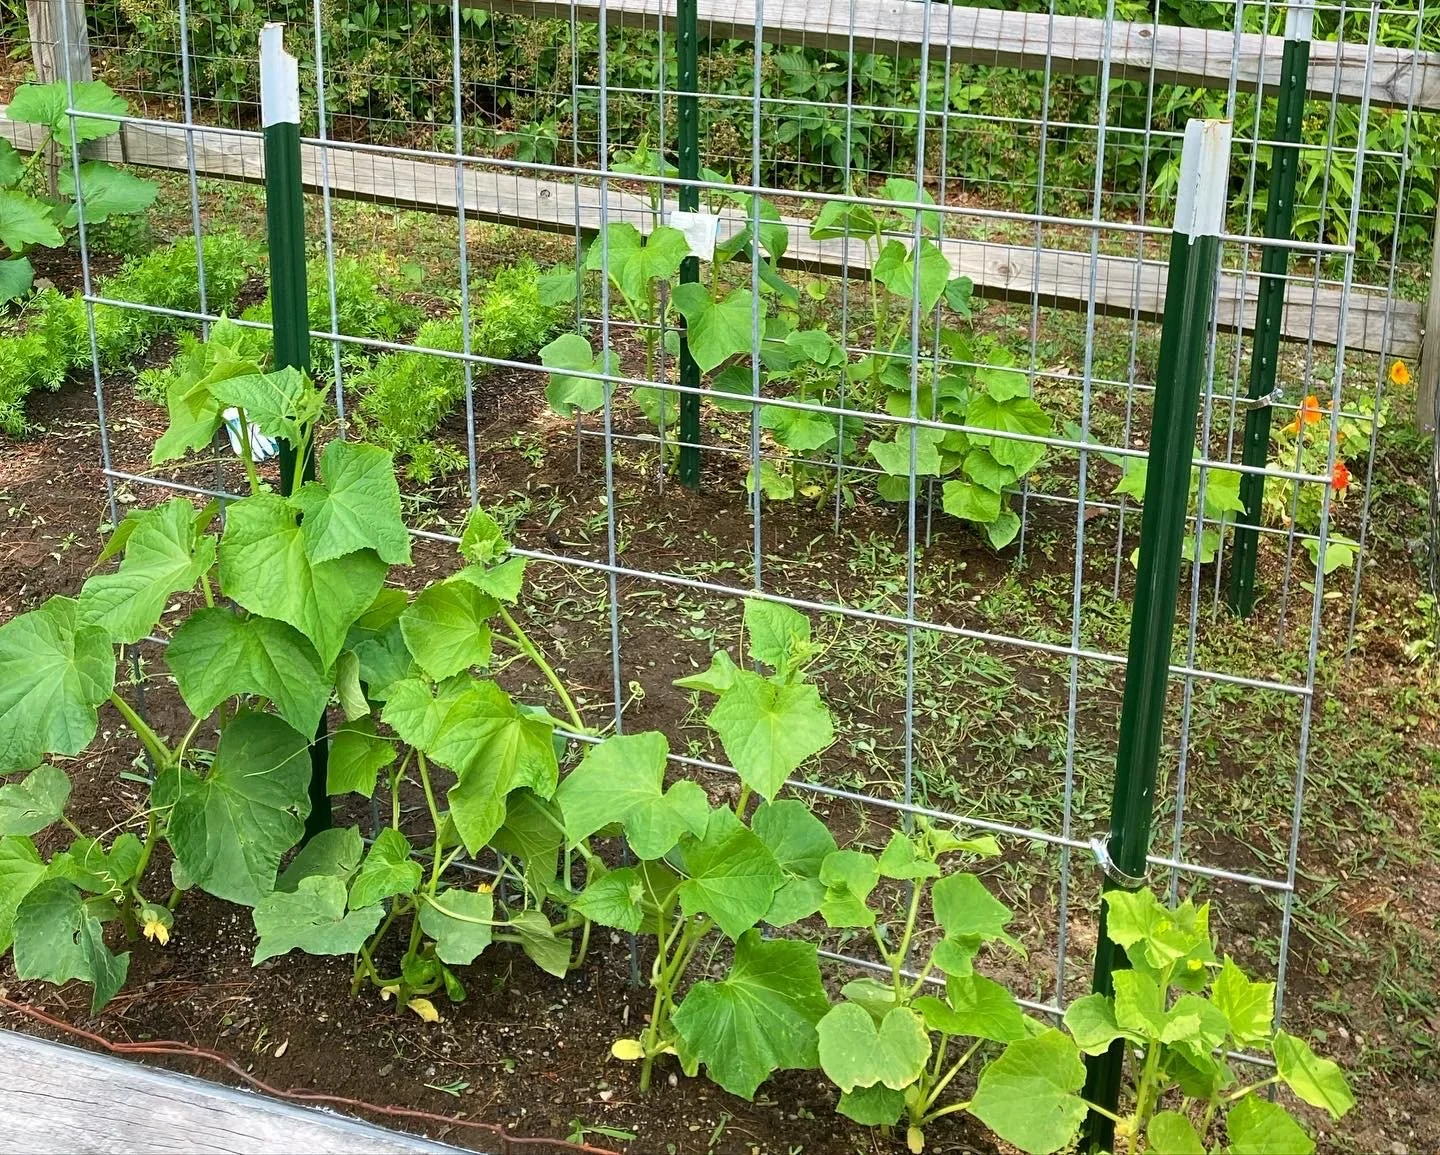
Now you can plant! We planted ours with vining cucumbers, but you could plant just about any vining plant on these - including peas, squash, ornamental gourds, flowers, etc.
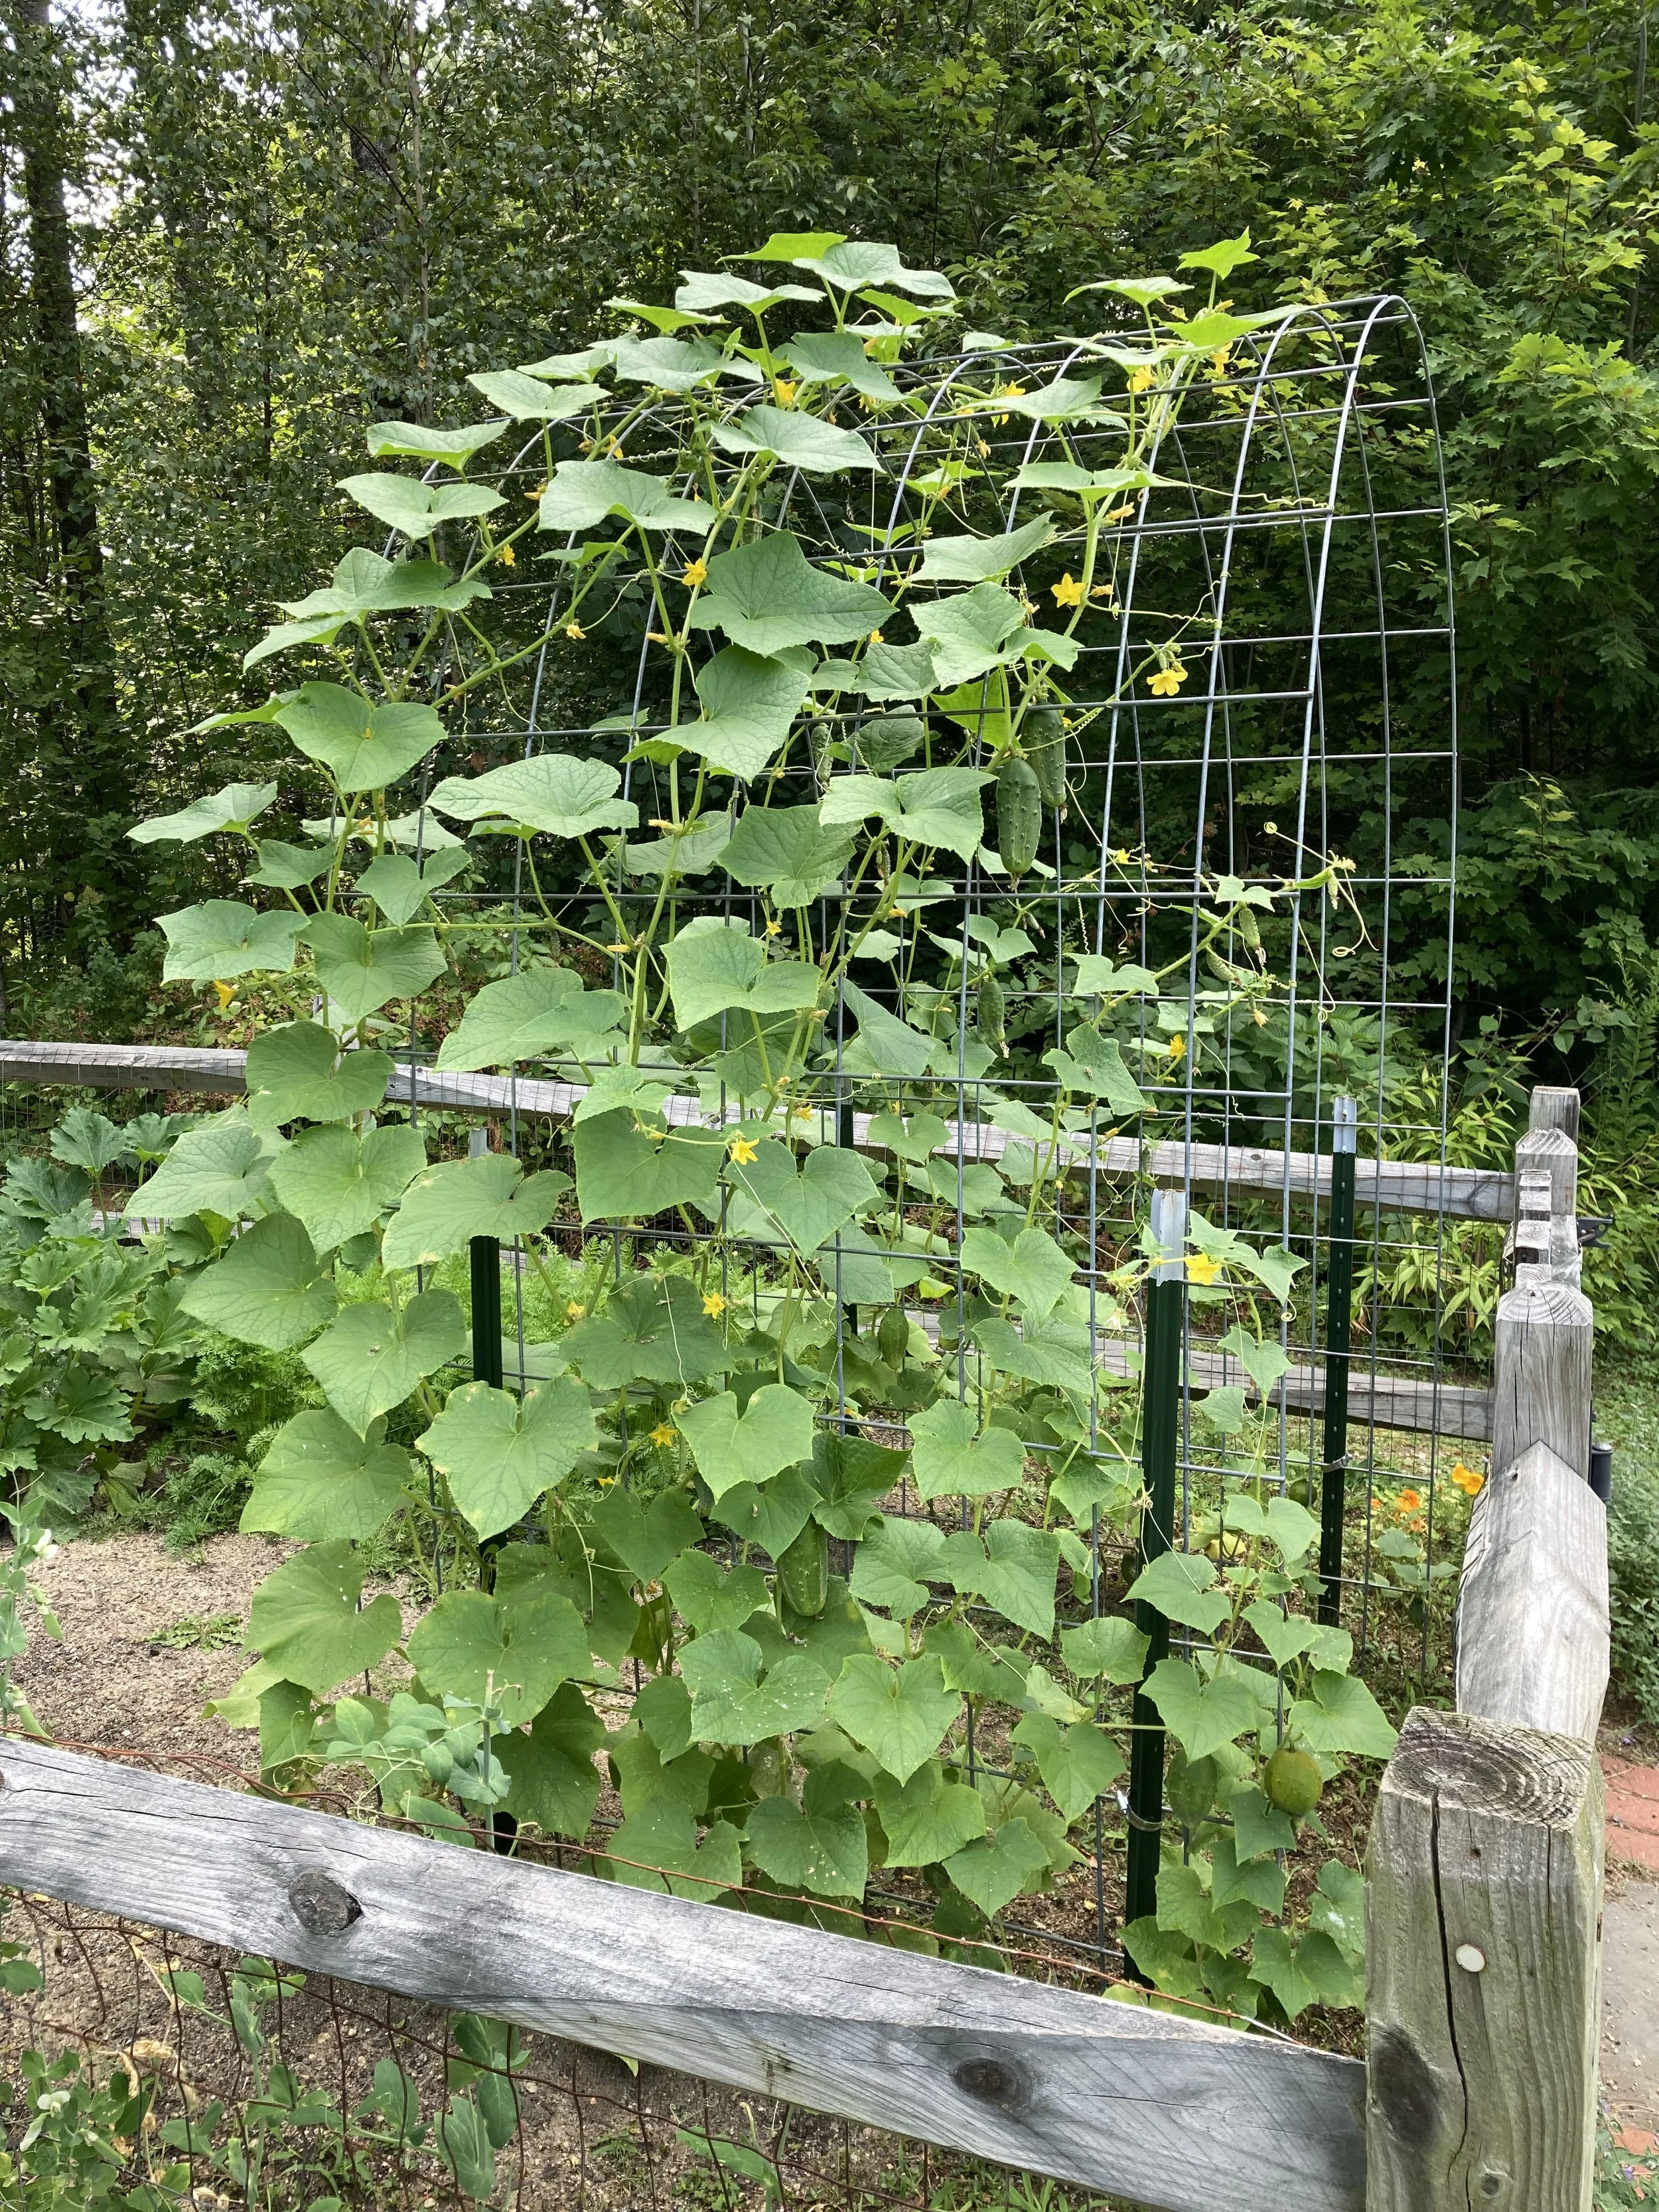
The vines do a great job climbing the arch on their own, but it’s a good idea to check them daily and gently guide the vines where you want them. There’s always a rogue vine that will try to go the other way! They will especially need some help being trained to follow along the top of the arch since their natural inclination will be to continue growing straight up rather than bending around the curve at the top.
And that’s it! Overall it was a very easy project and one we will definitely continue with in the future. I also noticed a huge benefit for our pollinators too - the bees were able to reach the flowers easily and we had a bumper crop of cucumbers this year. They were also very easy to pick hanging down from the arch.
Good luck on your cattle panel trellis adventure!
From earlier in the season, before the vines reached the top.