Two Minute Garage Door Makeover - No Tools Needed!

A few years ago we built a detached garage on our property which we nicknamed “the barn.” We were on a tight budget when we had it built so we kept everything very basic - basic windows, basic doors, etc. Now that we’ve lived with it for a few years we’re slowly upgrading what we can with easy and cheap DIYs, like this two minute garage door makeover - no tools needed! | This post contains affiliate links |

Two Minute Garage Door Makeover - No Tools Needed!
Garage Door Makeover - Before

The front of our barn just looked so plain and boring... it definitely needed "something" to give it more character and the basic builder-grade garage door just wasn't cutting it. One day while I was on Amazon I came across these magnetic faux hinges and handles with amazing reviews and thought that was perfect!

To install them I wiped down the garage door real quick first to remove any dirt and then just stuck the hinges to the door right from the box. There are several magnets on the back of each item so they’re easy to stick on and reposition as needed.

Garage Door Makeover - After

The faux hinges and handles are made from thick plastic so they won’t rust - but they certainly don’t look plastic! Even up close they have a lot of texture and really look like forged metal. The handles even fooled my kids and they totally thought they were real! And if you want to keep your doors more simple you could easily just put the hinges up or just the handles and leave it at that.

This quick addition to our plain garage door really has made a difference in making our “barn” look more finished and giving it better curb appeal. Hopefully next year we’ll get the driveway paved up to it and add some landscaping and then it really will be done.

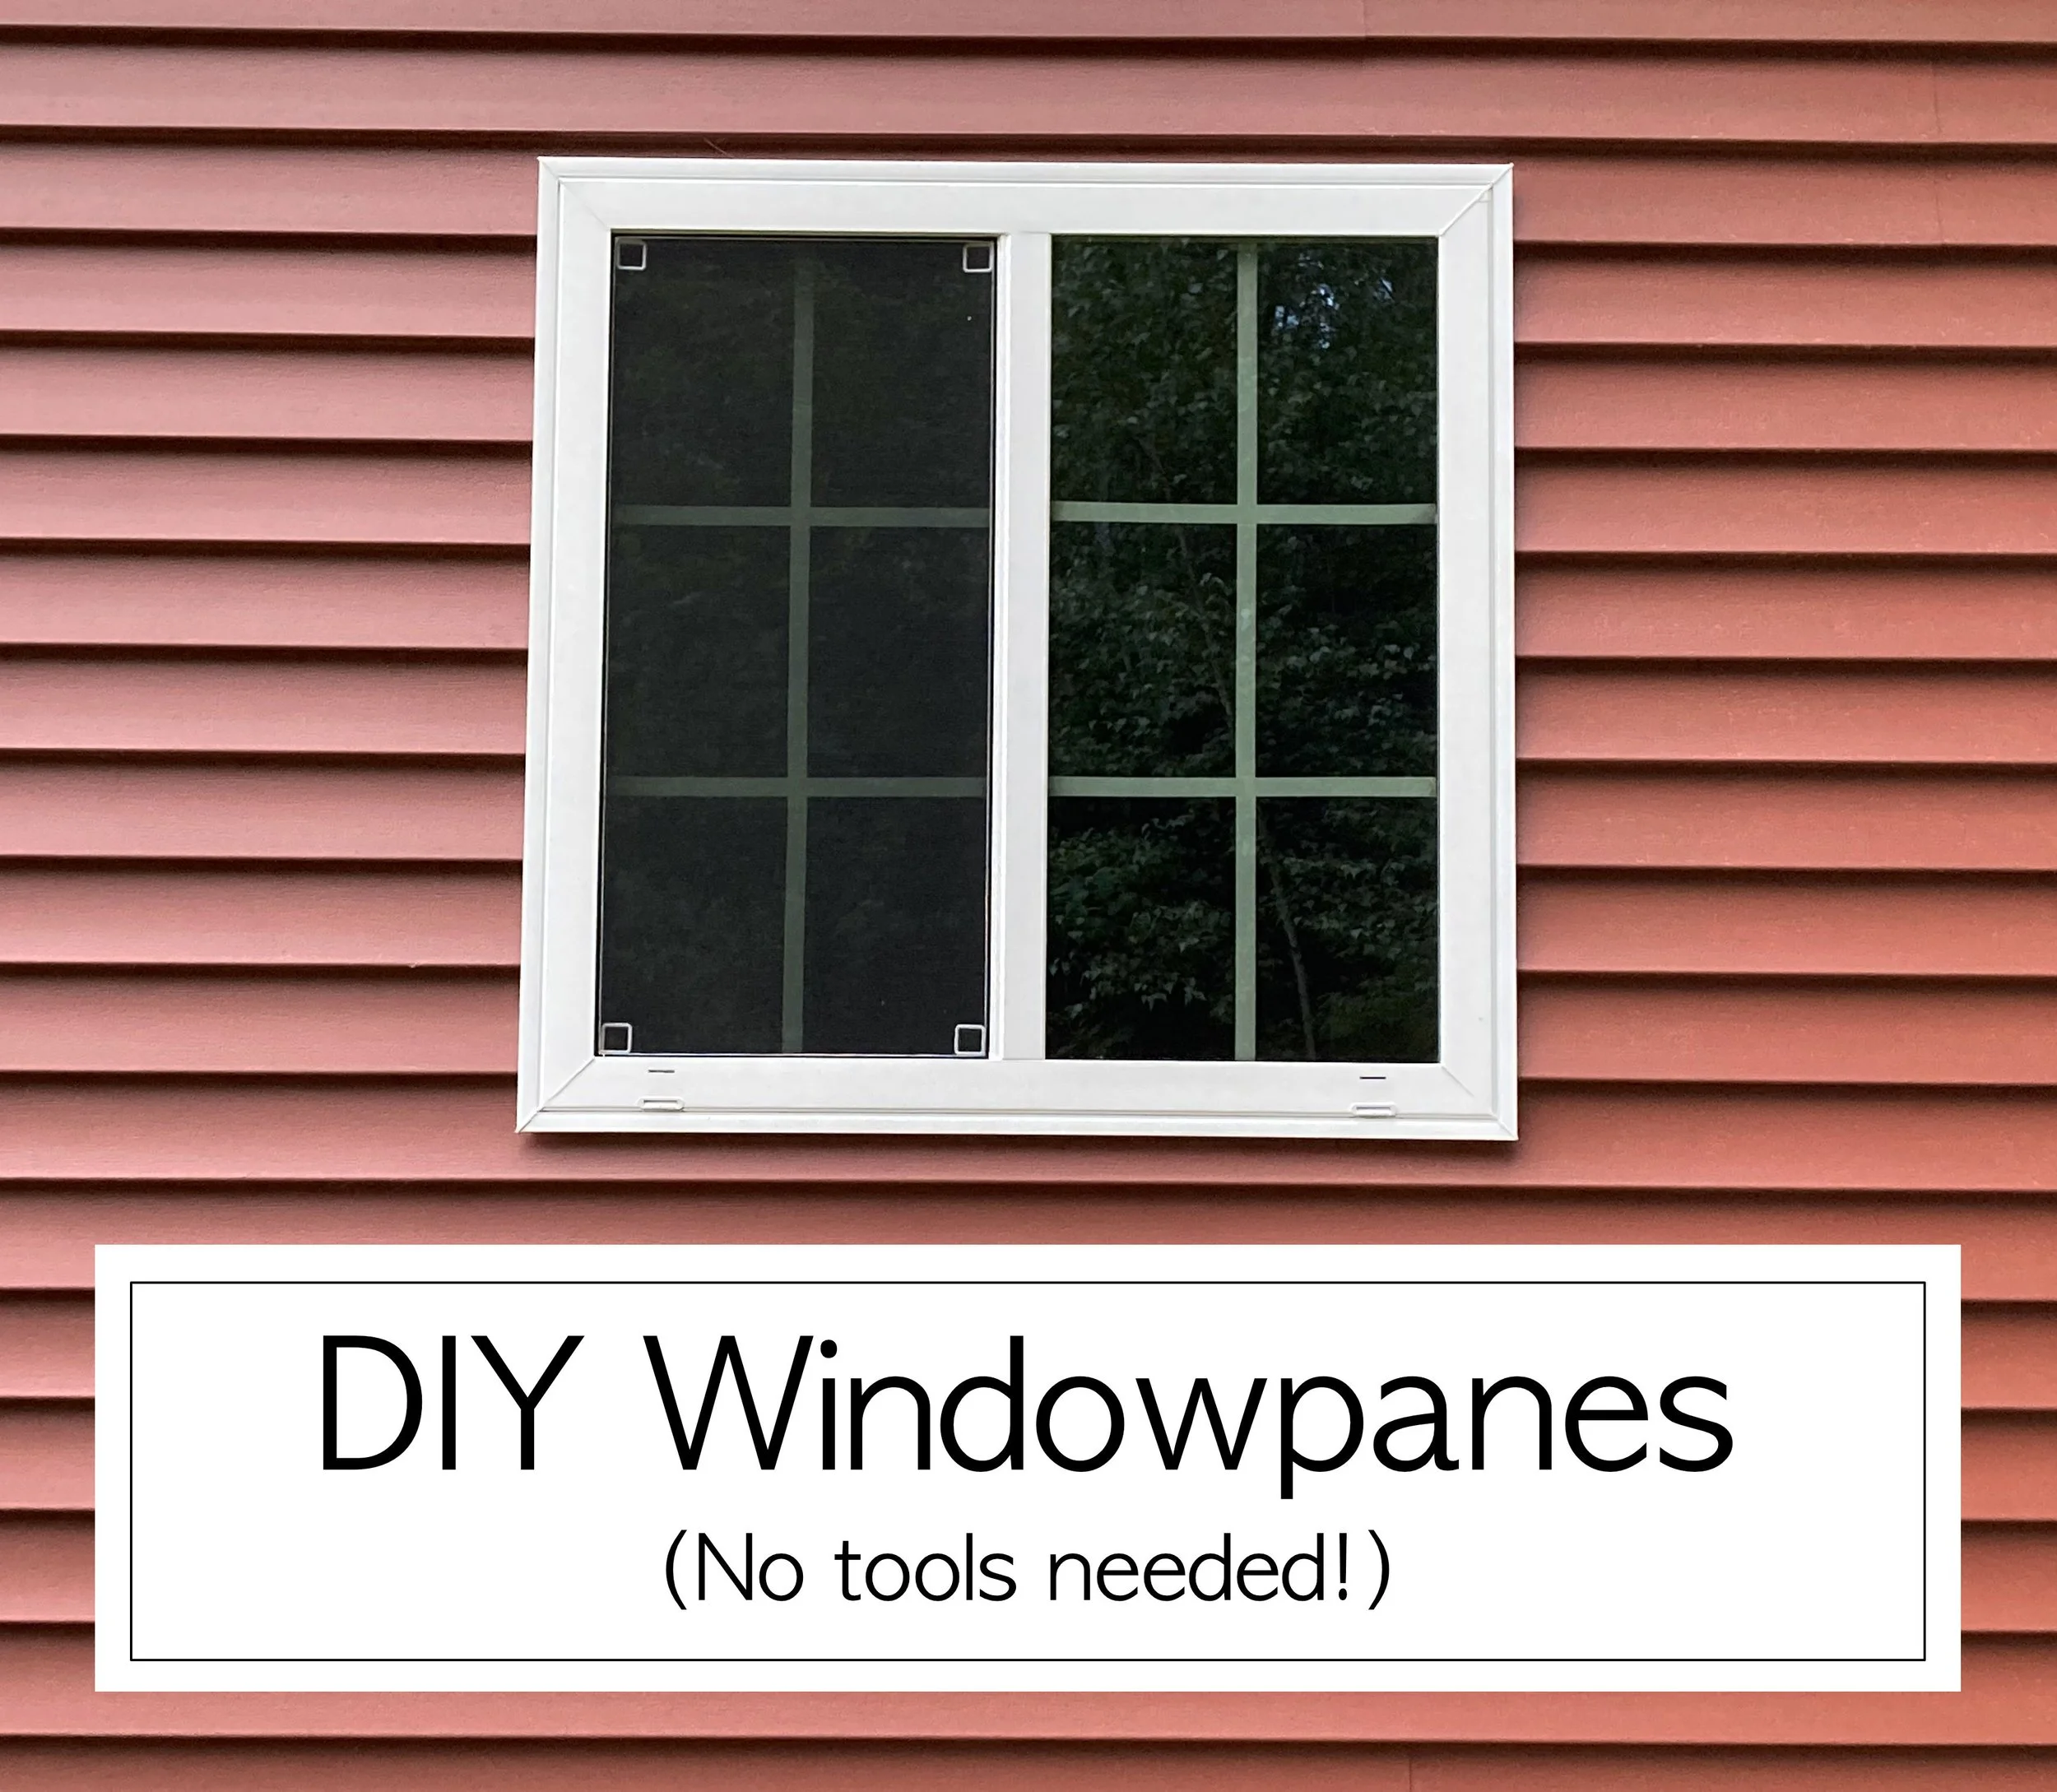
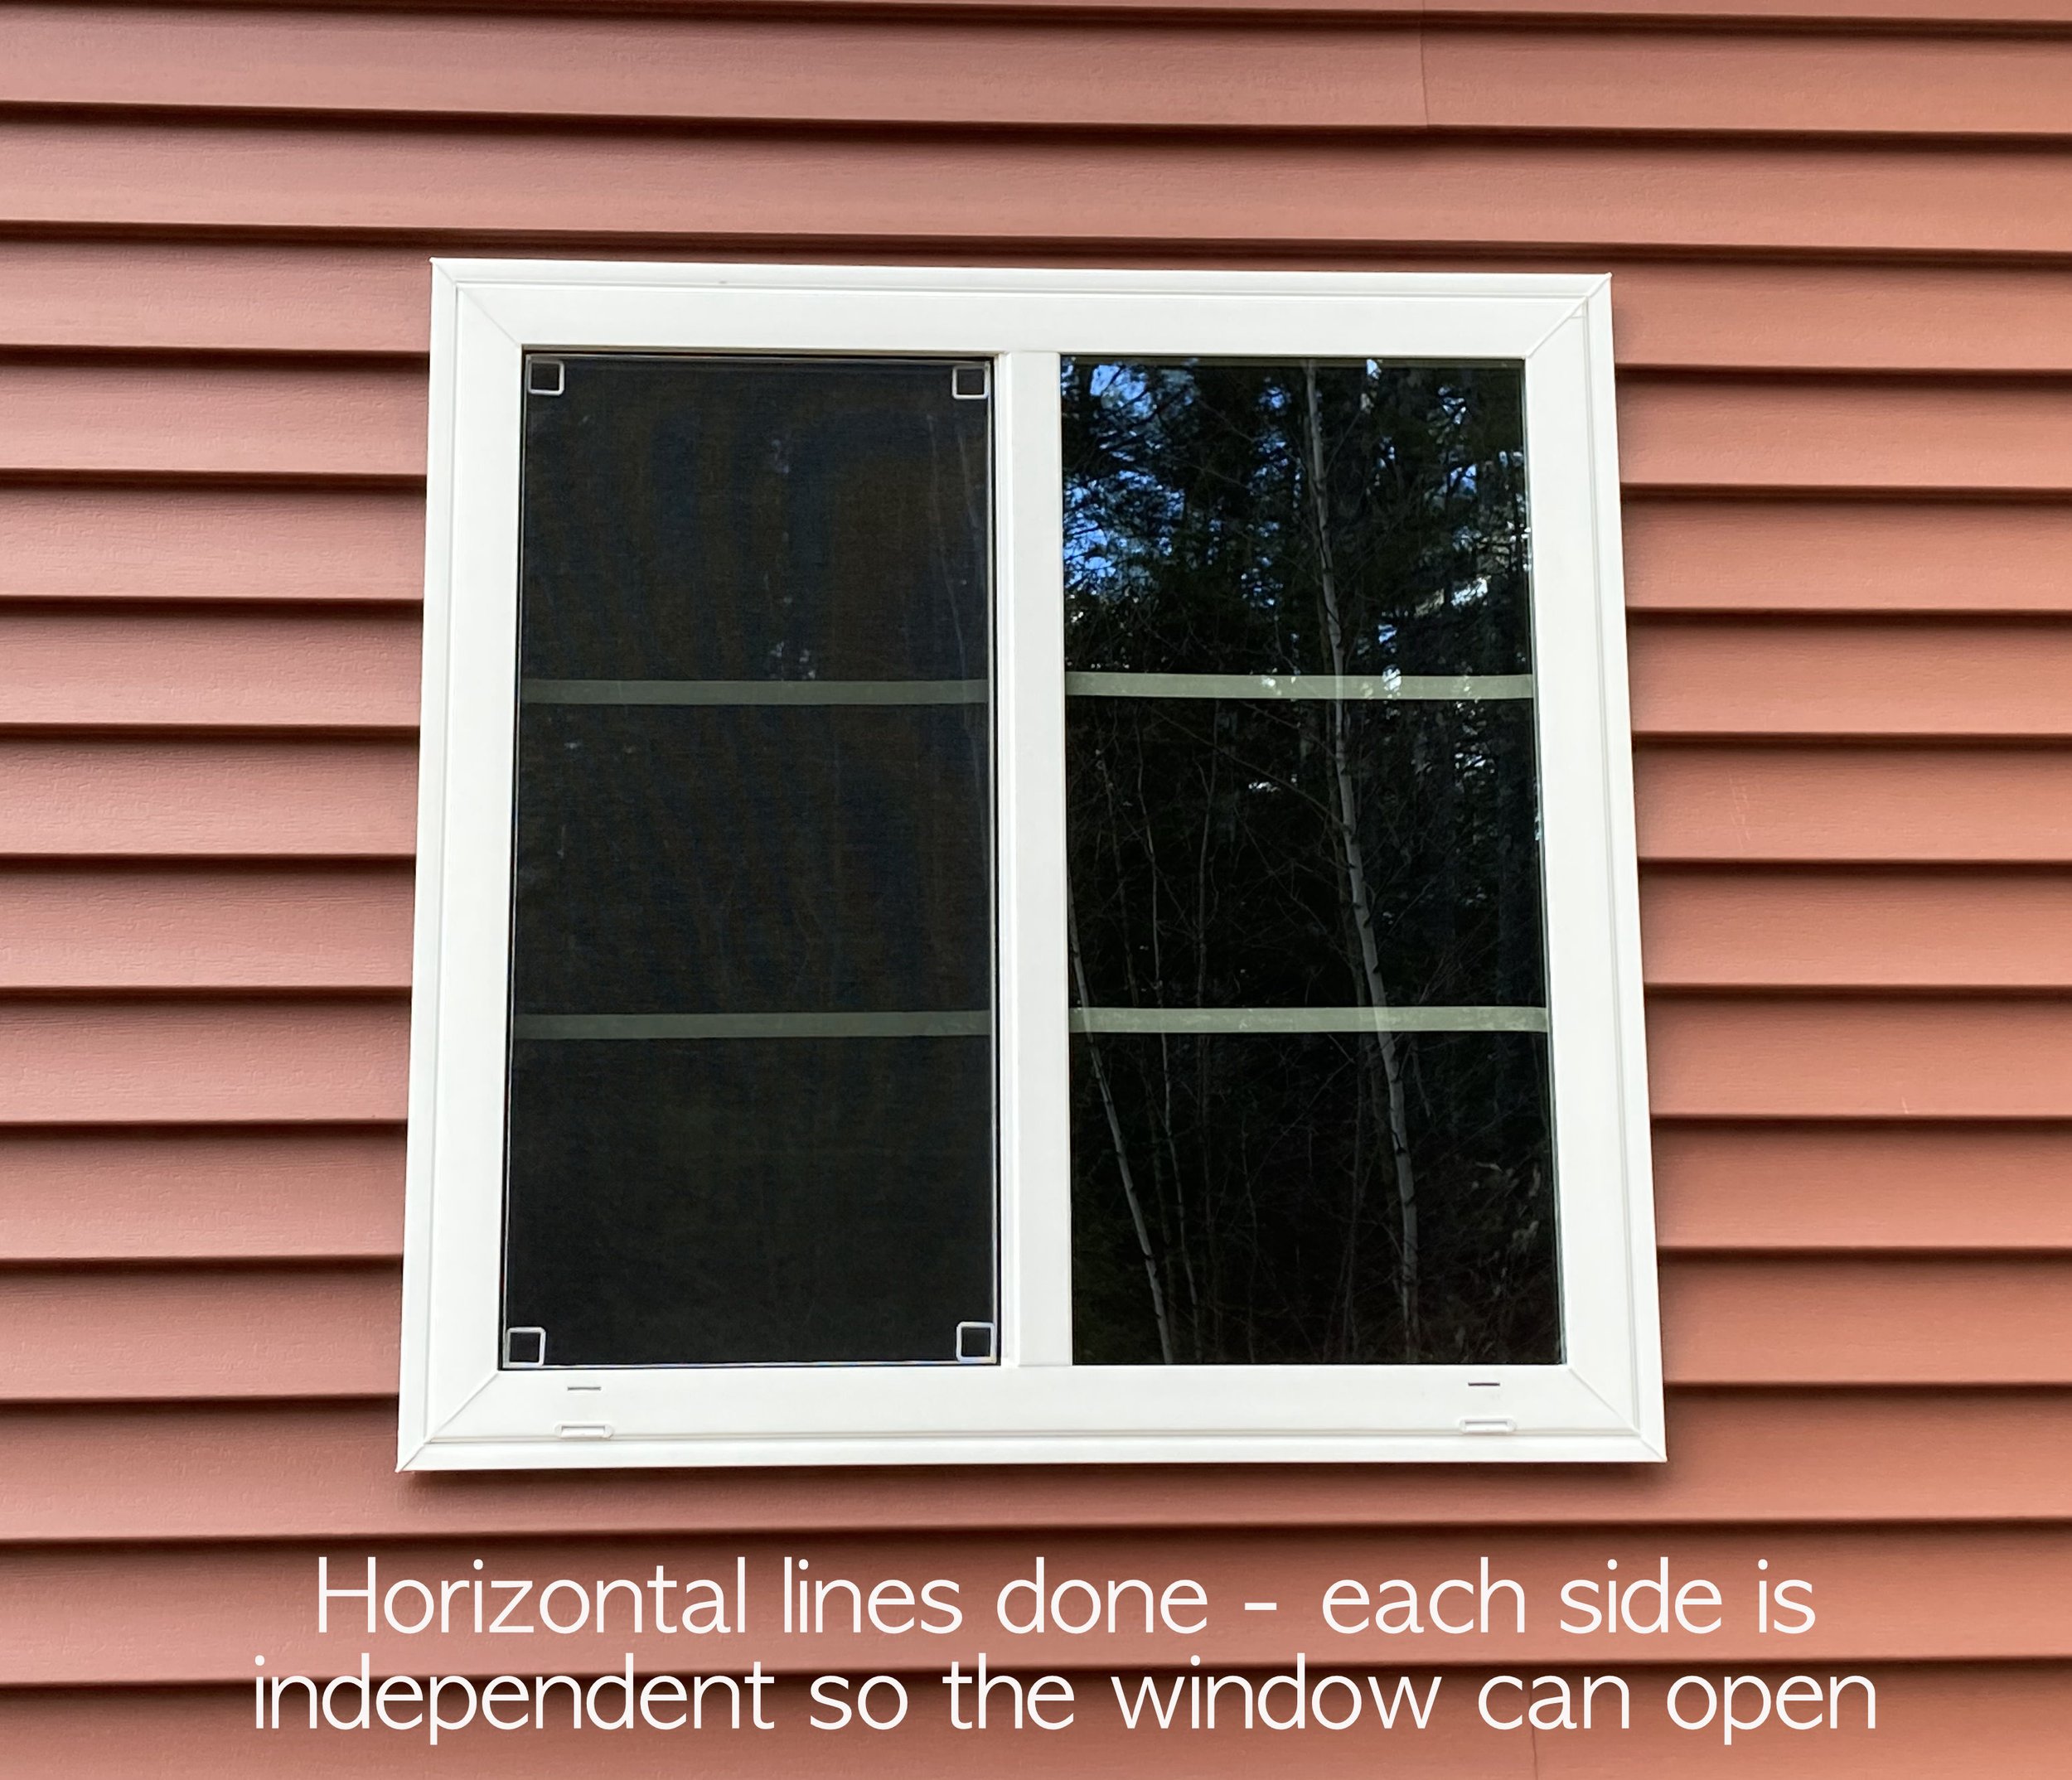
Looking for more cheap and easy DIY’s? See our previous Blog Post on how I added “window panes” to our basic builder-grade windows and it’s made such a difference. They’re still up years later and look as good as the day I first put them up.

KEEP UP WITH BIRCH LANDING HOME
|  Etsy  |  Facebook  |  Instagram  |  Pinterest  |  Bloglovin'  |  Hometalk  |

Easy and Cheap DIY Windowpanes - No Tools Needed!

This past fall we had a detached garage built on our property. Being what construction costs are these days we went with basic vinyl windows with no window panes since it was cheaper. We thought “Meh, it’s just a garage - it doesn’t have to match our house perfectly.” But after the garage was done we realized it really was missing something with the basic plain windows, and adding panes was just what it needed. | This post contains affiliate links |

DIY Windowpanes - No Tools Needed!
White Electrical Tape and Scissors to make Windowpanes

I considered a bunch of different ways to make the panes, including using thin scraps of wood painted and set within the window frame on the inside - but all of that was pretty labor-intensive. In the end I realized using thin strips of vinyl or tape would probably be the easiest - and so that’s what I did!

Using white electrical tape ended up being the perfect solution in our situation - it was to be used in a little-used area, it was the right width, and it was the right color.

Materials:

  • white electrical tape (though if your window sashes are black or a different color you can buy different colored tape to match)
  • scissors
  • tape measure
Window Before

How-To:

Marking where the lines will go on the window edge

To apply, I first washed and dried the windows well. Then I measured out how to divide the window in an aesthetically pleasing way. For the small windows I did 4 panes across and 3 panes down, and for the big window (not pictured) I ended up doing 4 panes across and 4 panes down.

I measured out my spacing and then made small marks with a pencil on the edge of the window where I was going to place my tape lines, then carefully pulled the tape across the window (I applied the tape on the inside of the window). I did the shorter, horizontal runs of tape first because I found them to be easier and help keep the longer, vertical runs straighter since it was easier to line them up straight with those horizontal reference points.

Horizontal Lines done

When pulling your tape lines make sure to go slow and pull the tape out straight. Electrical tape is rather stretchy and it’s easy to distort the lines and make them wonky. Taking your time is key and don’t be discouraged if you have to redo some of the lines! I had to redo a bunch of mine, especially at the beginning while I was getting the hang of it.

Window After - DIY Windowpanes

TA-DA! In just a short amount of time you now have easy and cheap windowpanes, and the best part was no tools were needed. The style windowpane I tried to mimic was “colonial” in order to match our house, but if you wanted to get fancy you could try laying out your lines in a different style (diamond, prairie, etc).

DISCLAIMER: Please note that the electrical tape I used for this project does have a Prop 65 warning on the package. You may want to do your own research regarding this. We used it since it was a non-living area in a detached garage. I also made sure to wash my hands well after handling it. Use at own risk.


Looking for more cheap and easy DIYs? Check out our blog post on how we gave our garage door a makeover in just minutes with no tools needed!


KEEP UP WITH BIRCH LANDING HOME
|  Etsy  |  Facebook  |  Instagram  |  Pinterest  |  Bloglovin'  |  Hometalk  |

DIY Teacup or Dish Bird Feeder

You might remember a previous post where I reused a repaired coffee mug as an herb planter in the kitchen.  Well this year I decided to transform that mug one more time into a little bird feeder for a focal point in the flower garden.  

DIY Teacup or Dish Bird Feeder
IMG_1642.JPG

Supplies & How-to:   

The supply list really couldn't be more simple - all you need is a mug, bowl, or plate, a wooden dowel, a rubber cap, and some super glue!  That's it!  

I had my husband paint the wooden dowel with a couple coats of white outdoor paint first (normally I would have painted it, but the outdoor paint isn't recommended to be used by pregnant women).  I wanted it painted to give a bit more of a finished look and to help make sure the dowel lasts longer outdoors.  

IMG_2348.JPG

Then with a little bit of Super Glue, I attached the rubber cap to the bottom of the ceramic mug.

By having the mug be removable from the dowel, you can easily pound the dowel sturdily into the ground with a small mallet or hammer then add the feeder once the dowel is in place.  It also makes it easy to clean out the feeder regularly.  

IMG_2351.JPG

Since we've had bears frequent our neighborhood lately, I will just be filling the mug with water for now for birds and butterflies to drink from.  Once the bears go into hibernation again I will be able to safely fill it with bird seed for our feathered friends.  

Overall I'm happy with how this simple project came out - it adds the perfect touch to our flower bed!  

IMG_2354.JPG

KEEP UP WITH BIRCH LANDING HOME
|  Etsy  |  Facebook  |  Instagram  |  Pinterest  |  Bloglovin'  |  Hometalk  |

Easy No-Hardware Valance for Blinds

Wooden blinds are a great window treatment option, but finishing them off can be tricky, especially if you don't want to hang curtains too.  Today I'm sharing my easy, no hardware-needed solution for dressing up the blinds.  

IMG_9299.JPG

All you need is a thin piece of wood or trim (about 1/4" thick) painted to match your blinds and adhesive velcro - that's it!  I cut down our trim board myself, but if you don't have a saw you could ask your hardware store to cut it to the width of your blinds when you purchase it.  

For velcro I used Scotch Indoor Velcro Squares.  They have a 3 lb weight limit which is more than enough needed for our project, but I made sure to use three velcro tabs per window for a secure hold.

IMG_9298.JPG

To hang, I just put the adhesive velcro tabs along the top assembly of the blinds and pressed the trim board on top securely.  That's it!  


This makes for a quick and professional finish to the blinds but still allows you to easily take it down to access the mounts for the blinds for window maintenance and cleaning.  

KEEP UP WITH BIRCH LANDING HOME
|  Etsy  |  Facebook  |  Instagram  |  Pinterest  |  Bloglovin'  |  Hometalk  |