Showing posts with label Baked Texture Powders. Show all posts

Saturday, May 25, 2019

Saturday Showcase - A Layered Tag with Graphic 45's Bloom Collection

Happy Saturday and welcome to The Frilly and Funkie Saturday Showcase! Maggi here with you to share a tutorial as well as some of my favorite products available at The Funkie Junkie Boutique.  I want to show you Graphic 45's recently released Bloom collection and how to make a really pretty tag that is also a card using different products, layers, shapes, and flowers, of course!


The Process

I'm using a large ivory Graphic 45 tag. I love the shape of these tags as they are just a bit wider than many tags of a similar size. I also love the fact that Graphic 45 has a die that makes a perfect die-cut to fit onto the tag. In this photo the tag is in the center and the front and back pieces are on either side. I'm using the gorgeous Bloom collection available at The Funkie Junkie Boutique. Lots of Graphic 45 products at the Funkie Junkie, do stop and check it out!

Step 1:
To begin, select your tag (you can make this whatever size you like) and cut a front and back for the tag.  Set these aside for a moment and go to Step 2.


Step 2:
Select some lace that would look nice with your tag. I've used some Venise Lace. The Funkie Junkie Boutique has several laces that would work great for this application.

After gluing the lace to the sides of the tag, glue a piece of cardboard that is about the same thickness as the lace down the center. This keeps the tag level and prevents the tag from dipping inward. Now glue the front cover to the tag.

Cut a shape for the center of the tag. Circles and ovals usually work nicely. I've used a scalloped die-cut and popped it up with cardboard. I want my tags to have lots of dimension. Of course, you can use dimensional foam but I like to use cardboard when I'm popping up something as large as this circle. Be sure that whatever you use, does not peek out from the tags on the side as you want the back of the tag to have a completely finished look.


Step 3:
Fussy cut some flowers and tuck just the edge under the circle. Use dimensional foam to pop up the blooms and leaves. Use different heights when popping this up.


Step 4:
Now for one of my favorite techniques! I'm using a chipboard frame, if you don't have one, you can die-cut a frame or use a purchased frame like some of the Tim Holtz Baseboard Frames. Coat the frame with embossing ink and sprinkle with Emerald Creek's Allure Powder - Soft Fallen Snow. Heat and after it cools, randomly dab embossing ink on the chippy and sprinkle with Seth Apter's Baked Velvet - Dusk by Emerald Creek. I love the mottled effect. Adhere the chippy to the tag. Add a sentiment of your choice. I chose chipboard words that I embossed with detail embossing powder. (I didn't think the thick texture of the Allure powder would work well on the small letters.)


Here's a closeup where you can see the thick texture of the Soft Fallen Snow embossing powder.


Step 5:
Turn the tag over and adhere the back piece cut in step 1. Select a large horizontal ephemera card and fold in half. Chose one that has room to write a message. Most of the back sides of the ephemera cards make perfect card "insides". Then adhere a small ephemera card to the front of the larger folded card so that you have a pretty front to the card. Adhere the card to the back of the tag and now you have a card and tag all in one!  


Step 6:
Chose a chipboard piece to go at the bottom of the tag as shown in the photo. Cut some design paper to cover the back of the chipboard piece so that it looks nice from both sides. Embellish with flowers and a pretty bow.


In this photo you can see the different levels created by popping up the layers.


More closeups


Links to the products used from The Funkie Junkie Boutique;

Graphic 45 - Staples - Large Tag and Flowers Dies
Emerald Creek Allure Powder - Soft Fallen Snow - out of stock  
Try Seth Apter's Baked Texture by Emerald Creek - Blizzard for a similar look

Thanks so much for spending part of your day with me.  Give yourself a break and take some time to craft!
xxo  Maggi

Saturday, August 11, 2018

Saturday Showcase: Graphic 45 Halloween in Wonderland Mixed Media Cards with Distress Oxides, Tim Holtz 3-D Texture Fades and Seth Apter Baked Textures

Hello, Friends! It's time for another edition of Saturday Showcase. This is a wonderful opportunity for the Frilly and Funkie Team to shine a spotlight on techniques and products that can help you take your art adventures to the next level. This week, we are looking ahead to Halloween! What fun!
Most people don't connect Graphic 45 papers with mixed media techniques. But today I am going to show you how to create a really spook-tacular mixed media background using the new Distress Oxide colors from Tim Holtz along with his fabulous new 3-D Texture Fades. Distress Resist Spray and Seth Apter Baked Textures add to the mixed media mayhem. These are the mixed media backgrounds we will be creating in today's SnapGuide Tutorial.


Graphic 45's Halloween in Wonderland is their all time top selling collection. It's traditionally very hard to find. But I have good news for you! Even as I write this post, the Deluxe Collector's Edition is at the printers! You can pre-order this wonderful collection right now at The Funkie Junkie Boutique.


These top fold cards measure 5 1/4" x 7 1/4". The mixed media backgrounds take this whimsical G45 collection to a whole new place. I can't remember the last time I had so much fun playing with paper!


The background for each card started with a 4 1/2" x 6 1/2" panel of Distress Mixed Media Heavy Stock. It holds up so well to all the abuse that mixed media requires. I'm not sure another base would turn out so well.


3-D Texture Fades are amazing! I used the Mechanical folder on this card. All the details can be found in the SnapGuide tutorial at the bottom of this post.


Here's a peek at the card interior. A small slash pocket holds an ATC sized accordion folio.


The bottom pocket holds a 4 1/4" x 6 1/4" accordion fold photo folio. The colors in this collection are a fabulous match for the new Distress Oxides! I used Mustard Seed, Crushed Olive, Ripe Persimmon, Ground Espresso, and Dusty Concord in my mixed media backgrounds.


You wouldn't naturally think of using the Botanical 3-D Texture Fade on a Halloween card, but it really came out great! I used Seth Apter Vintage Beeswax and Patina Oxide Baked Textures to add some funk. Seth's Ancient Amber Baked Texture gave both of the Weathered Clock Die Cuts a ghostly hue as well.


The interior of this card has a fun flap feature on the top half.


A hidden pocket holds another ATC sized accordion folio.


And I created another accordion fold folio for the large pocket on the bottom.

To learn how I created the mixed media backgrounds, just follow the simple steps in this SnapGuide Tutorial.


I hope this post has your creative wheels turning and your fingers itching to get inky! Thanks so much for joining me!

Happy crafting,
kathy

Product Links to the Funkie Junkie Boutique


Saturday, July 28, 2018

Saturday Showcase - Emerald Creek and Seth Apter Embossing Powders

Hi everyone and welcome! Jenny here with the latest tutorial in our Frilly and Funkie 'Saturday Showcase' series. This is where a member of the Design Team gets the chance to shine a spotlight on a product or range currently stocked by The Funkie Junkie Boutique. This week's featured range comes from Emerald Creek Crafts who, amongst many other things, create gorgeous blended embossing powders. They also collaborate with other designers to create bespoke embossing lines including the Baked Texture range by Seth Apter.

I began this whole creative process by making a swatch card of the Emerald Creek embossing powders currently in my possession and quickly realised that the mix of greens, browns, golds, rusts and black coppers were very reminiscent of the beach. This fits rather well with the current Frilly and Funkie challenge which has a travel theme (details HERE). Some are original Emerald Creek ones and some are Seth's delicious Baked Texture powders and they work together effortlessly. I thought back to trips to the seaside where souvenir stores would sell weathered wooden nick-nacks covered in semi-precious stones, multi-coloured sands and other beachcomber things. And so I set about making a 'semi-precious' trinket box to show off the beauty of these gorgeous embossing powders (click on each image for a closer look);


The 'How To' Tutorial


Now I bet that looks super complicated right? But actually it's just a pile of heat embossed die cuts arranged on a weather worn look trinket box. I used Eileen Hull's Trinket Box by Sizzix but you could do this on anything from a wooden spoon to a card or even a piece of driftwood! Let's show you how.

I used the dies from Tim Holtz 'Funky Floral' sets #1 and #3 and ran each one through my Sizzix Sidekick for speed. I also recommend using Ranger's Emboss It Dabber to deliver lots of embossing ink and Ranger's Heat Tool (initially from a distance) because it is less forceful and allows the larger granules to melt into the smaller ones rather than move around.


For the largest flower use kraft card and apply two layers of Chunky Rust Baked Texture Embossing Powder. Having embossed the first layer use the dabber over the flower again and just apply a second layer of powder. The 'floss' element to this powder give the flower a beautiful fluffy textured finish.


The centre of the flower is also cut from kraft card and embossed with Emerald Creek's Oil Rubbed Bronze Embossing Powder. Only one coat is needed and once set it can be glued onto the centre of the flower.


Cut the long leaf stems from white card (though this powder is opaque when melted so you could use kraft card if preferred). Emboss with Seth Apter's Patina Oxide Baked Texture Embossing Powder.


The grass fronds definitely need cutting from white card because one coat of Seth Apter's Deep Sea Baked Texture Embossing Powder is semi-translucent and you get a gorgeous mottled deep green effect when melted.


One of my all time favourite powders, Emerald Creek's Fractured Ice Embossing Powder works amazingly over dark coloured inks, but for these branches apply onto white card to get that pale turquoise mottled effect.


Seth Apter's Ancient Amber Baked Texture Embossing Powder is also a semi-translucent powder and over kraft card produces a beautiful golden shimmer with just one coat.


Emerald Creek's Charred Gold Embossing Powder is another of my all time favourites. This is also an opaque powder and has multiple colours included (in fact it has a look of rough sand when in it's un-melted state) so cut the seed head flower from either white or kraft card and emboss with one coat of powder.


The final flower head can be cut from kraft or white card (I went with kraft) and is covered with Emerald Creek's Burnt Copper Leaves Embossing Powder which has a delicious mix of copper and gold tones.


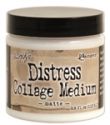
Finally cover the base of your chosen project, be it box lid, card, spoon or driftwood etc with a coat of Matte Distress Collage Medium and sprinkle with Seth Apter's Dirty Sand Baked Texture Embossing Powder. It will stick firm in place without the need for heat setting so you can achieve that matte multi-toned look of real sand.

To finish layer up the various embossed flowers and foliage. I began with the largest flowers mounted on black foam tape and added in the other elements underneath overlapping them as I went. I also added Emerald Creek Quartz Gemstones into the centre of the large flowers.

The Close Ups


I took a bunch of close ups to let you see in more detail the beauty of these gorgeous embossing powders. Remember you can click on each one for a closer look;


I'm sure you'll agree these Emerald Creek and Seth Apter Embossing Powders create wonderful effects in both their heated and un-heated states. Check out the full range available at The Funkie Junkie Boutique HERE. And I've added a full list of ingredients for this project below.

Thanks for joining me here today. Have a great weekend and remember to get creative!
Jenny xxx