Showing posts with label DT - Creative Charms. Show all posts

Wednesday, February 22, 2012

Creative Charms Inventory Clearance and Design Studio Cartridge Update


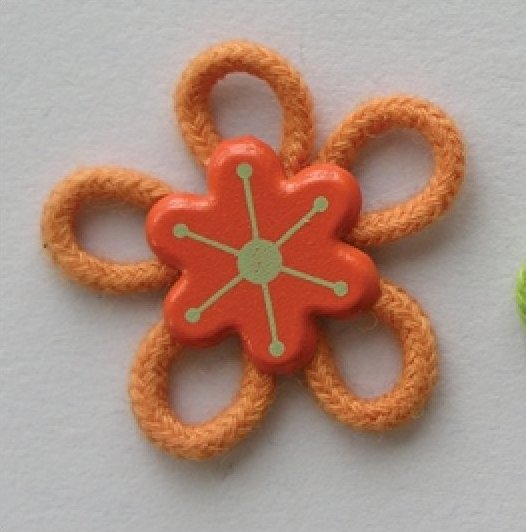
Creative Charms is having an inventory clearance sale.  The sale is starting off with the Loop d' Loop items at incredibly low prices..  You need to buy in groups of six packages for the Braided Daisy and Groovy Petal Medleys - the Fuzzy Daisy Kit can be purchased in single units.
Learn More
1.5" & 2" Flowers
4 Pieces per Package
Inventory Clearance Price - $ .50 per Package Quantities of 6 Only

6 Packages for $3.00
Learn More

The kit includes a 3 1/8" Chenille Daisy centered with a Jumbo Polka Dot Brad, a Daisy Chipboard/Stencil, 6 Chipboard Petals, and 18" Leafy Ribbon

Inventory Clearance Price - $.49 per Package
Learn More

1" & 1.5" Flowers
4 Flowers per Package
Inventory Clearance Price - $ .50 per Package Quantities of 6 Only

6 Packages for $3.00


These prices represent a huge discount and all items are offered while supplies last.  This is your last chance to stock up on your favorite Creative Charms items.

Here are some of my projects featuring these lines.  You can click on the photos to go to the original post for each project.


I layered two Groovy Petal flowers on this card.


The Fuzzy Daisy Kit includes the leafy ribbon I used on this ornament.


More Groovy Petals (with the centers exchanged to gem brads) on this card.


A braided daisy - I love the button centers!


The Fuzzy Daisy has such a nostalgic look - it makes me think of chenille bedspreads and robes.


Groovy Petals come in such cute bright colors!


I added a gem sticker to the center of this Groovy Petal flower for added sparkle.


Two sizes and colors of the Braided Daisy Medley on this woven front "quilt" card.


Another Groovy Petal on this door hanger sign.


The five petal shapes work nicely with lots of Cricut cuts.

Happy Shopping!

Update for Cricut Design Studio available

The February Cartridges have been added to Design Studio.  To update your program, click HERE to go to the update page on the Cricut.com site.  Scroll down to the Cartridge Content Update section and click the download button.


The cartridges to be added are listed above.  The Creative Memories Divine Wedding cartridge is full of beautiful wedding images and great fonts and monograms.  I have had some emails asking about purchasing this cartridge.  It will be available starting on March 1st on my CM Personal Website - it should be on This Page with the other cartridges.


This window will pop up and show the update as V120216.  Be sure to SAVE the update file and then run it so it will install correctly.  If you have Design Studio open when you install the update, you will need to close and reopen the program to see the new cartridges.


When you open the downloaded update file, you will see this screen.  Just click to install the update.  You will have to give permission for the update to install on a separate screen.

Thanks for all of the kind comments about my first oil painting.  It really was almost like a "paint-by-numbers" class since we were following some very specific directions.  I did enjoy it and I may try to do some more painting...someday... 

I'll be busy today getting packed for my trip.  Apparently not only 'cute shoes" but also sparkly evening outfits are expected at this event!  I fly very early tomorrow morning and will try to have posts scheduled for the days that I am away.  I might have a chance to post a few photos while I am gone but they may have to wait until I get back.

I hope you have a great Wednesday. 

.Subscribe to Capadia Designs 

Share/Bookmark

Tuesday, January 17, 2012

Valentine Cards with Creative Charms


Today is my day to post my projects for Creative Charms.  The Design Team has been creating lots of great projects - if you haven't checked out the Creative Charms blog lately be sure to hop over to see what is new.


I made two cards that will be perfect for Valentine's Day.  This is the more formal card with a medallion created with Spellbinder's dies.  I'll give the details for this card to day and post more about the second card tomorrow.


I was able to pick up this set of dies with a 50% off coupon last week.  There are four circle dies with heart details around the edges.  The larger two dies cut tiny hearts on the edge of the circle and the two small dies emboss hearts on the edge of the circle.


I cut the circles using Core'dinations gemstone cardstock and found that the small pieces stayed lodged in the die.  This might not happen with lighter weight cardstock.


The dies are made with holes that allow you to poke out the small shapes that are stuck after the cut.  A pair of tweezers or another pointed tool will help you to quickly pop out these pieces.


If you pop out the outer ring of shapes first, you will have a nice little group of 20 tiny hearts to use for another project.  You could also save the triangle shapes to use for confetti in a shaker card.


Here is one of the smaller circles with the hearts embossed  (they are really too small to be done as cuts).


I added pink Gradient Pearl Stickers in alternating sizes to the outer ring of hearts on the largest circle.


The smaller ring is accented with the smallest clear Gradient Gem Stickers.


I used lots of foam dots to raise the large medallion from the card front.


The second circle is also raised with foam circles and a red Vintage Velvet Poppy is fastened in the center.  I pierced a hole in the center with a sharp tool before inserting the brad of the flower.


The base card is white cardstock cut at 5 x 10 inches for a 5 x 5 inch square card.  The red layer is cut at 4 3/4 x 4 3/4 inches and the heart patterned paper (from K and Company) is cut at 4 1/2 x 4 1/2 inches.


You can add a verse or sentiment to the inside of the card and leave the front of the card as is - it could even be framed or used in a shadowbox after the holiday.


This is the second card I made - I'll post the measurements and directions tomorrow.  Do you recognize the patterned paper?


It snowed again last night but the temperature should be in the 40's today so it won't last.  In a little over a week I'll be getting on a plane to go to Germany.  I hope all of the snow will stay away - there is nothing worse than being stuck in an airport with a weather delay!

Have you started on Valentine's Day cards yet?  Do you make a lot or just a few for the very special people in your life?

Have a wonderful crafty day! 


Subscribe to Capadia Designs 

Share/Bookmark

Thursday, December 29, 2011

Winter Decorations with Creative Charms


Today is my day to post on the Creative Charms blog.  I decided to do a Winter project and avoid the overload of red and green that many of us are feeling by now.  Of course, I love blue and white so it was easy to talk myself into this theme!


I started with the small solo shadowbox tray by 7Gypsies - I just got this in my last order from Blitsy (they have sold out of these now but the regular price is $10 so it's not too expensive even if you have to pay full price at another store).


For the backing paper in each compartment I used this stack by DCWV.  I cut the word Winter from the Cheerful Seasons Cricut cartridge in blue Dazzle cardstock, also from DCWV.


For the large top section, I added a piece of Core'dinations Core Couture glitter cardstock in white along the bottom.  I hand cut a curve to look something like a snowbank.


The rosette in the center section along the bottom was cut with the Tim Holtz rosette die with paper that I printed on the Imagine from the Heirloom cartridge.


I like the effect you get by layering gem stickers on top of other embellishments like these snowflakes.  used some snowflakes from the Winter Seasonal Medley and the Winter Seasonal Sparkles and then added Gradient Gem stickers to the centers for additional dimension and color.


Here are a few tips for working with these trays.

1.  Be sure to measure the inside dimensions of each section that you plan to "wallpaper" with some background paper.  They are usually just a bit smaller than the nominal size.  This box is supposed to have a 4 x 6 compartment and three 2 x 2 compartments.  I actually cut the paper at 5 7/8 x 3 7/8 for the large section and 1 7/8 x 1 7/8 for the small squares.

2.  The depth is nearly 3/4 of an inch so you can add lots of small dimensional items and place tiny figures or shapes on the ledges of the box.  I am going to start a box with anything I find that has the potential to fit in one of these trays.  I also used adhesive foam squares to raise some of the items within the box.

3.  You can change out the sections inside the box for different seasons if you use repositionable tape or magnets to hold the piece of paper in place.

4.  I "fussy cut" the small sections for the bottom row to make sure that a full key and the entire medallion would fit into these positions.

5.  Tweezers are very helpful when working with the papers and trying to get them out of the compartments when you are ready to stick everything down.


This sort of project is fairly quick and easy to do if you gather all of your coordinating papers and embellishments together and just start trying various placements and combinations of elements.  This would make a great little gift for a friend or just a nice decoration to tuck in an empty spot on a table or shelf.


Lettering Delights  Dollar Days sale is continuing.  Most items are just $1 (Graphic sets, fonts, alphabets, clip art, paper packs, doodlebats, candy wraps, etc.) and the Cut-its and SVGs are 50% off.  You can get an additional savings of $20 off on an order of $50 or more by using the code newyear20.

We went to see the movie "Hugo" in 3D last night - it was amazing!  Do you go to the movies during the holiday season?  It has become a tradition in our family to try to see at least one movie in the theater over the holidays.

Subscribe to Capadia Designs 

Share/Bookmark

Tuesday, December 13, 2011

Creative Charms Ornaments and Games


There are so many things  you can do with embellishments.  Today is my day to post on the Creative Charms blog and I decided to use some of the products for projects that are a little different.  If you haven't checked the Creative Charms blog lately, be sure to stop over to see what the rest of the Design Team has been sharing on the blog.


These glittered ornaments have been very popular for the past few years.  I usually see them with vinyl words or initials applied to personalize the ornament.  I looked around in my stash of Creative Charms goodies to find another way to decorate this ornament.  (If you don't know how to make the glittered ornaments check THIS POST).


The leafy ribbon comes with the Fuzzy Daisy Kit.  I used 1/8 inch ScorTape to adhere it to the ornament.  First, I wrapped the tape around the ornament.


 Then I started to peel off a small section of the protective backing.


I carefully worked my way around the ornament, placing the ribbon directly on top of the Scor-Tape.  Don't worry if a little bit of the adhesive shows - it will be nearly invisible when you are done.


 The ornament looks pretty with the leaf ribbon but it needs a bit more bling!  I added two shades of Gradient Gem Stickers in an alternating pattern around the leaf ribbon.


 Then I took some brown Velvet Ric Rac ribbon and wrapped it around the ornament hanger at the top.  I used Scor-Tape again to adhere the ribbon to the ornament holder.


 I cut a ten inch piece of ribbon and knotted it at the ends.  Then I threaded it through the ornament hanger and pulled the tail through the loop.


This is very quick and easy project to do.  You could try all sorts of variations for decorating the balls once you start exploring the items in your Creative Charms stash.


The ornaments look very pretty hanging in the tree - the gem stickers will catch the light from the tree lights and sparkle.


I also made a little holiday tic-tac-toe game using the Vintage Metal Frames.    These are very easy to convert into playing pieces.


 I punched 3/4 inch circles from watercolor paper and stuck the ornaments to the circles of paper.  You could always add adhesive to the base of a piece to use it in another project later.  You need ten pieces for a tic-tac-toe game so you will need two sets of the frames and you will have two extras to use for another project.


The game board is made with heavy watercolor paper (cut at 6 x 6 inches) as the base.   Next there is a layer of patterned paper to add some color.


This K & Company paper pack is a good match for the colors in the Vintage Metal Frames.  The second layer of the board is the red patterned paper cut at 5 1/2 x 5 1/2 inches.  Next is another layer of the watercolor paper cut at 4 3/4 x 4 3/4 inches.  Finally, there are nine squares of the green paper cut at 1 1/4  inches and arranged in a grid.  Be sure to add plenty of adhesive around the edges of the squares so they will stay flat.  You can also cut a grid from the watercolor paper and layer it over a single piece of green paper - this is easiest if you have a die cutting machine.


You can store the pieces in a little bag like this one that came from Creative Charms with some butterflies inside it.  These sorts of bags are easy to find in craft stores if you don't have one.  You could also use a candy tin or something else you have around the house - just get creative!


I hope you will start thinking of some more ways to use your papercrafting embellishments for other projects - I'd love to see what you come up with.

******************
SALE - SALE - SALE

For those of you who use the Creative Memories Storybook program, there is a 30% off sale on holiday digital content.  This sale will end at 11:59 Central time on the 14th.  You can click HERE to go directly to the sale page on my Creative Memories personal website.

 
I hope you have a great day - I have plans to finish up a few projects around the house to get ready for company!

Subscribe to Capadia Designs 

Share/Bookmark